Building DIY Wood Countertops from Plywood & Laminate for $300
Learn how to build DIY kitchen countertops from plywood and laminate for less than $300! This is the second video in my DIY kitchen remodel series!
Note: The links below are affiliate links
🛠 Tools Used On The Cabinet Installation:
📦 Materials Used On The Cabinet Installation:
🍳Samsung Appliances :

Process For Building Laminated Plywood Counter Tops:
Step 1: Kitchen Design Inspiration And Research
In case you missed last week’s video, I finished installing our new kitchen cabinets and the next step in the kitchen remodel was to build and install some countertops.
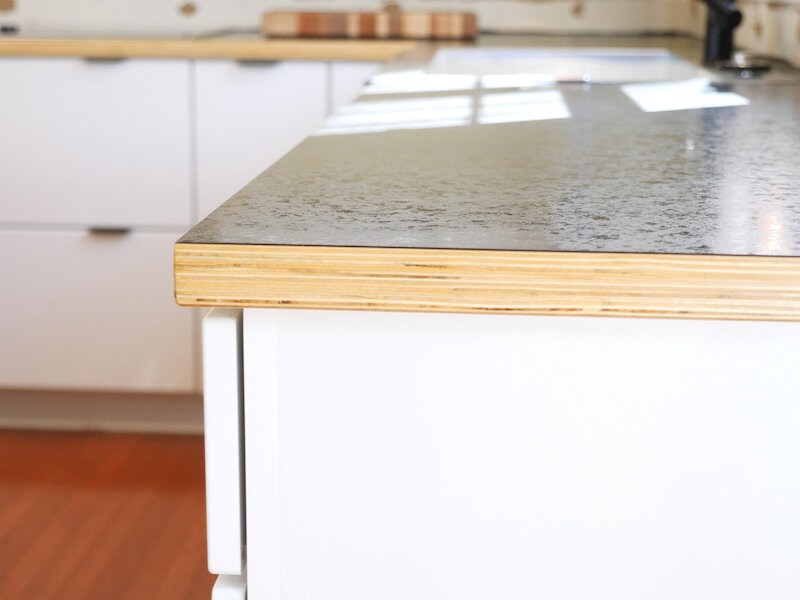
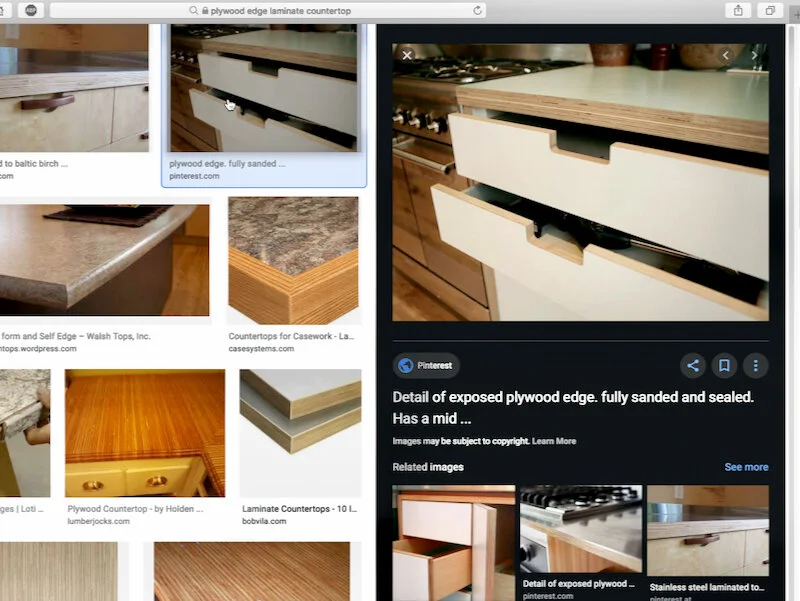
When looking for design inspiration when planning this kitchen project, I kept coming across countertops being made from plywood with a laminate veneer on the top surface. I noticed a lot of people were leaving thosee plywood edges exposed, which is a look you’ll know I love if you follow my channel.
Step 2: Constructing And Layout Of New Plywood Countertops
I decided to try my hand at building some countertops in this style, and the first step was to pick up a few sheets of ¾” plywood from my local Lowe’s store. I had the sheets ripped to a width of 25 ½” on the panel saw at the store, which makes them much more manageable, and then I could lay out the final length of the pieces once I brought them home.
To best hide the seam between the two sections of countertop I’d be building, I figured I could have the two sections meet where our apron-front sink would go, since most of this section would end up getting cut out and covered up anyway.
After figuring out the length of this first section, I cut a piece of plywood to length using my track saw, but a circular saw and straight edge would also work here. I also made sure to cut off the factory edge on both ends of the piece, to make sure I had as clean of an edge as I could get.
On one of the sections, I needed to notch out the area where the countertop met up with the face frame on the wall oven cabinet. To do this, I marked out the area, cut away the majority of the material with my jigsaw, and then cleaned it up with a rasp.
After finishing the cutout, I test fit the piece and it fit great.
The last piece to cut was to fill in the area between the two longer strips, and I once again cut this piece to length using the track saw.
Once that piece was cut, I could test fit all of the top pieces and, with the fit confirmed, I could move on to building up the edges of the pieces.
Step 3: Stabilizing Edges Of Plywood Countertops
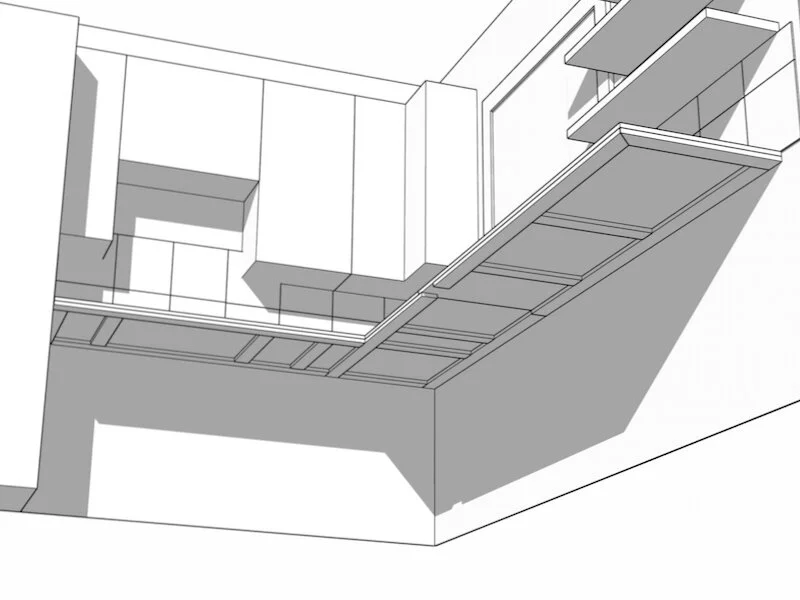
What I mean by building up the edges is that, rather than just gluing together two full sized pieces of plywood for the entire countertop, I decided to just add strips around the edges of the top pieces, as well as where the countertops are supported by the cabinets below.
Building the countertops like this not only saved me a bunch of money on plywood, but it also made the countertops much lighter and easier to install. It also allowed me to better utilize the 4x8 sheets of plywood I used, since those 23” wide offcuts wouldn’t have been useable for these countertops otherwise.
Before adding the strips, I first marked out where the top met up with the cabinets below. Since the strips I used were 3 inches wide, I could just roughly mark out these locations on the underside of my pieces and work from those marks.
Speaking of strips, next I could rip a few of those 23” offcuts into a bunch of 3” strips at the table saw. I could have also had this done on the panel saw at Lowe’s, and that would be a great option if you don’t own a table saw. You absolutely don’t need a table saw to build countertops like these, as long as you can utilize the panel saw at your local store, plus a circular saw for making the final cuts at home.
After ripping some strips, I could start cutting the strips to length, starting with the one mitered cut I needed to do, on the outside corner on the right end of my countertops.
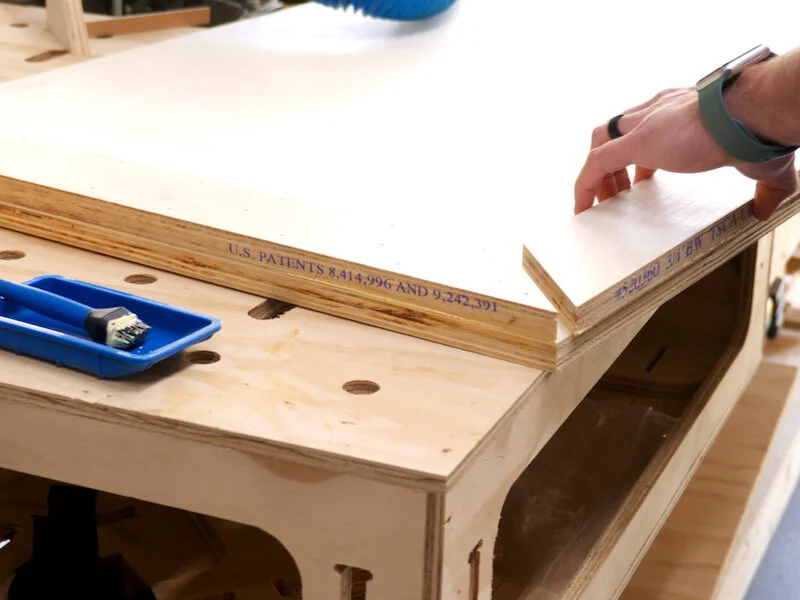
By making a mitered cut here, I could make it appear as though these counters were truly two layers thick, whereas I would have had an ugly seam if I just used a butt joint here.
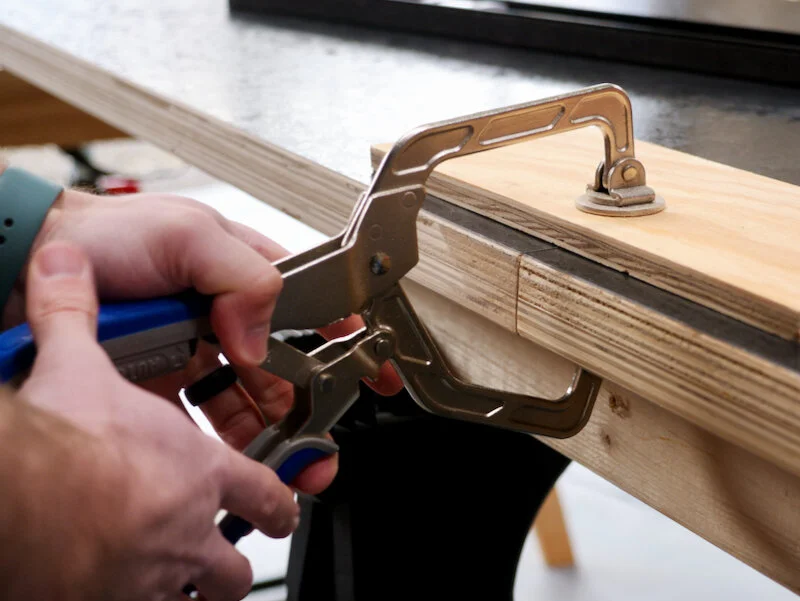
After cutting the two mitered pieces to length, I attached them to the underside of the countertop using wood glue and a bunch of 1” brad nails. Brad nails are a great option here, as they have a decent amount of holding power and you don’t have to use a ton of clamps to get a tight seam, but you could also use screws if you don’t have a brad nailer.
That said, if you do have some clamps at your disposal, you might as well use them, as they do help really tighten up those seams.
Next, I just continued filling out the edges and center of the countertop, cutting the pieces to length at the miter saw. These pieces won’t be seen in the final countertop, so I wasn’t as worried about getting them absolutely perfect. I just made sure to align the edges as well as I could, and I added filler strips along where I made those marks previously, where the countertop is supported by the cabinets below.
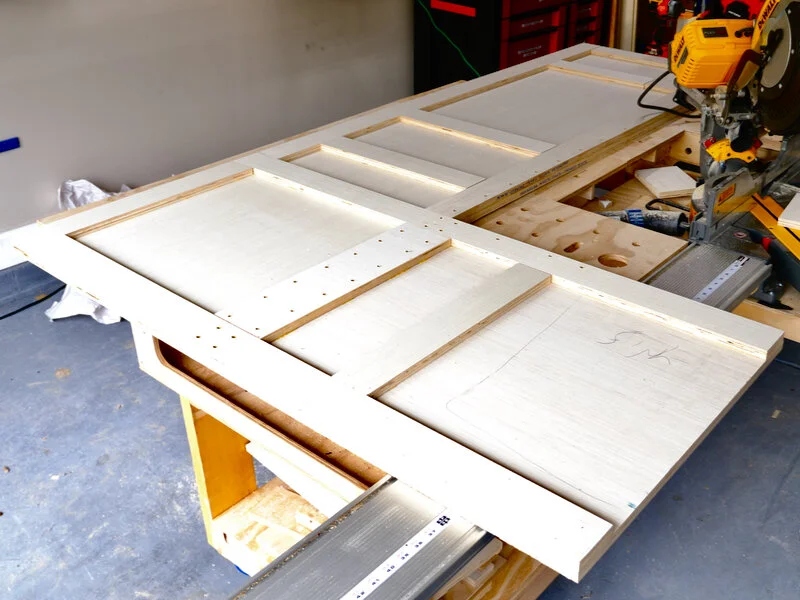
With that, the first section of countertop was assembled, so I could move on to the L-shaped corner section. This section required I join two top pieces of countertop, so I added strips along the underside of the joint, both perpendicular as well as parallel to the edges of the top.
After dry fitting the pieces, I got the countertop assembled in the same way as before, but I unfortunately lost the time-lapse of this. Here’s how this section looked once assembled. As you can see, I did use some screws here, especially along the seam between those two top pieces. This was partially to add strength, but the screws also provided more clamping pressure than brad nails would have and really pulled the pieces into the same plane.
With that, both countertop sections were assembled so, before actually adding the laminate, I wanted to go ahead and do some finish prep on the plywood pieces. I started by filling the tiny gap between the two pieces I had to put together for the L-shaped piece, and I used wood filler to fill in this area.
I let it dry for a bit and then sanded all of the edges, along with the top, with 80 grit sandpaper to start to smooth things out.
After the initial pass with the sander on the edges, I went back and applied wood filler to all of the visible edges, really putting it on nice and thick. I wanted these edges to be smooth to the touch, and also any open voids would be areas where water could work its way in later.
After letting the wood filler set up, I came back and sanded the edges, working my way up to 180 grit, which left them super smooth with no visible voids.
While I had the countertop upside down, I went ahead and added a chamfer to the bottom edge using a trim router. This will not only help to keep the edges from chipping out, but it’ll also make the countertops nicer on the hands.
Finally, I sanded the top with 120 grit to really smooth things out, and then I could start working on the laminate.
Step 4: Adhering Laminate To Plywood Countertops
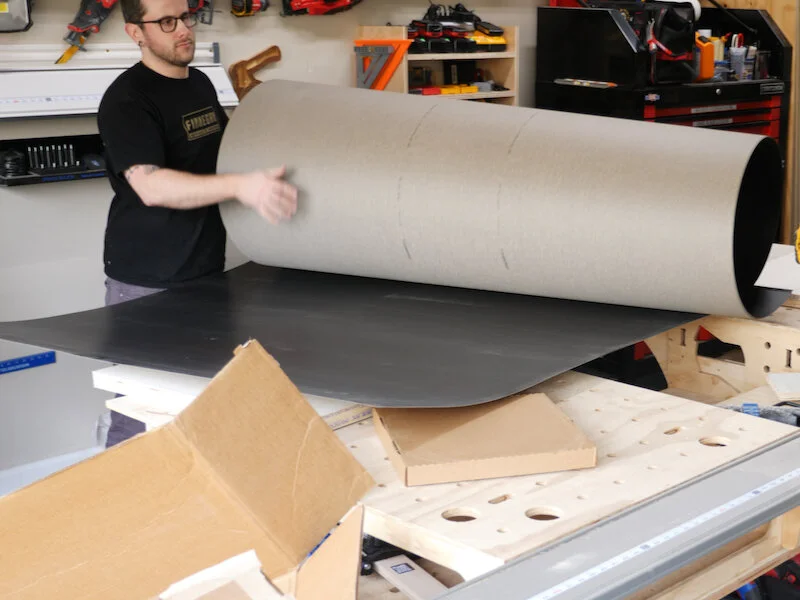
I ordered two 5x10 sheets of laminate from the Lowe’s website for this project, even though I could cover these countertops with one sheet, and I ordered two since it’s so difficult to get a feel for what a color or pattern will look like from a 1” square swatch.
Both of the sheets were black, with one being a more matte finish and the other having a slight texture. I decided I preferred the matte finish, so I moved ahead with that sheet.
Unfortunately, I paid no attention to the orientation of the countertop when rolling out the sheet of matte black laminate, and you’ll see that this came back to bite me in a bit.
Anyway, to cut the laminate to size, I clamped the sheet in place on top of the countertop, with about 2 inches of overhang on the back edges, and then I used a flush trim bit in my trim router to cut the sheet to size.
I also made sure to support the offcut in this L-shaped section, as I’ve had issues with laminate tearing in these types of corners in the past. Overall, this worked great, but again, I cut the laminate with the countertop section upside down without thinking about the fact that, since this section is L-shaped, it wouldn’t match up once the countertop was right side up.
After panicking for a minute, I figured I could just change gears and hide the seam underneath the cooktop rather than the sink. This would still be a little more visible in the final counter, but I figured it would be a tight enough seam if I could the pieces nice and straight.
To do this, I used a template bit on my trim router, and clamped the two adjoining pieces between two pieces of plywood and then routed the edges nice and straight. This actually worked like a charm and would have been a great option, but unfortunately, when I went to move this freshly cut L-shaped section so I could start adding the contact cement, the corner seam cracked, rendering the piece completely useless.
I also might have broken up the piece a bit in a fit of rage after this happened but, after calming down, I decided to just scrap this matte black piece, saving the offcuts for a future project, and go back to that textured sheet of laminate.
Luckily, I was able to repeat the steps I’ve shown off camera, using the router with the flush trim bit to cut the piece to size, this time with the countertop facing up, and everything worked out smoothly, so I could move on to adding the contact cement.
I added contact cement to the top of the counter as well as the underside of the laminate and let it set up for about 30 minutes.
If you’ve never worked with contact cement, it can be a bit tricky, as once the two pieces touch, they’re pretty much bonded for good. To allow for some positioning of the large piece of laminate on top of the counter, I used some aluminum clamps as spacers. You could also use dowels here, or I’ve even seen people use extension cords coiled up on the surface.
Most things won’t actually stick to the contact cement by themselves, it’s only when there’s contact cement on both surfaces that they’ll stick for good.
Anyway, with the clamps in place, I moved the piece of laminate and got it positioned over the countertop, making sure I had a good overhang on all of the edges.
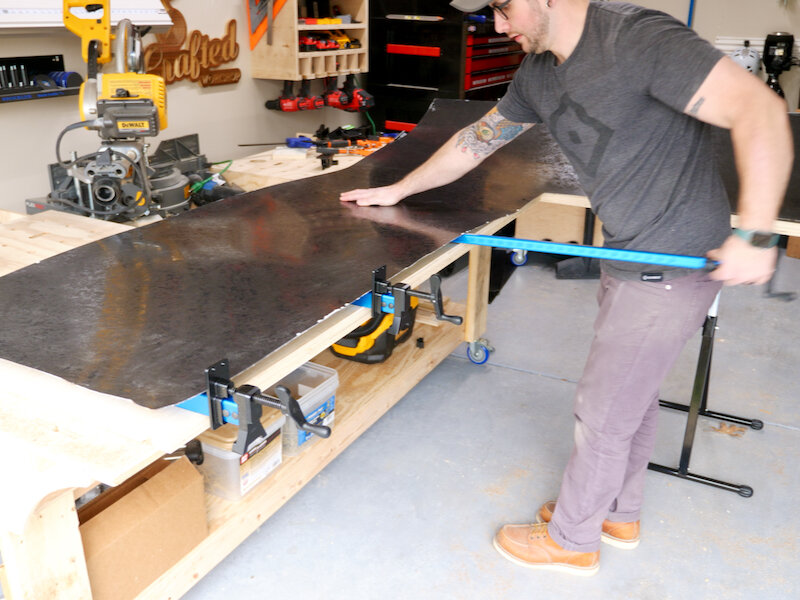
Once the piece was where I wanted it, I started removing the clamps one by one, applying pressure to set the laminate in place as I went.
Thankfully, this went smoothly, and I could come back with a pressure roller after removing all of the clamps to permanently bond the pieces. You might notice that a few areas around the edges were lifting slightly, and I think this was because of how cold it was on the day I was applying this laminate.
To help with this, I actually came back with my wife’s hairdryer and just added a little heat in those problem spots, which seemed to reactivate the contact cement, and then I could follow it up with more pressure rolling.
Once the laminate was applied, I could come back with that same flush trim bit and flush up the edges of the laminate with the plywood, and this is always super satisfying. One tip here is to clean off your bit as you go, as the contact cement has the tendency to gum things up, leaving you with a less clean edge.
I repeated the same process on the other countertop section, using the offcut from the L-shaped section for this. I was able to cover both of these sections of countertop using one 5x10 sheet, and I ended up with almost no waste.
To finish off the edges, I came back with that chamfer bit and added a chamfer to all of the edges. These laminate edges are extremely sharp after flush trimming, so I’d definitely recommend doing some kind of edge treatment here, even if it’s just filing the edges with a laminate file.

After routing, I hit the chamfered area with a sanding block and then I was ready for finish.
The laminate obviously doesn’t need any kind of finish, but I wanted to protect the plywood edges from exposure to water, which they’ll obviously see plenty of since this is a kitchen.
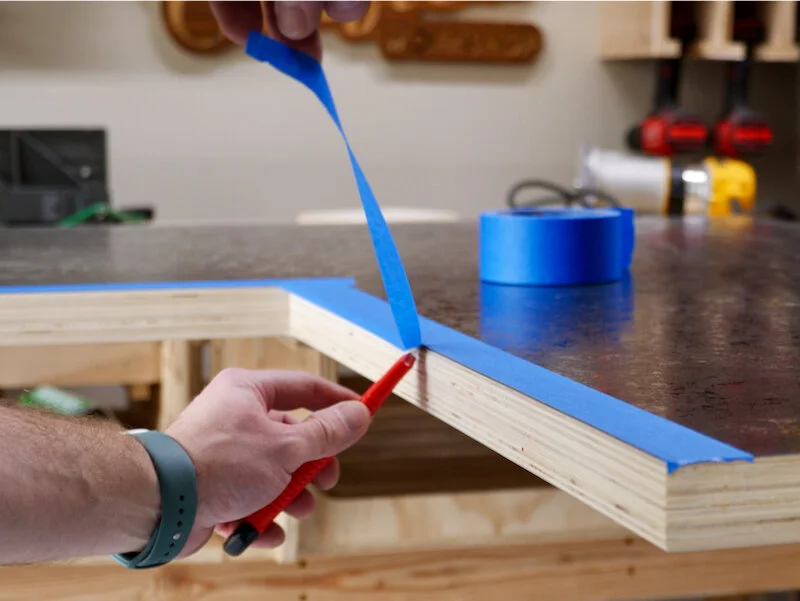
To keep the finish off of the laminate, I taped off the edges with some painter’s tape, and having a nice, sharp edge profile like a chamfer really makes this easy.
Step 5: Finish
Next, I could apply some finish, and I used a spar urethane here, which is a marine-grade outdoor finish. This type of finish will stand up really well against water, and I also like the way the finish accentuated the layers in the edges of the plywood.
Also, you’ll notice that I only focused on the exposed edges here, as all of the edges against the cabinets and wall will be protected with caulk plus then a tile backsplash on top of that.
After applying three coats of finish, I peeled off the tape and the edges were looking really nice.
Step 6: Plywood Countertop Butt Joint With Pocket Holes
Next, I needed to come up with a way to connect the two countertop sections once they were in place in the kitchen. Since most of the area where the countertop sections met would be cut out for the sink, I only had a small potential area to work with.
I figured a couple of 2 ½” pocket screws would be perfect, as they really just needed to pull the pieces together before I attached them to the cabinet below. I used a little mini Kreg Jig to drill the holes and then clamped the pieces together before driving in the screws.
Step 7: Preparing Kitchen Cabinets For Sink Installation
With that done, I could work on the handful of other things I needed to do before actually moving the countertops into place, the first of which was cutting out the face frame on the sink base to accept the sink I’m using.
This is a top-mount apron sink from Kohler which I picked up at Lowe’s. I chose this sink not only because I really liked the way it looked, but I also liked the fact that it being top-mounted would limit the water contact with the plywood edges.
Once the sink was dry fit and looking good, I could add some blocking in the corners of the cabinets, through which I’d run the screws to hold the countertops in place. This blocking really just helped to keep the screws from pulling this inner structure of the cabinets out of whack, and I tacked them in place with my brad nailer to keep them from moving around when I dropped the countertops in place.
The last thing to add was a little corner support piece, where the corner cabinet didn’t fully extend into that area. Since I only had one stud to hit here, I also added some construction adhesive to provide some additional holding power. I also made sure the support was in line with the cabinets using a level.
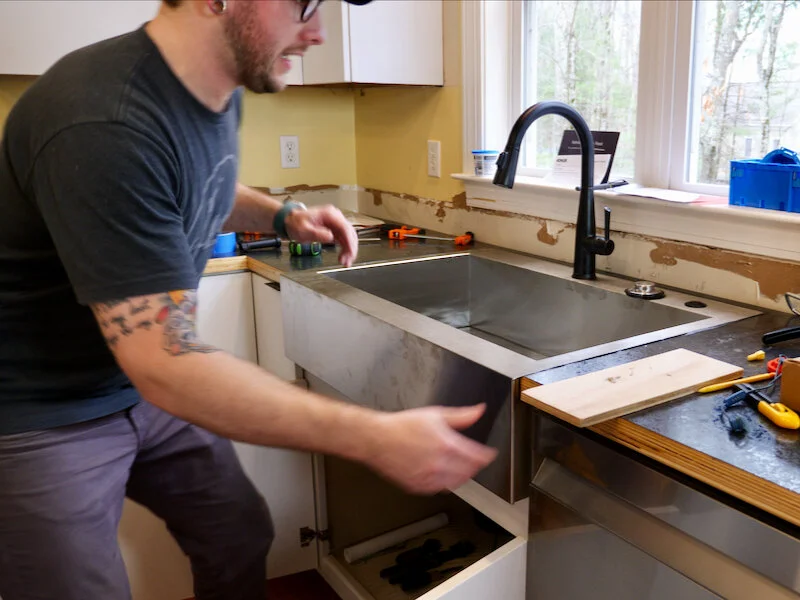
Step 8: Installing Modern Plywood Kitchen Countertops
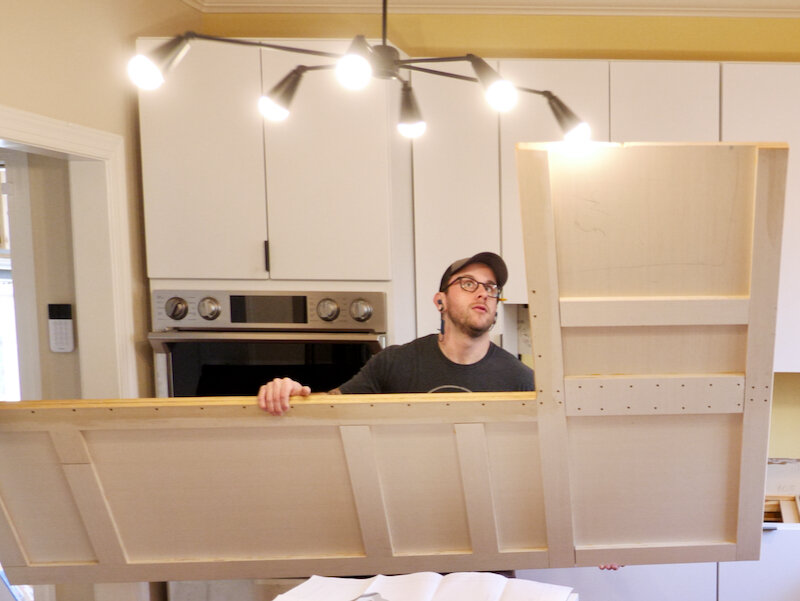
Finally, it was time for the moment of truth, moving the big L-shaped countertop section into place and thankfully, besides knocking the light fixture out of whack, this went really smoothly and the countertop just dropped into place.
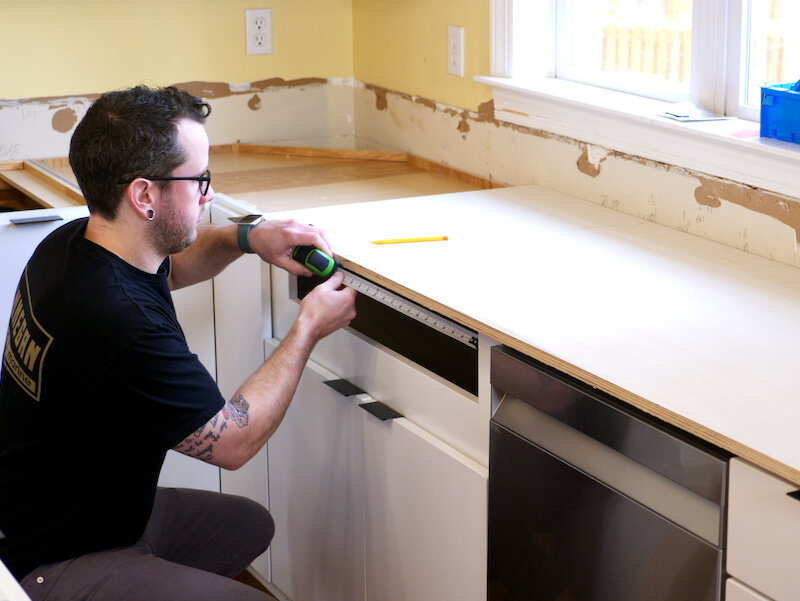
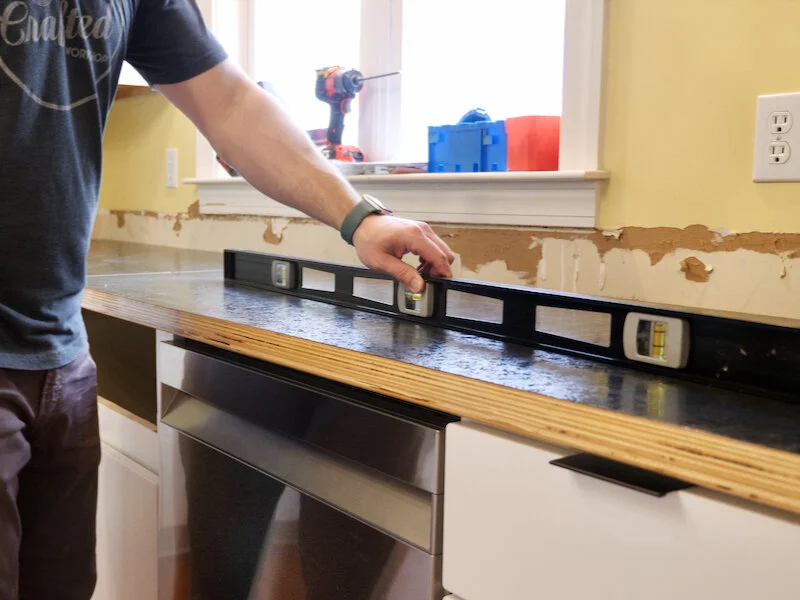
Next, I set up my line laser to shoot a line 25 inches from the wall, and then checked the front edge of the two sections to make sure they were in line. Thankfully, with just a tiny bit of tweaking, they were, and my wall was straight enough to not need any scribing on the back edges of the countertops.
With the countertops in their final position, I clamped them down and starting adding 2 ½” screws up through the blocking I had added previously. I used self-tapping screws here and was able to avoid pre-drilling, which was nice considering how awkward it was to try and add screws inside these cabinets.
Once that first section was fixed in place, I went ahead and added those two pocket screws from below to join the two sections, and I ended up with a really nice, flush top. I actually chamfered one of the edges at this seam, to allow me to add a bead of black silicone caulk later, to make sure it was really nicely sealed, considering this is right behind the sink.
Next, I just continued working my way around the counter, adding screws through the blocking I added. One other thing to note here, I installed my cabinets myself using a line laser, so I was really confident in how flat and level these cabinets were, but you might need to do some shimming if your cabinets aren’t level.
As a testament to this, I checked the counters for flat and level after installation and they were pretty much dead on.
Step 9: Sink Installation
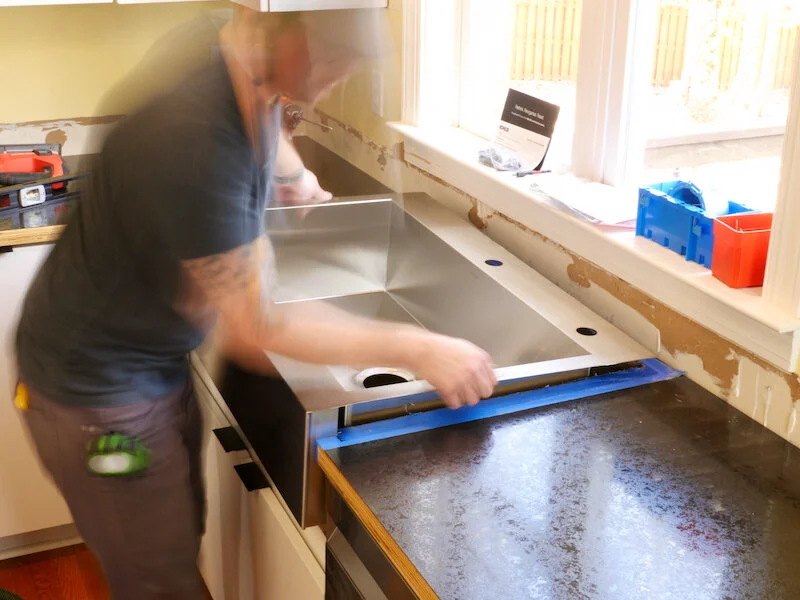
With that, the counters were in, so next I could get the sink installed to get our kitchen functional again. This sink comes with a template, but you actually have to cut it out yourself, which I did find kind of frustrating just because it could introduce some more error into this process.
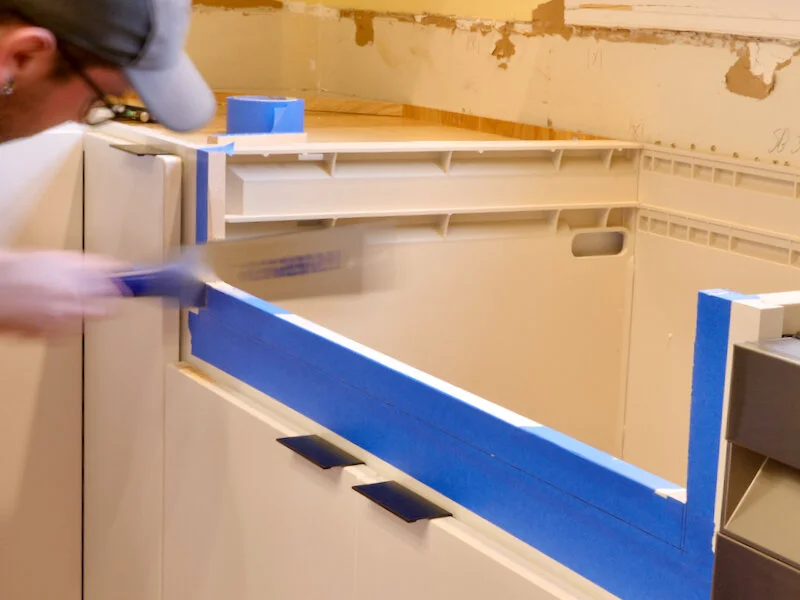
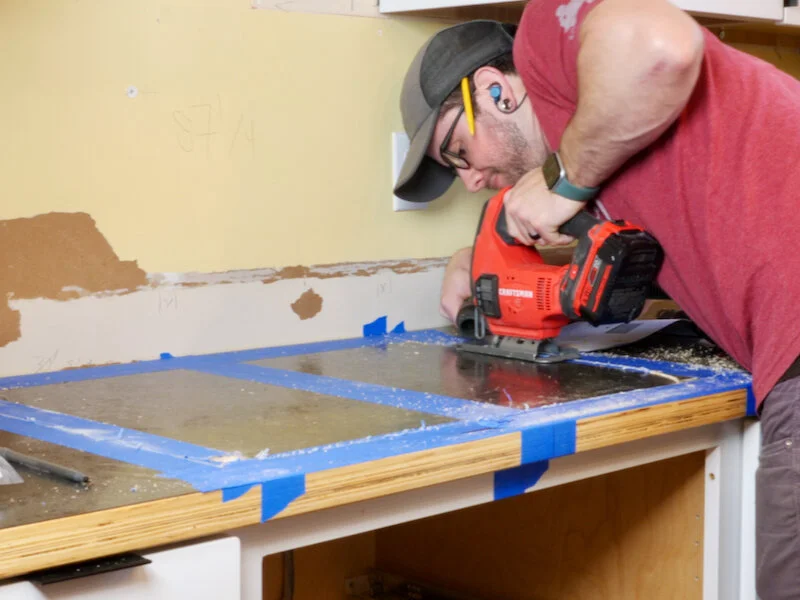
Anyway, after cutting out the template, I got some painter’s tape added to the areas I’d be cutting, both to help prevent tearout on the laminate but also to help keep the jigsaw base from scuffing the laminate. Next, I added some layout lines, marking the center of the sink, and then I could trace around the template to figure out where I needed to cut.
After double and triple checking that I had laid everything out correctly, I could start cutting the countertop, which was definitely a little nerve wracking. Luckily, most of this cut will be covered by the top mount sink, but where the sink meets the countertop at the front edge of the counter is actually visible, so I made sure to take my time there.
I also used a higher tooth count blade on my jigsaw here, to leave me with the cleanest cut possible, since that laminate really has a tendency to tear out.
Finally, once the opening was cut, I could dry fit the sink and thankfully it fit pretty much perfectly.
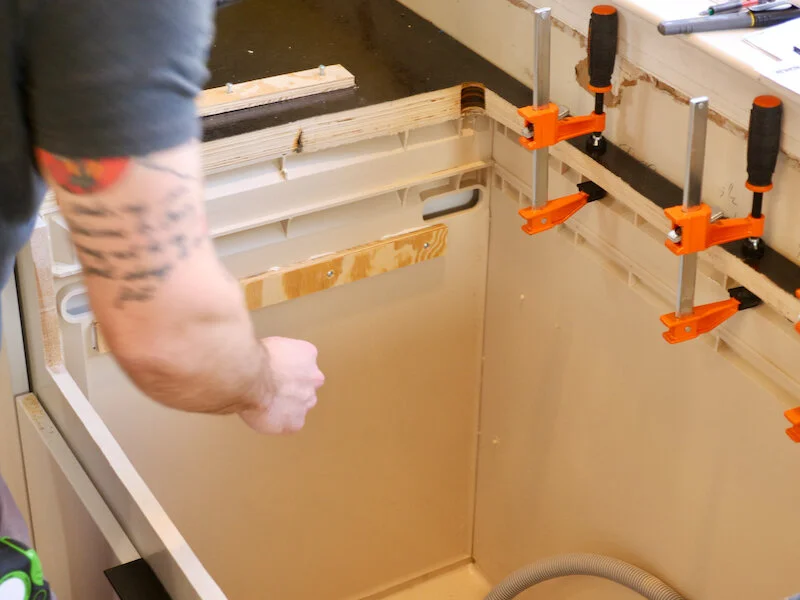
Before installing the sink permanently, I needed to add these strips to the inside walls of the sink base, and these will be what the hold down clips that actually anchor the sink in place attach to.
You’ll also notice the clamps along the back edge of the opening, and these were holding the countertop down while the construction adhesive I added in that area dried. I wasn’t able to get screws in this area from below, so I figured a little extra adhesive wouldn’t hurt.
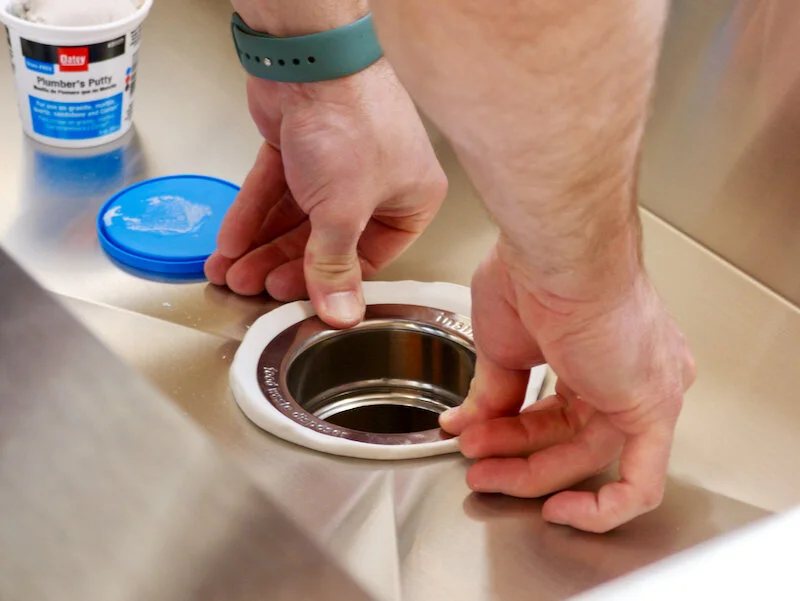
I also decided to go ahead and add the disposal drain before permanently installing the sink, so I worked on that next, first adding some plumber’s putty under the drain flange before pressing it into place.
Next, I added the rest of the drain assembly, including the fiber gasket, backup flange, and mounting ring, on the underside of the drain, and then I tightened it down with the set screws. After tightening, I cleaned up the excess plumber’s putty off camera and then I could get the plumbing installed.
I basically just replicated what was here before I pulled out the cabinets, with a vent at the top of this stack and a wye coming off for the sink drain.
I assembled the pieces with some PVC cement after test fitting everything and then installed it under the sink, also adding an escutcheon ring and a bunch of silicone to seal the cabinet while I was at it. In case you missed the cabinet install video, this sink base is actually made of plastic and is sealed with silicone to prevent damage to the subfloor below in case of leaks.
I also added the unit for controlling the push button disposal switch while I was at it, and then I could get the sink installed. First, I added a heavy bead of silicone and then dropped the sink in place, cleaning up any excess silicone while I was at it. To attach the sink, I added the included clips from below, but I did this off camera since it was pretty much impossible to film, and this will also vary depending on the sink you’re using.
Anyway, once the clips were in, I could add the disposal, which just slips on to the mounting ring that I installed previously. In retrospect, I should have installed this after installing the faucet, but you live, you learn.
Speaking of which, next I could get this really cool touch faucet installed, which was fairly simple but also pretty difficult to film. Basically, the faucet is held in place with a mounting nut, and then the touch functionality is just powered by a few AA batteries.
Once the faucet was installed, I got the disposal drain plumbed up and then I could test my plumbing for leaks. To do this, I added the drain plug and allowed the sink to fill up about halfway, and then I pulled the plug. This basically sends as much water as the sink will ever see at one time through the system. A plumber friend showed me this leak test awhile back, and I’ve always done it when installing sinks since then, and it’s always worked great.
Unfortunately, I forgot to attach the dishwasher drain hose to the disposal before doing this test, so I had water shooting out of the side of the disposal, and I was certainly thankful to have this waterproof plastic sink base when that happened.
Anyway, I got the drain line connected and tested the plumbing again and everything was leak free, and here’s a look at how all of the plumbing came together in case you have a similar setup under your sink.
Step 10: Installing Induction Cooktop In Modern Smart Kitchen

With that, the sink was done, so next I could get our Samsung induction cooktop installed, which I was super excited about. First, I needed to do some more countertop surgery, cutting another giant hole into the top. I also had to cut through some of those inner support pieces this time, and I had to pull out the reciprocating saw to do it.
Finally, I got the opening cut out and could test fit the cooktop and, thankfully, it fit great.
Before installing the cooktop permanently, I added this foam gasket material that helps keep crud from building up under the edge of the cooktop, and then I could drop it into place and attach it with a few clips from below. I just wired it up based on the instructions in the manual, and then I could test it out by boiling some water.
You do need to make sure your pans have a magnetic bottom if you want to use them with an induction cooktop like this, but man is this technology insane. Induction supposedly boils water even faster than gas, and it’s way easier to install. I also love how easy to clean flat cooktops like this are, vs gas stove grates.
Anyway, after geeking out over the induction cooktop, I could finish up the countertops by adding some caulk around the edges of the sink, along with the back edges of the countertop.
Also, you might be wondering about that island top, and I’m going to cover building that in a separate video, considering it was essentially its own project. Anyway, with the caulk added, I could call these countertops done, and I really love the way they came out, especially considering the fact that they cost less than $300 to build.
Anyway, I think that’s going to do it for this one so, thanks for watching y’all and, until next time, happy building.