DIY Guitar Hanger Made Using Bent Wood Lamination
I built a DIY guitar hanger using basic tools and bent wood lamination! This was my first time doing bent lamination on one of my projects and I think it turned out great.
Note: Links below are Amazon affiliate links
Thanks to Rockler Woodworking & Hardware for sponsoring this build, support them!
Materials Used On DIY Guitar Hanger:
Tools Used On DIY Guitar Hanger:

Pin it!
Build Procedure For Bent Lamination Guitar Hanger:
Step 1: Create The Form For Your Bent Lamination

The first step with any bent lamination project is to create the form. I had some small scraps of plywood that I ended up using, but any sheet good would be a great option for making a form.
I laid out the shape I was looking for, with a height of about six inches and a depth of about four inches. Keep in mind that this is the profile view of the guitar hanger.
After figuring out the shape I wanted, I cut it out using a jigsaw. I stayed right on my line when cutting, since I wouldn’t be doing any shaping until all of the pieces were together.
Next, I traced the outline of the first piece onto the remaining plywood, using it as a template. My form needed to be wider than the final width of the guitar hanger, about 3 ½”, so I needed five pieces of ¾” plywood to make up this width.
After cutting out all of my pieces, I attached the pieces together using CA glue and brad nails. I made sure to keep two of the edges flushed up, to reduce the amount of sanding I had to do later. Once all of the pieces were attached, I clamped them together and let the CA glue set up for a few minutes.

Next, I shaped the form using my oscillating belt sander. I purposely made the form just wide enough so I could sand it with this sander, as it really was the perfect tool for shaping the form. You could also clamp a regular belt sander to your workbench and get a similar result.
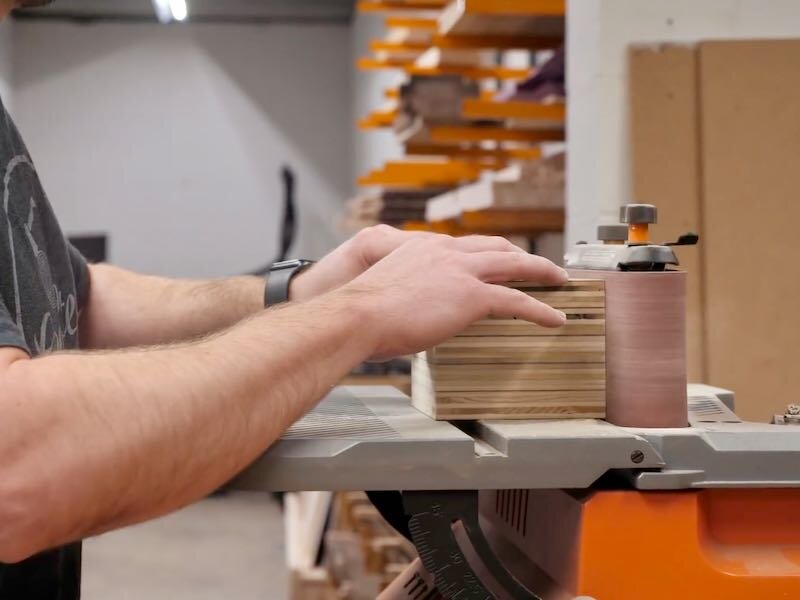
I started with 80 grit sandpaper to roughly flatten the form and bring all of the layers even with each other, and then switched to 120 grit to refine the curves.
Step 2: Cut And Glue Your Veneers

With the form finished, I could move on to cutting my veneers. First, I measured the outside length of the form, taking into account the curve. I needed to make sure none of my veneer layers were longer than this measurement, since I didn’t want the ends of the pieces overhanging the form and getting damaged.
For the veneer on this build, I used this two-ply Walnut veneer from Rockler. The two plys make the veneer much more pliable and less prone to cracking, making it a lot easier to work with.
I needed to cut the veneer into strips about 3 ½” wide, and I did this with an X-Acto knife and a straight edge. The veneer cut extremely cleanly using this method, although I guess a veneer saw would have been the correct tool for the job.
I cut two strips with the veneer in this orientation, and then rotated the sheet of veneer 90 degrees and cut two more strips. These alternating grain directions make the final piece much stronger, and this is how the veneer layers in plywood are oriented.
Once I had my four strips cut, I marked in 10 ½”, slightly shorter than the outside face of the bending form, and then crosscut the strips, again using my X-Acto knife. I cut all of the strips to this length.

Before the glue up, I covered the bending form with packing tape, to make sure the veneers didn’t get glued to the form.
I also arranged the veneer layers so that the grain directions alternated, and I also made sure the inside and outside faces of the hanger would end up with the Walnut veneer facing out. The second ply on this two-ply veneer isn’t Walnut, so this is super important.
Step 3: Glueing Up The Bent Lamination

Finally, it was time for the big moment, the glue up. I used strap clamps to hold the veneers in place and then added a bunch of clamps. I’m not sure why I didn’t think about it, but creating a negative form, so that I could clamp two halves of the form together around the veneers, would have worked a lot better here, but it still ended up working out fine.
I also used this cold press veneer glue for this project, but I think, if I were to do this again, I’d use Titebond III. It turns out that this cold press glue isn’t really structural, it’s meant for applying a veneer to a substrate. It worked fine since this isn’t really a high wear application, but I think regular wood glue would have worked just as well.
I let the glue cure for a few hours then removed the clamps.

After removing the clamps, I noticed there were a few areas on the edges that didn’t get great clamping pressure, so I added a little CA glue, clamped them together, and then sprayed on some activator to secure those layers.
With all of the edges looking good, I left the glue to dry overnight.
The next day, I pulled out the belt sander again and shaped the guitar hanger, flushing up all of the edges and rounding over the corners. I was actually really impressed with how clean all of the edges were, there were no gaps, which was pretty awesome.
Step 4: Guitar Next Cut Out

Next, I marked out the opening for the guitar. I measured a guitar stand I already have and came up with a measurement of two inches wide by 1 ¾” deep, which ended up working great.
To cut this section, I couldn’t think of any method besides a coping saw or fret saw, which actually ended up working great. This is one of those tools that I never think to use, but it’s actually really easy to control.
After cutting out that area, I cleaned up with curves with a rasp. By the way, I finally picked up a set of rasps that I really love, I’ll have a link to them in the video description below.
Next, I hand sanded the whole piece up to 180 grit, making sure all of the edges were nice and smooth.
Step 5: Apply Finish To Guitar Hanger

For the finish, I went with spray lacquer, mostly because I had about half a can left and wanted to use it up. It was honestly way glossier than I wanted, but it still looks pretty nice.
Step 6: Install Padding To Guitar Hanger
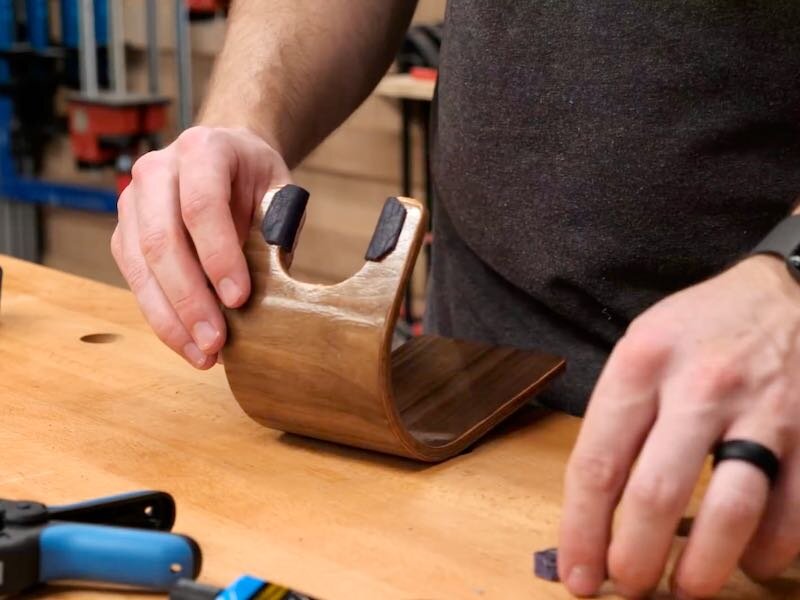
Next, I worked on the padding for the guitar, so that the hanger doesn’t scratch up the guitar neck.
I bought this bag of leather scraps from a local sandal store awhile back and dug through the pile of scraps until I found some leather I thought would match the hanger.
My original plan was to have the leather run the full width of the inside edge, so I marked the piece of leather to length and cut it with a rotary cutter. I also squared up all of the edges of the leather while I was at it.
Next, I tried to get the piece of leather to conform to the curve with no luck. Instead of trying to have one continuous piece, I decided to cut the leather into three pieces and attach them to each flat face of the inside edge.
To attach the leather to the guitar hanger, I used barge cement, which is a really great adhesive when working with leather. I applied a little barge cement to the back of each piece, spread it evenly, and let it dry for about 15 minutes.
I also applied barge cement to the areas of the guitar hanger where I’d be attaching the leather.
After letting the cement set up, I placed the leather pieces onto the hanger and then added some Bandy clamps to apply even pressure. I let the pieces set up overnight in the clamps.
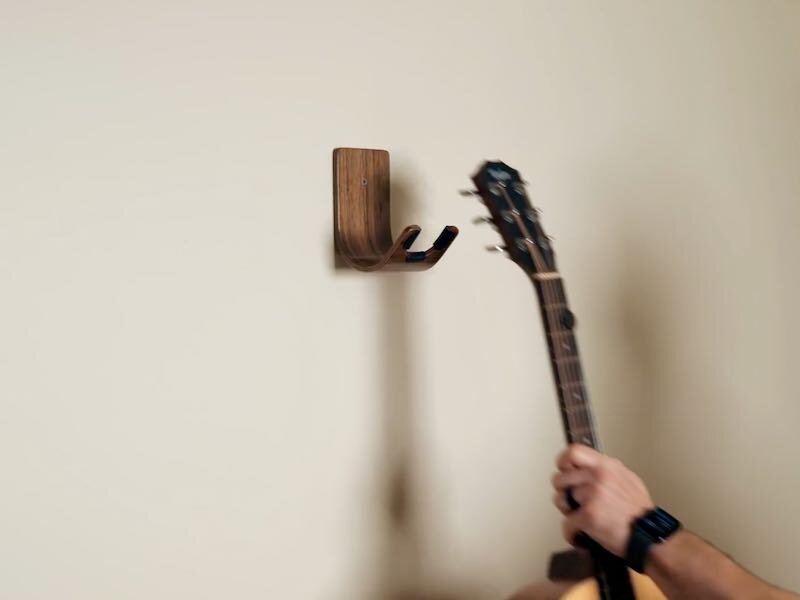
Step 7: Mount Guitar Hanger To Wall And Hang Guitar

The last step was to drill a hole for a screw, which I used to mount the guitar hanger to the wall.
Guitars generally weigh a max of 15 pounds, so drywall anchors are more than strong enough, but I found a stud to mount the hanger to and screwed it into place. Finally, I could test it out, and it worked great.