DIY Laundry Room Makeover with Plywood Countertops & Organization!
I made plywood countertops and matching shelving, added new lighting, and got things super organized for my DIY LAUNDRY ROOM MAKEOVER!
Note: The links below are Amazon affiliate links
🛠 Tools Used On DIY Laundry Room Makeover :
📦 Materials Used On DIY Laundry Room Makeover:
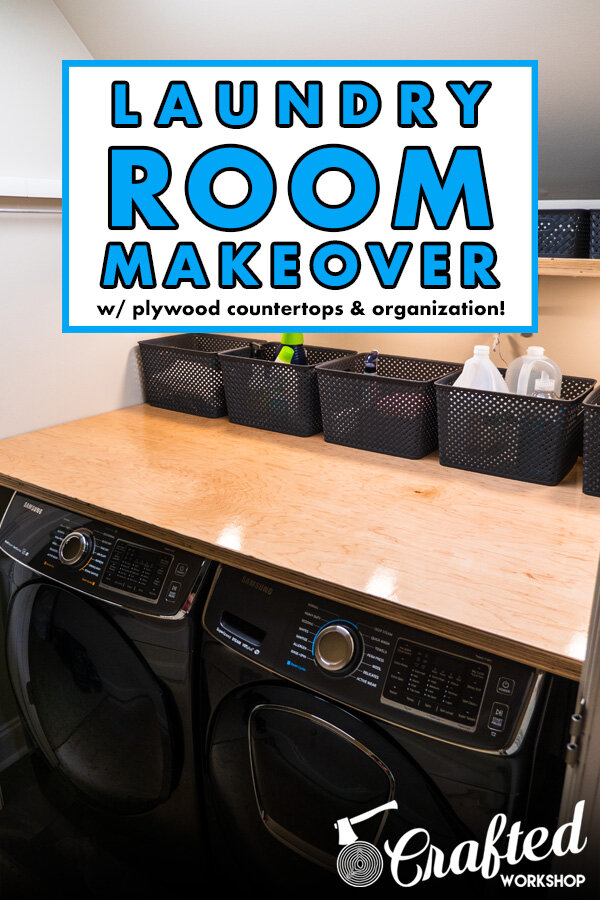
Pin it!
Process To Remodel Your Laundry Room:
Step 1: Demolition Of Old Laundry Room Flooring
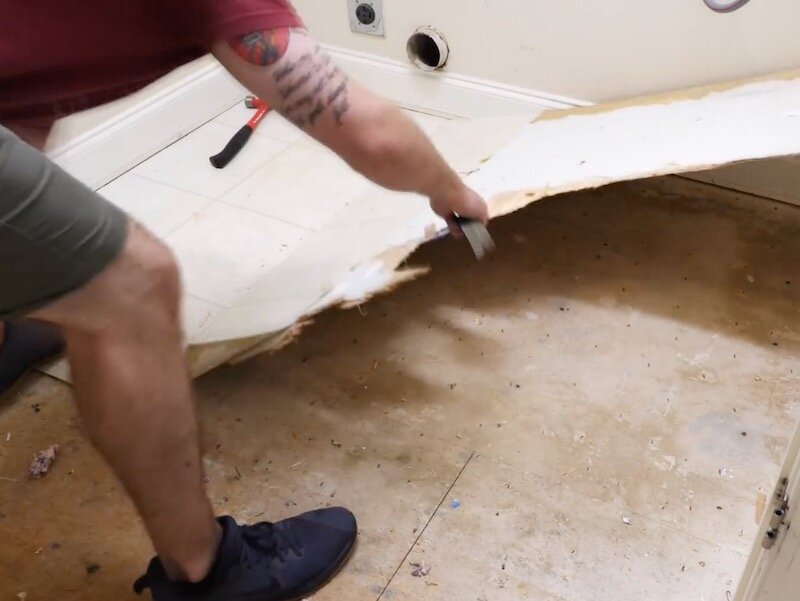
The first step in this project was to get everything out of the room. This included all of the random odds and ends that had collected on and around the washer and dryer, as well as the washer and dryer themselves, which were due for replacement anyway.
To give myself a little more room to work and also make filming in this space a little easier, I removed the two doors leading into the laundry room. Clearly, these doors hadn’t been removed in awhile, because they really didn’t want to budge.
This laundry room is really more of a closet. It’s super convenient to have it on the second level, but there’s definitely not a lot of space to work in there. This caused some challenges later, especially when getting the countertop into the space.
Anyway, after removing the doors, the first item on my list was to get some better lighting in the space, both to make filming easier but also to make it more pleasant to work in the laundry room. I picked up this super bright LED fixture from Lowe’s and installed it, but of course not without some issues.
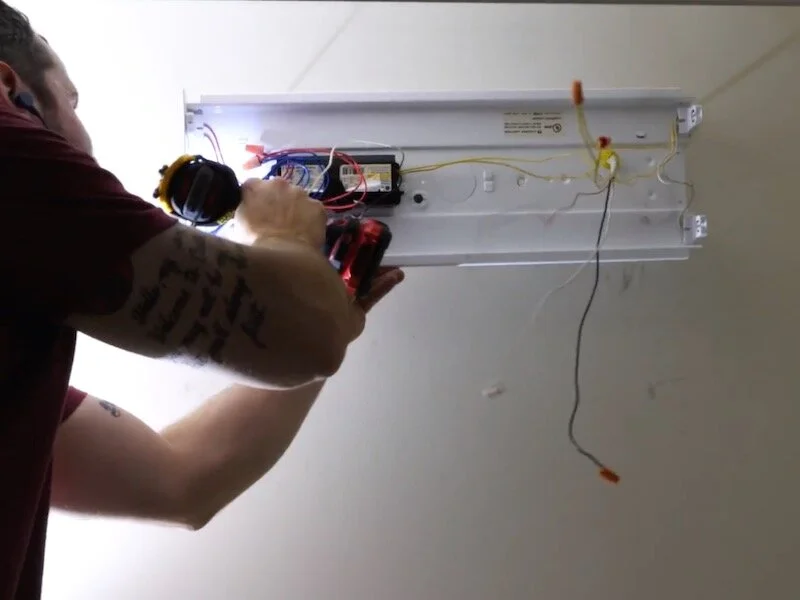
To my surprise, whoever installed the previous fixture had not added a junction box, so I had to make another trip back to Lowe’s to pick up an old work box, get that installed, reroute the wiring, and then install the new fixture.
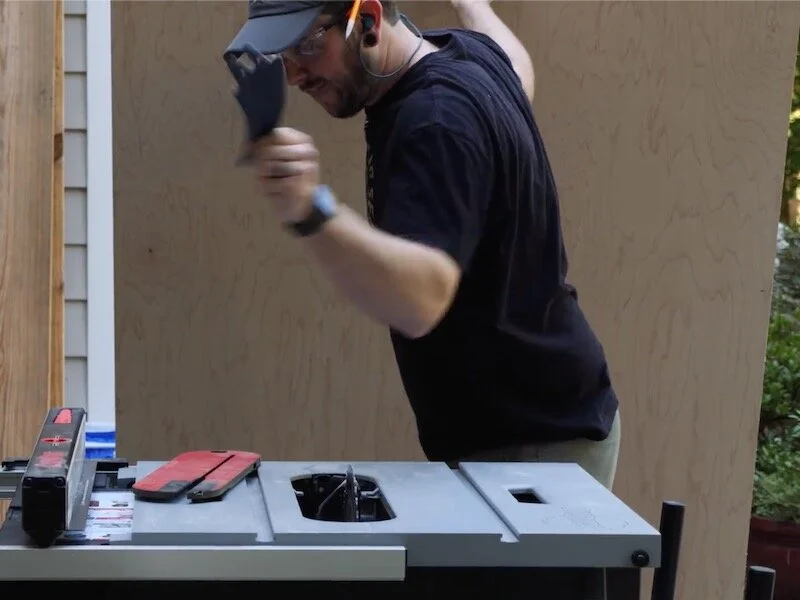
Thankfully, the new fixture gave me a ton more light to work with, and next I could get the crappy wire shelf removed. I personally absolutely hate wire shelving. It’s ugly, things have a tendency to tip over on the shelves, and, worst of all, they’re a bit of a pain to remove.
After royally screwing up my drywall during this removal, I looked up a better way to remove these shelves so I could relay that info to you and, evidently, if you remove the nail in the center of the brackets on these shelves, they’ll come out a lot easier without damaging your drywall as much. The more you know, I guess
Once the shelving was removed, I tackled the flooring, removing the old vinyl flooring and installing new tile, and again I covered that in a separate video. Go check that out if you’re interested.
Step 2: Applying Quarter Round Trim
One thing relating to the flooring that I didn’t cover in the tile video was installing the quarter round. First, I took some measurements in the space so I could pre-cut the pieces. This laundry room is on the second level of our house, so running up and down the stairs to make cuts would have been super time consuming.
I actually like to take measurements with a laser tape measure when doing trim work like this, as I find it’s a lot more accurate than trying to use a regular tape measure. This cheap laser measure has been incredibly handy and it’s always in my tool bag here at the house.
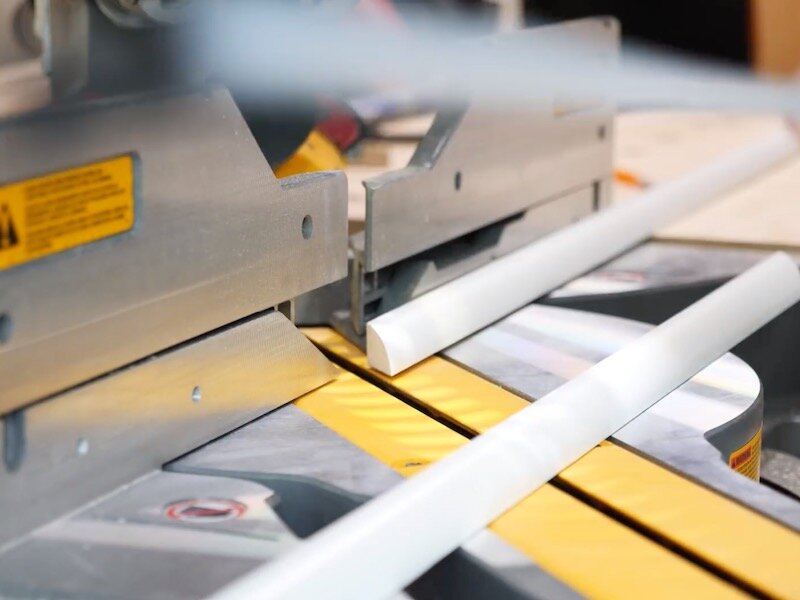
Anyway, after taking my measurements, I made my cuts at the miter saw. I use painted MDF quarter round here, which is really easy to work with and means less work when installing since it’s already painted.
The real key here is to make sure you’re taking your measurements from the long points of the miters. It’s easy to get mixed up during this process, so just take your time. I like to lay the pieces out on the floor of the garage as I’m cutting, to help me keep them oriented correctly.
Once the pieces were cut, I could dry fit them in the space. I did need to trim two of the pieces a bit to get them to fit, but overall the pieces fit together pretty nicely.
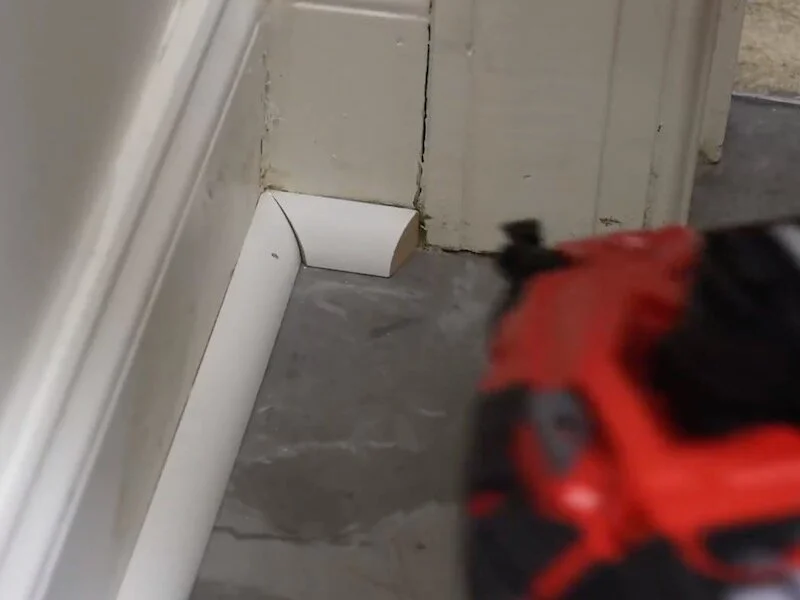
I cut this last little piece with a 22.5 degree angle on the end, which I think gives it a nice transition to the door trim. Also, once I caulked the corners, that little bit of mismatch disappeared.
Step 3: Plywood Countertop Construction In Laundry Room
With that, the flooring was officially done, so I could move on to the rest of the build. To give this laundry room a ton more functionality, I wanted to build a countertop to go over the washer and dryer, as well as a matching shelf to replace the wire shelf. I went with plywood here, and there’s a good reason that a lot of people use plywood for their laundry room countertops.
You see, laundry machines are a lot deeper than standard kitchen appliances, so standard countertops won’t work. You need a countertop depth of roughly 40 inches, depending on your exact washer and dryer, and standard countertops are about 25 inches deep.
Sheets of plywood come in 4 foot by 8 foot sheets, and that makes them pretty much the perfect choice. Plywood is also fairly inexpensive and easy to work with, and I also love the look of exposed plywood edges.
I decided to do this project entirely out of my garage shop, which I’m just finishing setting up, and I hope to bring you guys more DIY projects from the house, vs. my fully stocked dream woodworking shop. I know a lot of you are looking for more approachable projects and I’m trying to set up this home shop to match those types of projects.Contact me if there’s anything specific you’d like to see.
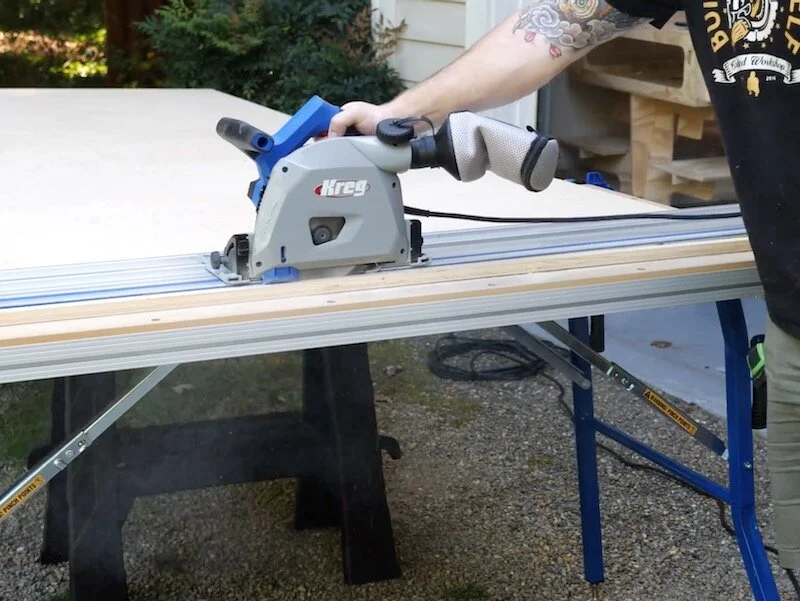
Anyway, to break down the sheets, I used a combination of my track saw and table saw, but a circular saw and straight edge would work fine for these larger cuts. Actually, I would have had the sheets cut to length at Lowe’s, but their panel saw happened to be down for repairs when I purchased the plywood.
I needed a countertop and shelf length of about 72”, so I first crosscut one sheet about an inch over that, so I could trim off the other factory edge. This left me with a super clean edge on both sides.
I repeated the same process on the second sheet of plywood and then I could get the sections ripped to width with the table saw. The first piece I needed to cut was the countertop, so I looked over the sheets and picked the best looking section for the countertop, since it would be the most visible part in the final build.
Next, I ripped the countertop to width at the table saw, or at least I tried to. I had purchased a new table saw blade after dulling my blade on the vinyl plank flooring I installed at the shop, and I didn’t realize that the blade I purchased was too thin for the riving knife on this saw. This meant that the riving knife was binding in the kerf as I tried to pass the piece through the saw.
The weird thing is this wasn’t an issue on the smaller strips, just on these larger panels. It took me way too long to figure out what the problem was, and I ended up just forcing the pieces through until I came to my senses and removed the riving knife.
Now, I wouldn’t recommend using your table saw without a riving knife if it has one, as they are a major safety feature, and I’ve already purchased and installed a new blade and reinstalled the riving knife, but I had to get these pieces cut so I could finish this project on time, so I moved on without it.
After ripping the pieces to width at the table saw, I cut them to length at the miter saw. I would highly recommend some kind of stop block when cutting your pieces, so you can get them cut to a consistent length. It means you’ll have a lot less sanding to do later.
Step 4: Designing Laundry Room Countertop In Sketch up
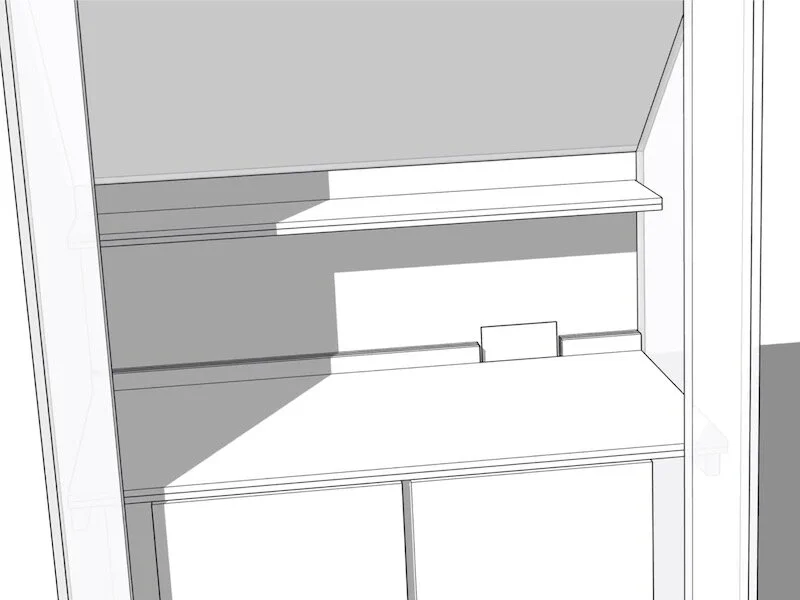
Before I move on to assembly, let’s hop into SketchUp and I can show you how this countertop will come together, as I had to build it a little differently.
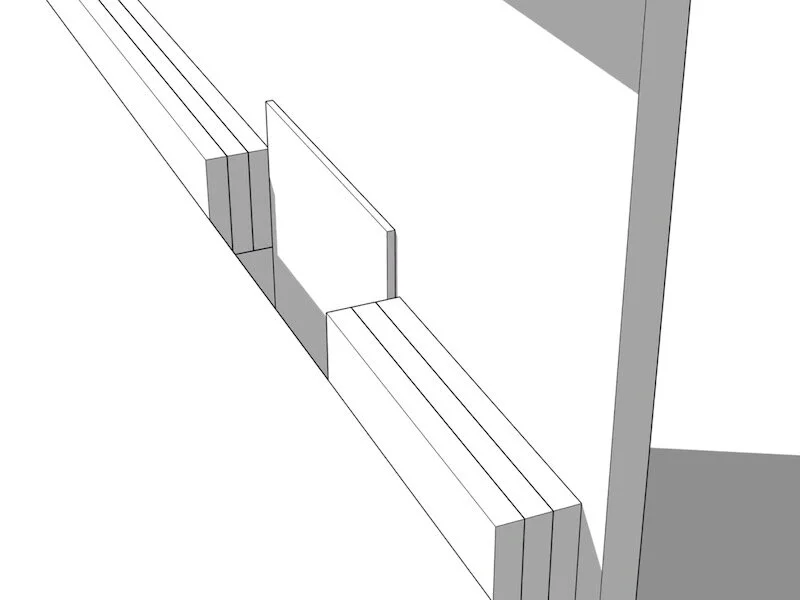
You see, my water lines and drain for the washer happened to line up exactly where I wanted the countertop, of course, and I didn’t want to lower the box as I wanted quick access to shut off the water in case I had a leak in the future.
To create spacing between the wall and the back edge of the countertop, I decided to add a few stacked strips of plywood, to kind of act like a thick backsplash. Not only did this allow me to use the plywood sheets more efficiently, but I think it gives the countertop a nice, finished look.
Step 5: Assembling Plywood Countertop
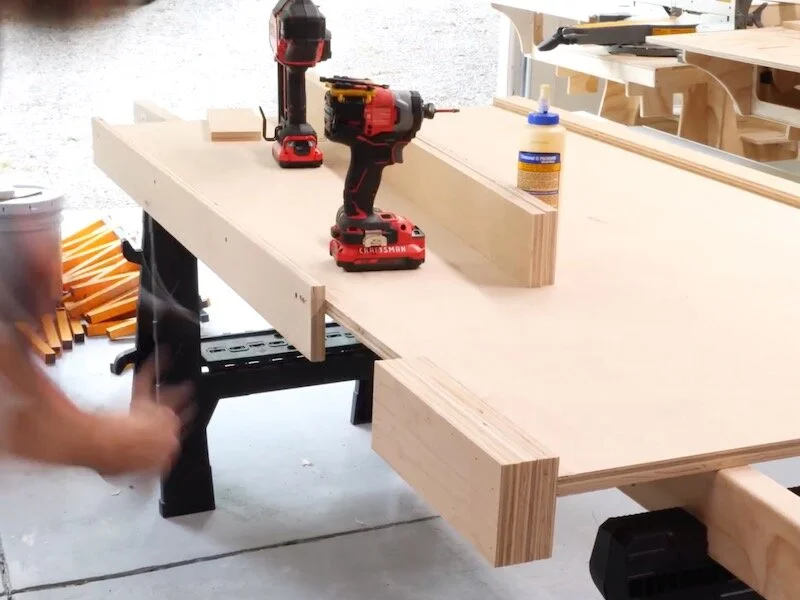
Back to the build, after cutting the trim pieces to length at the miter saw, I could start getting the countertop assembled. First, I added a strip to the front edge of the countertop, to give it a beefier look. I also added a strip to the front of the shelf, so it matched the countertop. The strip on the shelf also helped to hide the wiring for the lights I added under the shelf later.
Next, I started adding the trim along the back edge of the countertop. As you can see, I made the back trim pieces start ¾” below the bottom of the countertop, so that they would line up with the strip at the front of the counter. That way, I could mount all of the 2x4 supports on the wall at the same height rather than trying to stagger them to match the underside of the countertop.
I added glue and tacked the first strip in place with brad nails, and then added 2” inch screws to permanently attach it. Make sure to pre-drill your holes here, as plywood edges have the tendency to split out otherwise.
After getting the first strip attached, I attached the next two strips with glue, tacking them in place with brad nails. The brad nails are really just there in place of clamps, as the glue provides all of the strength after it dries.
Last, I added two more filler strips along the left and right edges of the counter, again to make the bottom edge of the countertop even for mounting. The sides won’t be seen on this countertop, so I didn’t worry about mitering them, but my friends Evan and Katelyn built a similar countertop for their laundry room and mitered the edges for a cleaner look, since the side of their countertop was visible.
Finally, I flipped the countertop over, removed any glue squeeze out, and then let the glue dry for a few hours.
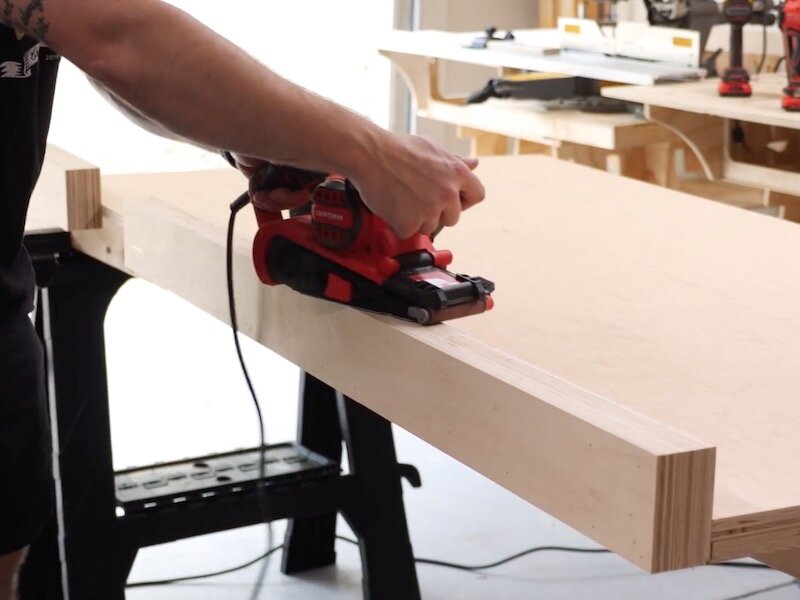
Once the glue dried, I could get the plywood edges flushed up with the belt sander. I don’t use a belt sander often, but it’s perfect for jobs like this, as it tends to keep surfaces a lot flatter than a random orbit sander. It also removes material a lot quicker.
After belt sanding, I swapped over to my random orbit sander and sanded everything with 120 grit, also breaking all of the edges. Also, I decided to forgo the shop vac since it was upstairs, but I won’t be doing that again. I created a dust storm and just about everything in our garage is now covered in a fine layer of dust.
Step 5: Applying Finish To Plywood Counter Top
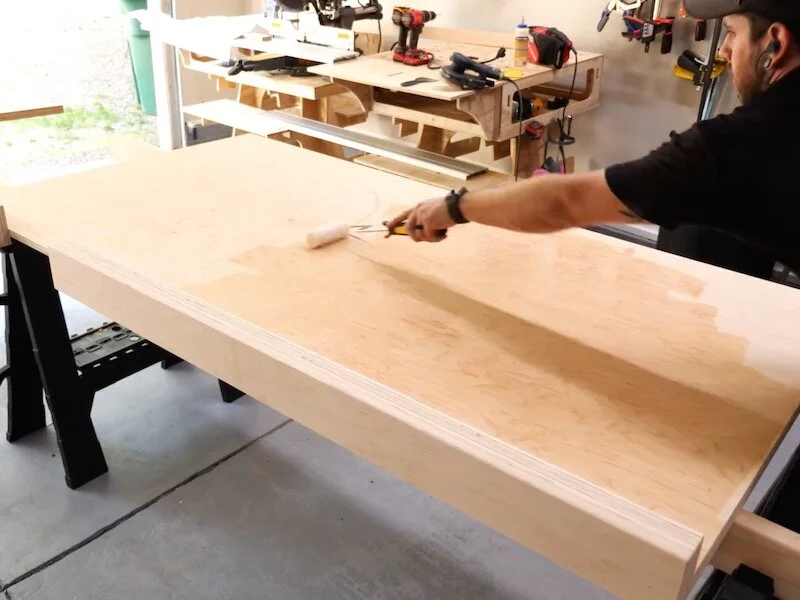
I finished sanding the countertop and shelf with 180 grit, blew off the dust with my blower and compressor, and then I could apply finish. I went with a water based polyurethane here and decided to try something new, applying it with a roller. This was actually extremely quick and easy, and I ended up with a really nice surface finish. I applied three coats, sanding with 320 grit after the second coat.
Step 6: Spackle And Painting
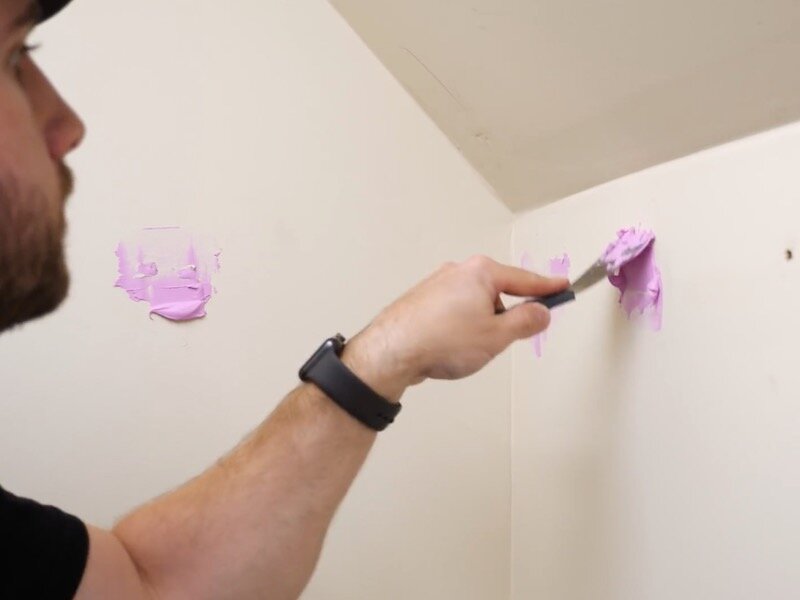
With the finish drying, I could move back to the laundry room to get prepped for paint. I patched all of the holes I was left with after removing the wire shelving and really regretted not being more careful, as this spackling took much longer to dry since the holes were so large. I ended up having to delay painting by a day because of the spackling and really should have done this earlier in the project.
I added the first round of spackling, let it dry, sanded it with a sanding block, vacuumed off the surface, then added a second round of spackling and repeated the process before moving on to paint.
Now, I typically hate painting, but I watched a bunch of videos on proper painting technique and also picked up some good quality paint supplies and, I must say, this painting when much more smoothly.
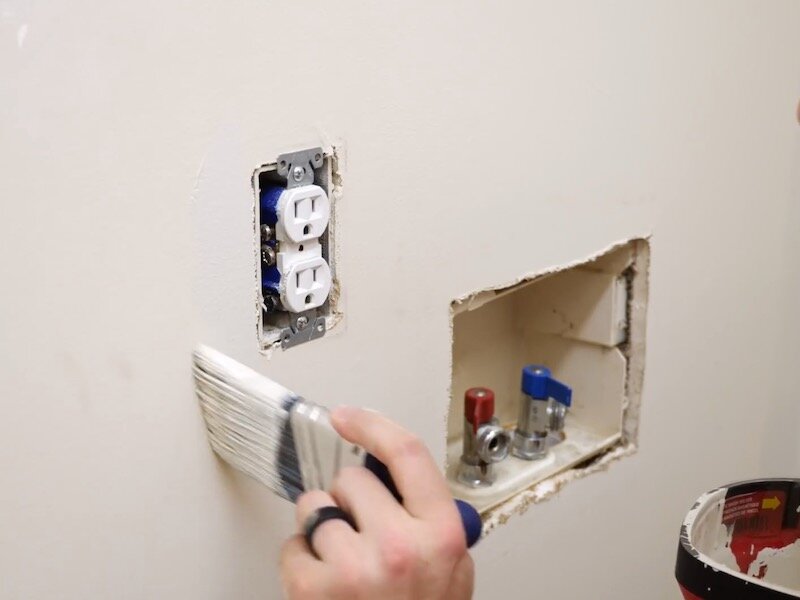
First of all, I cut in with a rubber handled brush designed for cutting in, which made the process much easier. This room was also great practice for cutting in, since this trim will never be seen once the laundry machines are in.
After cutting in, I rolled out the rest of the room, and adding an extension to the roller made a world of difference here. I also loaded my roller more frequently, so that I didn’t have to use as much pressure when rolling out the paint. This meant I got much less fatigued. I added two coats of paint, in my favorite color, Repose Gray, and then I could get the countertop installed.
Step 7: Installing Plywood Counter Tops In Laundry Room
To support the countertop, I used 2x4s, but I would have used 2x2s if I had to do it again, to make sure they were better hidden in the final installation.
I cut the 2x4s to length at the miter saw and then headed up to the laundry room to install them.
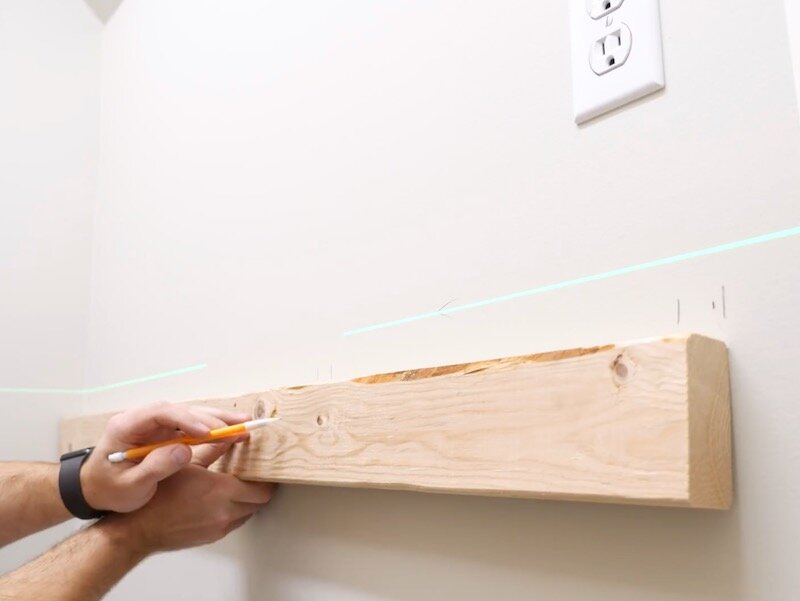
My washer and dryer had a height of 38 ½”, so I mounted the 2x4s at 39” high to give them a little clearance. I set up my line laser at this height to give me a good reference line around the entire room and then I marked out the stud locations.
I transferred those locations to the 2x4s and partially drove in some 3 inch screws to make mounting the 2x4s easier.
To mount the 2x4s, I lined up the top edge of the 2x4 with my laser and drove in the screws, making sure they hit the studs. If the screws didn’t pull the 2x4 flush to the wall, I would back out the screw and drive in the screw at a different angle to make absolutely sure they were in the stud.
After adding the two screws at the ends of the 2x4, I checked for level just to confirm the laser line and then drove in the other screws.
I just repeated the process for the rest of the 2x4s, which ended about 4 inches short of the front edge of the countertop, so that they would be hidden.
Once the 2x4s were in, I went ahead and moved in the washer and dryer and got them hooked up. This would be next to impossible once the countertop was in, so I needed to get this done before installing it.
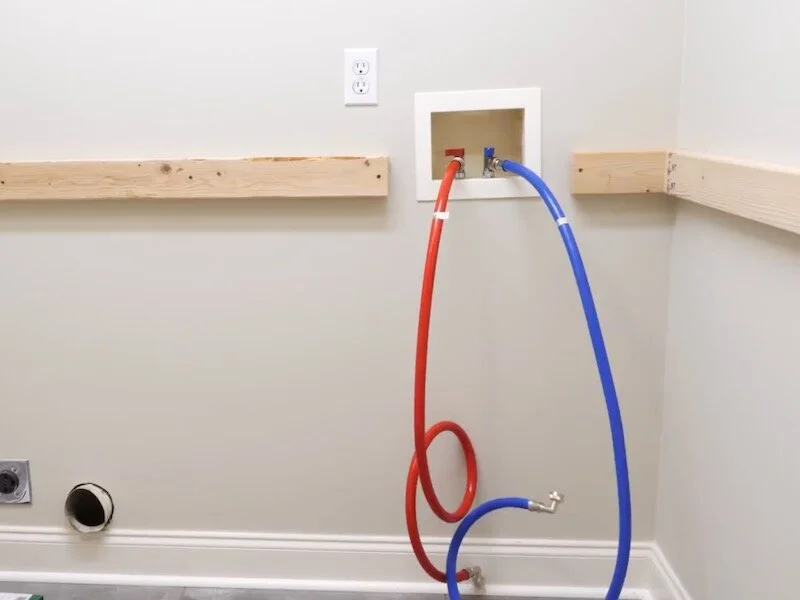
I also bought new water lines for the washer when I got the new appliances, just for some peace of mind. My alarm system also has a water sensor that I have placed behind the washing machine, to alert me of any future leaks.
After getting the washer and dryer in place, I swapped the swing of the door on the dryer, which I unfortunately couldn’t do on the washer, and then I could get the countertop moved in, which, as I mentioned, was a little tricky.
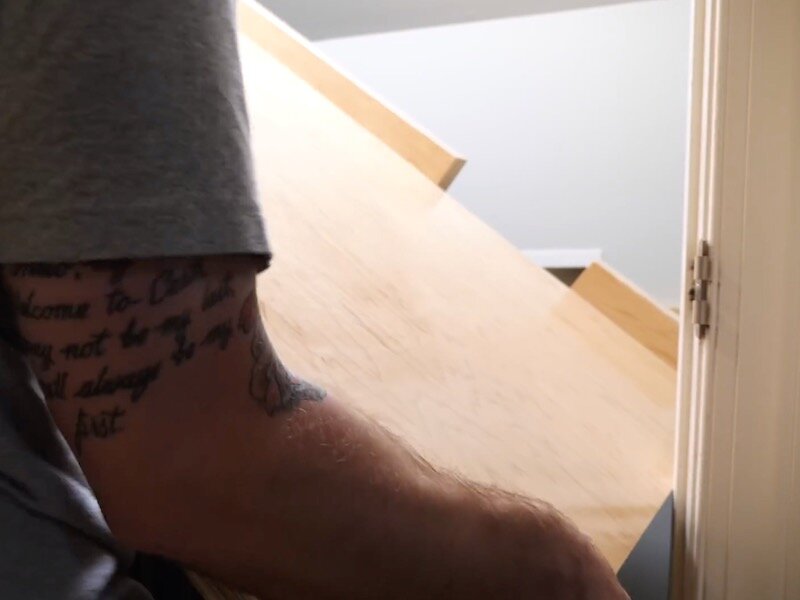
After trying to move the countertop in with it oriented horizontally and realizing it was hitting the angled ceiling, we reset, moved the dang camera out of the way, and went in with the countertop oriented vertically. This, luckily, worked and the countertop dropped into place. The wall was a little out of square, so it required a little persuasion to fully seat it, but it looked great once it was in.
You might also notice I notched one corner of the backsplash in anticipation of installing it horizontally but this didn’t end up being necessary.
Also, I had initially planned to attach the countertop to the 2x4s with construction adhesive, but I decided to just have the countertop sit on top of the 2x4s unattached. Since it’s jammed against the wall, it stays in place just fine, and this way I’ll have easy access in case I need to get behind the washer or dryer in the future.
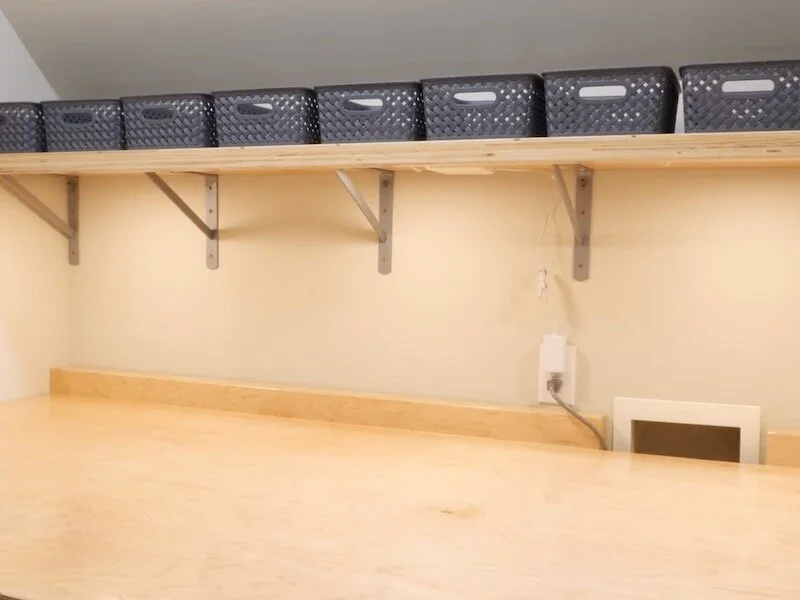
Step 7: Plywood Storage Shelf Installed Above Washer And Dryer
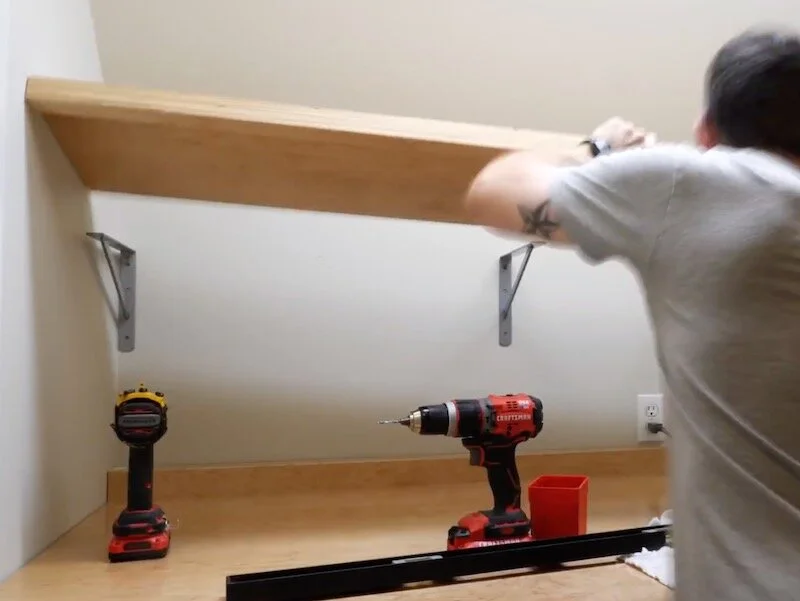
Next, I could get the shelf installed. First, I mounted the shelf brackets, again using the line laser to set the height. I also marked all of the stud locations on painter’s tape, so I wouldn’t be left with any marks on the wall.
Unfortunately, the stud spacing is a little awkward on this wall, so I couldn’t things perfectly symmetrical, but I did end up adding one more shelf bracket to even things out.
I attached the shelf to the brackets using ¾” screws from below, and then I could install some puck lights to give the countertop better lighting. These lights are pretty cool, they’re super low profile and have a little button that allows you to turn them on and off easily. They just attached with some included Command Strips, and I used some packing tape for a little extra cable management.
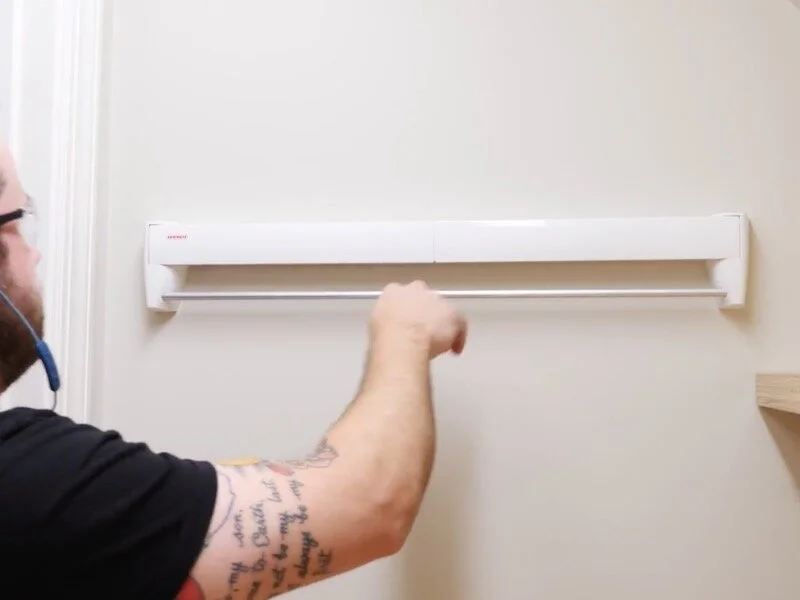
The last thing to install in the laundry room was a few drying racks, which we use for all of our synthetics. I found these super cool, low profile racks, which fold flat against the wall when not in use. They installed with a few included drywall anchors and I think look great in the finished space.
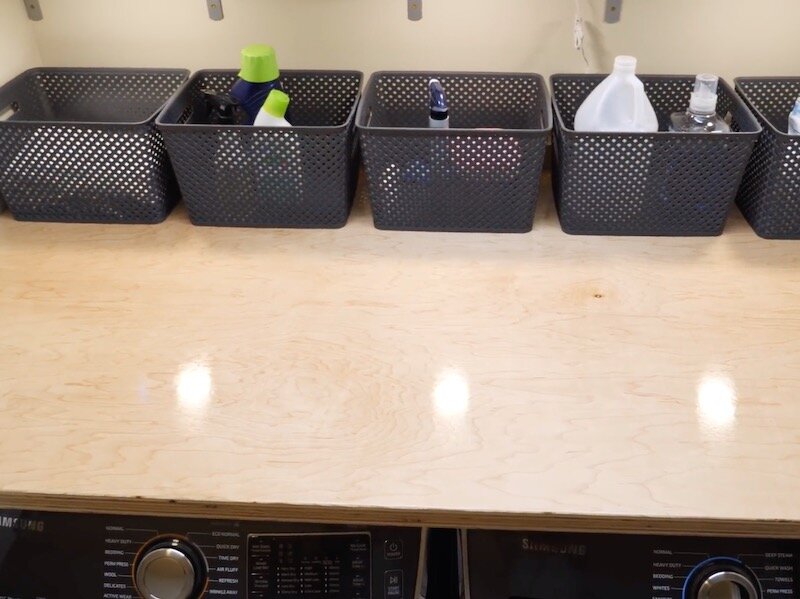
With that, all that was left to do was get everything moved back in and organized. I picked up these plastic baskets which happen to fit perfectly in the space, and they really help to reduce the visual clutter. I’ll go back and add labels, especially to the baskets on the shelves, so it’ll be easier to find everything, but, with that, the laundry room was officially finished.