
DIY Outdoor Patio Cooler Ice Chest Made Using Basic Tools
I built this DIY modern outdoor patio cooler using basic power tools, including a circular saw and drill, and dimensional lumber. This patio cooler ice chest is designed to hold an Orca 20qt cooler but could be sized to fit a bunch of different coolers.
Free Outdoor Patio Cooler Ice Chest Plans!
I have free plans available for this build, click the button below to download them!
Materials Used On The Outdoor Patio Cooler Ice Chest (affiliate) :
- 2” stainless screws
- 6 x 1” Black pipe, t-joint
- 4 x 1” Black pipe, flange
- 4 x 1” Black pipe, 2” section
- 4 x 1” Black pipe, 9” section
- 1 x 1” Black pipe, 4” section
- Furniture sockets
- Casters
DIY Outdoor Patio Cooler Ice Chest Build Process:
Base Layout
I decided to use black pipe for the base on this patio cooler build, so I started with building the base. Black pipe is notoriously hard to get exact measurements on, so I wanted to make sure the base was going to fit the top section of the patio cooler before building it. It’s a lot easier to make measurement adjustments before building something than trying to make them afterwards.
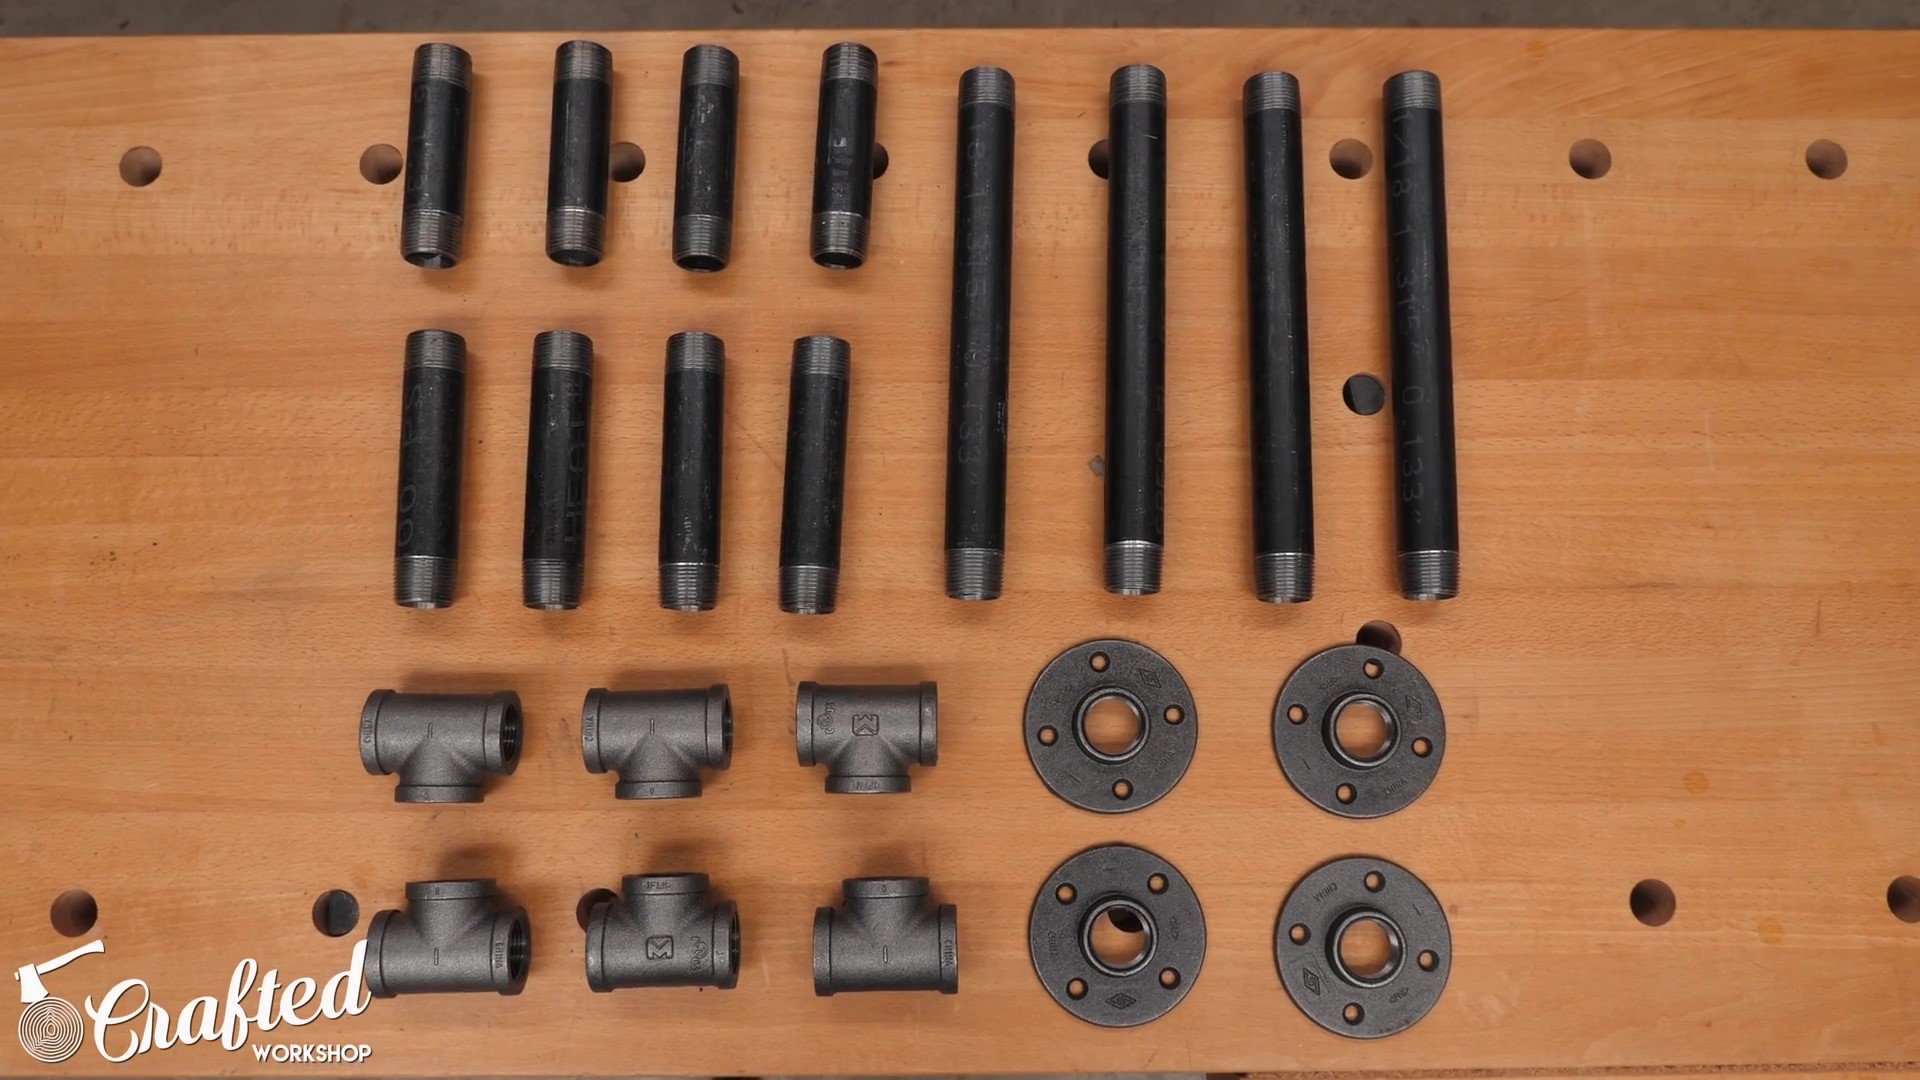
I took all of the pieces out of their individual bags and threaded them together to form the base. Each leg section forms kind of an H-shape and then the two halves are connected by one long stretcher piece.
After getting everything assembled, I measured and realized I was way off, with the base about four inches too long and three inches too tall. After making a trip back to the store, I got the final pieces I needed and then could move on to final assembly.
Before assembly, I needed to clean all of the gunk off of the pieces. Luckily, since these parts were individually packaged, they didn’t have the annoying labels these pieces usually have, but they were still covered in a coating of grease. To remove this, I used acetone, which cut through the coating with no problems.
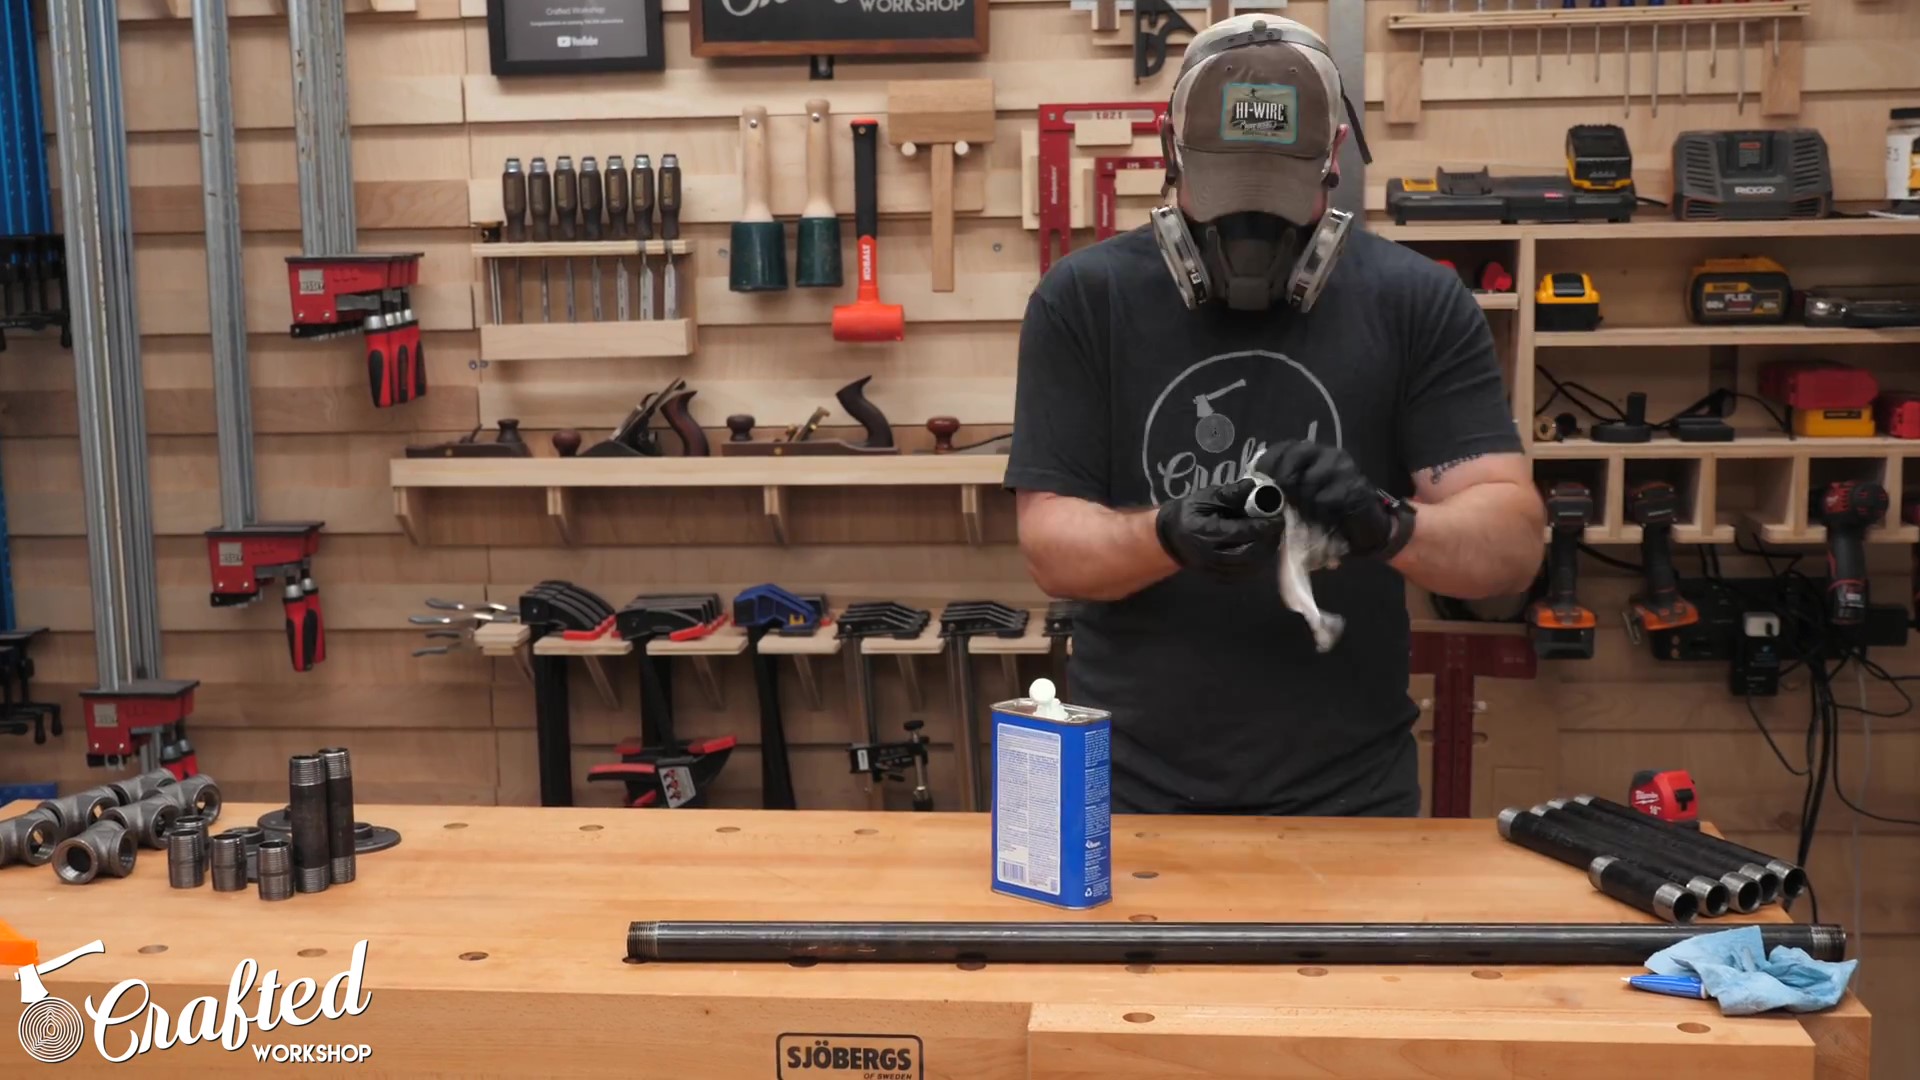
You should definitely wear a respirator if you’re going to use acetone though, because the fumes are pretty terrible.
Base Assembly
After getting everything cleaned up, I could start with assembly. I used thread locker to lock all of the joints together and added a few drops onto the threads at each connection point. After adding thread locker, I threaded the pieces together as tightly as I could. A strap wrench would probably be helpful here, but I don’t have one of those.
Once one section was together, I made sure to check its measurements against one of the other pieces to make sure they lined up. If these leg sections are uneven, the base will rock, which is no bueno.
Next, I repeated the process for the short stretcher sections that connect the legs and long stretchers. If you’ve got a vice on your workbench, it can be really helpful in getting these joints tight.
I could then assemble each leg section, attaching a leg to each end of the short stretcher. I also needed to make sure the center T connection was perpendicular to the legs here, so that the long stretcher would line up properly.
Finally, I could add the long stretcher to complete the base. I made sure everything was nice and tight and checked all of the measurements before moving on to paint.

Finishing the Base
If I left the black pipe as it was, it would have rusted from being exposed to the elements. To protect it and give it a clean look, I sprayed on a few coats of flat black enamel spray paint, which is rated for outdoor use.
I wanted this patio cooler to be mobile, so it could be moved to wherever beverages are needed on my patio, so I decided to add casters. I found these little adapters on Amazon, I’ll have a link to them below, but they allow you to connect casters to black pipe.
I threaded the casters onto the adapters, made sure they were completely seated, and then used some 5 minute epoxy to glue them into the bottom of the base.
While the epoxy dried, I could get to work on the top section of the patio cooler.

Building the Frame
I started by breaking down one of the pressure treated 2x4s into the pieces that would form the frame of the top section using my circular saw and a speed square.
Next, I clamped the pieces together, checked for square, and then pre-drilled and added 2” stainless steel screws in each corner. It’s also really important to make sure things are square at this point, as everything will be built on top of this framework.

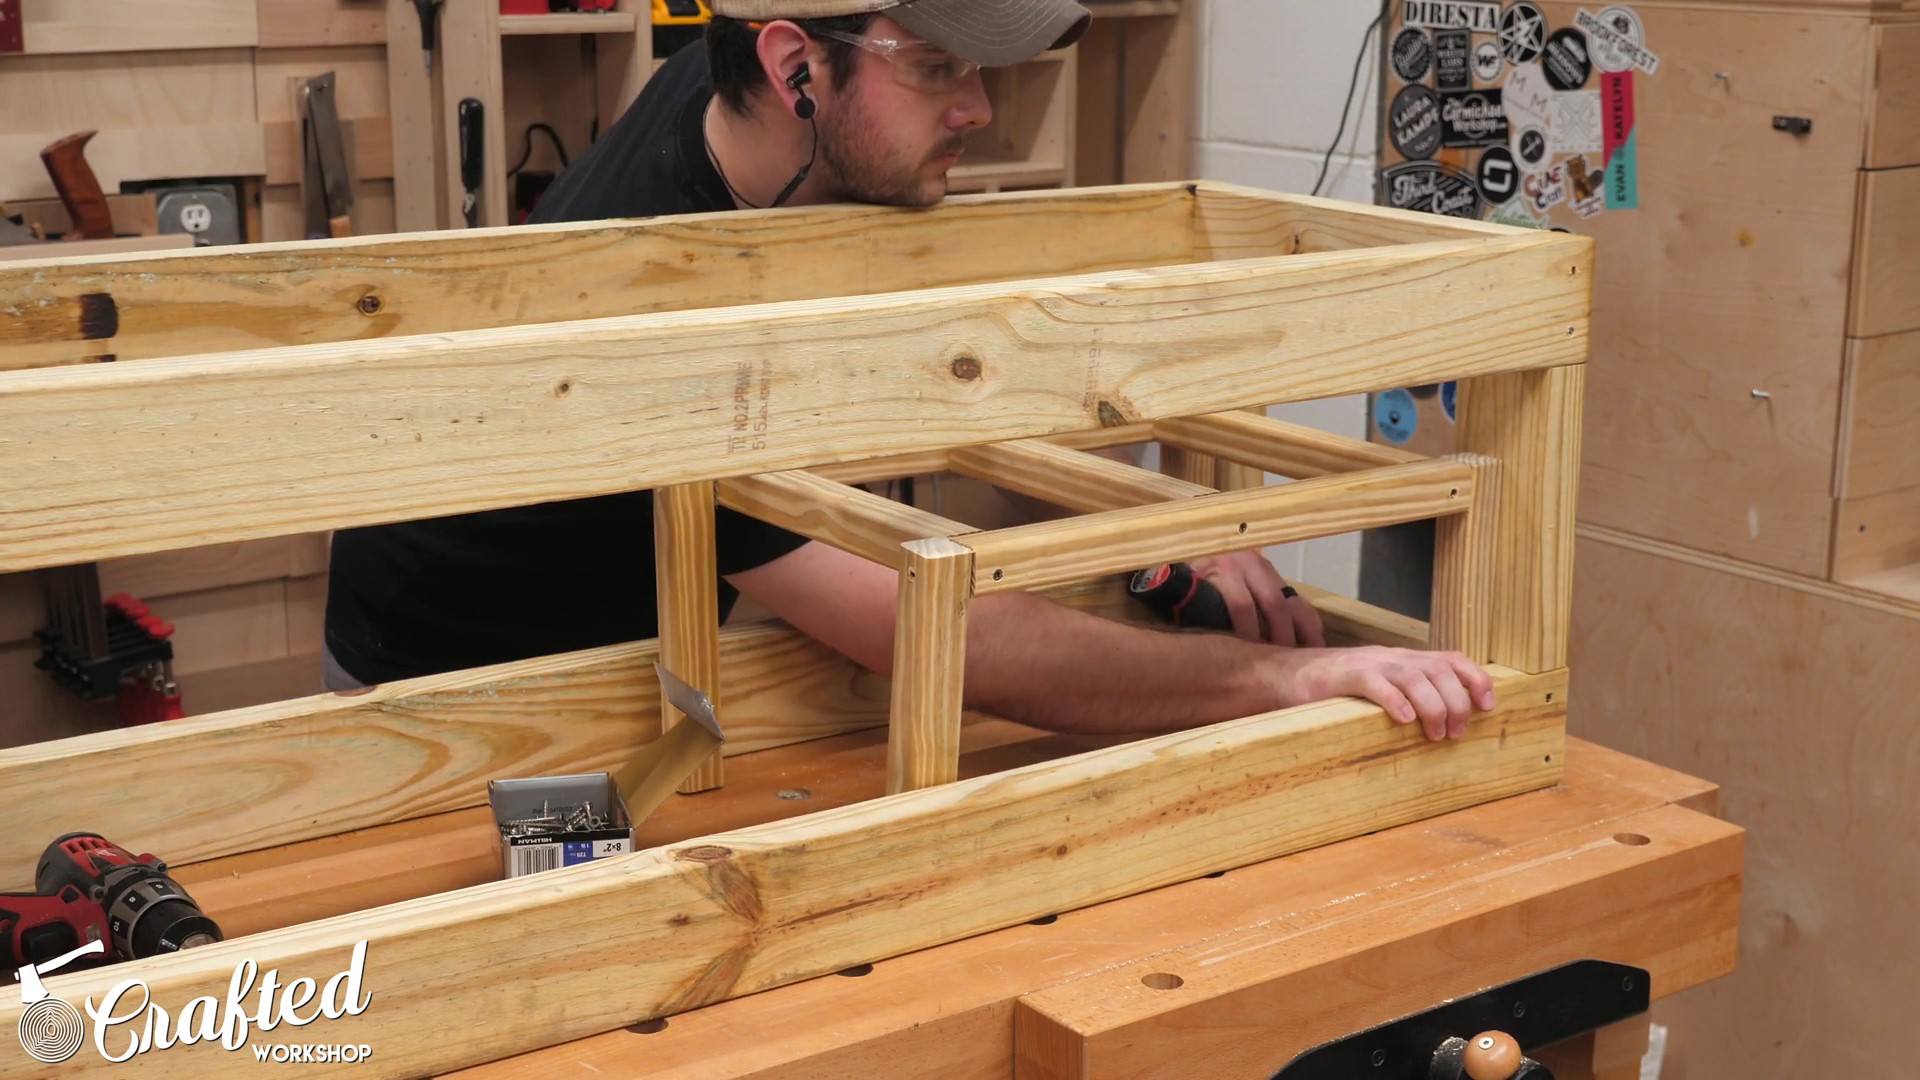
I made two of these frame sections, and then cut the short uprights to size. To connect these, I drilled angled holes through each end of the piece, so that I could toenail the screws through the upright and into the frames. I then clamped the upright into place and drove in two screws.
I repeated this process at each corner of one of the frames, pre-drilling angle holes and then driving in two screws per joint, and then added the other frame section and attached it to the other end of the uprights. This forms the framework for the top section.
Cooler Support
Next, I needed to build the structure that would support the cooler. I built this out of pressure treated 2x2s, and cut the pieces to length based on the plans using my circular saw and a speed square.
To assemble the frame, I clamped them together, pre-drilled and added one screw per joint, making sure to check for square along the way.
Next, I added the center support piece in the same way.
The cooler support is attached to the 2x4 frame with an upright at each corner, which I attached with one screw on each upright.
After adding the uprights, I did a quick test fit with the Orca cooler, to make sure it fit, and it did.
Next, I flipped the cooler support upside down and dropped it into one end of the 2x4 frame. I then drove two screws through each upright into the 2x4 frame.
Completing the Frame
I needed something for the boards which will cover this frame to attach to on the center of the front of the patio cooler, so I added a 2x2 upright to the center, again using the angled screw method.
I also needed one more board in the center of the top of the piece, to provide some support once the hole for the cooler was cut out, so I cut a piece of 2x4 to length and added it with a few screws.

The back of the patio cooler was going to have an open area, so I figured it would make a perfect shelf for storing little odds and ends, so I cut some more 2x2 pieces to fit the opening and attached them with a screw from each end. I used a couple of pieces of scraps to space the pieces about ¼”.
The last pieces to add to the frame were a few short 2x4 pieces that would give some more area for the flanges on the metal base to attach to, and I added those to the inside of each corner using a few 2 ½” screws. I should have done this before adding the outer boards, hence why you see some of that already added.
Installing the Exterior Boards
Speaking of those outer boards, next it was time to start installing those. I used Trex for this build, which is a composite decking material that comes in a bunch of different colors and sizes. I picked up 6 boards at 8 feet long, and made sure to get boards with no groove on the edges, since I wouldn’t be using the grooves.
Now, Trex isn’t cheap, these boards were about $13 each, so you could certainly save some money by using pressure treated 1x6s or cedar fence pickets instead, but I wanted to try working with Trex.
The first boards to add were the three top boards, which are flush with the edges and ends of the frame, and the boards are spaced ⅛” apart.
These boards need to be added in a specific order, as the lengths are referenced off of each other and the boards are oriented so no end grain is visible from the front of the patio cooler.

I pre-drilled and added three screws on each end of each board, which was overkill. If I were to do it again, I would have used two screws instead, but once the first board had three screws, the rest needed to match.
I also made sure to measure out the location of each screw, so that they all lined up.
The next board to add was on the back top edge of the patio cooler, and it needed to be ripped to width to line up with the opening for the shelf. I ripped the board using my circular saw and a 5 foot level as a straight edge.
I installed the piece on the back of the patio cooler using a few screws, some of which needed to be angled since they were running into some of the screws in the frame section.
Next, I added another piece to the bottom edge of the back, which again needed to be ripped to width.
I cut a couple of pieces from the offcut from that bottom piece to fit the gap between the back pieces and added them using a few screws. You’ll notice that the cut edges of these pieces are all oriented towards to outside edges of the piece, and that is so they’ll be covered up later on.
Plunge Cut Cooler Opening
While the sides of the patio cooler were still open, I went ahead and cut out the opening for the patio cooler. It was a lot easier to do this while I could still see where the cooler support pieces were on the inside of the frame.
I laid out the lines using my speed square and level, making sure the opening lined up with the opening in the frame, and then clamped my level in place, taking into account the offset from the circular saw plate.

To make this cut, I needed to do a plunge cut with the circular saw, which can be a little dangerous if done incorrectly, so make sure you’re comfortable with this cut before trying it. Basically, I pulled back the blade guard, lined up the plate of the saw with the straight edge, and lowered the blade into the top.
It is extremely important to watch your blade here, because you don’t want to cut past the layout lines. I cut about 1/2” too far on this first cut, which wasn’t a huge deal but ended up causing a few issues later. Just make sure to cut to your lines and you’ll be good.
Next, I moved everything to the other end of the opening, this time using one of the offcuts as my straight edge since the level was too wide to use here, and made my second cut.
With both ends cut, I could cut the sides. This is where that errant cut from earlier became a little annoying. Instead of this cut being into open space, it was over the very edge of the frame below. This wasn’t an issue when making the cut with the circular saw, but when I went to cut the corners with my flush trim saw, I couldn’t get into the area because the frame was blocking it.
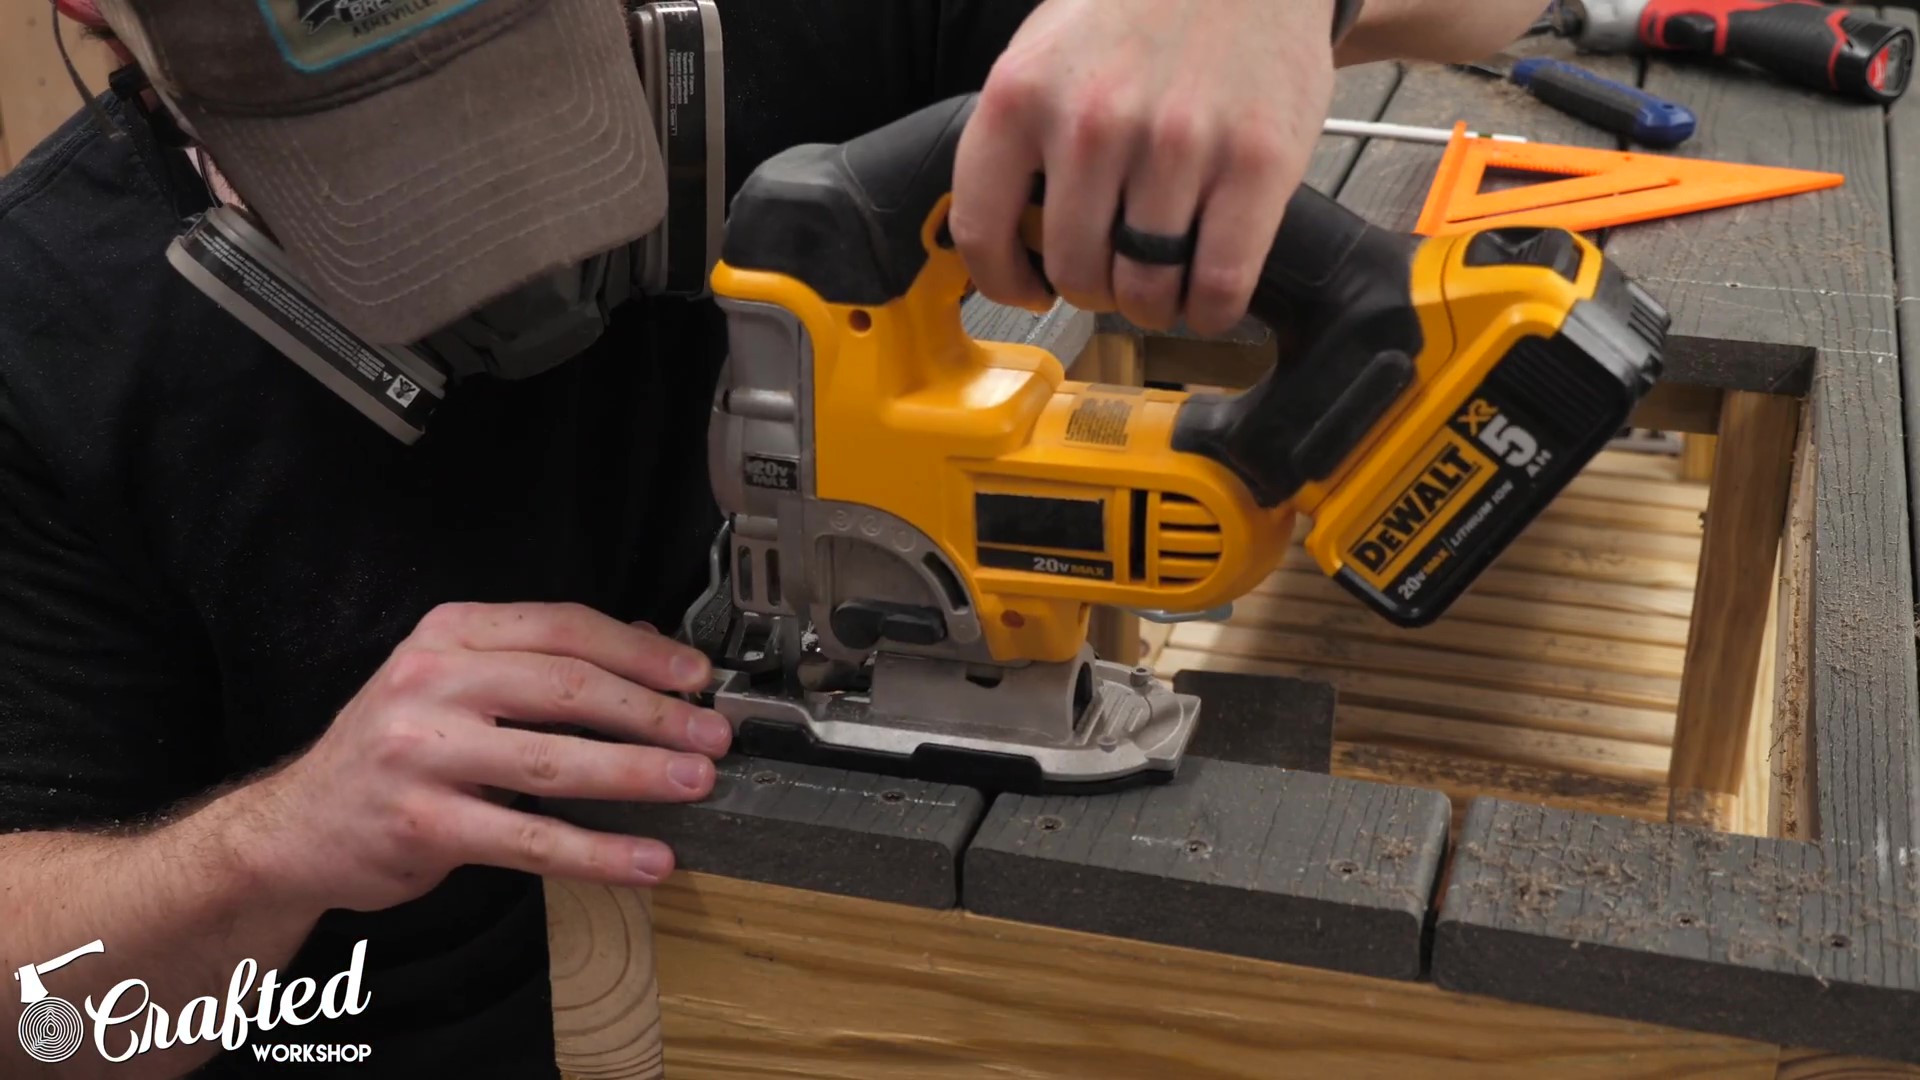
Any time you’re making cuts like this with the circular saw, you have to finish them with some other kind of saw since the round blade of the saw doesn’t complete the cut. I pulled out my jigsaw since the flush trim saw wasn’t working and forced it into the kerf and got it done, but it was a bit of a pain with the jigsaw bouncing all over the place at first.
The moral of the story is to just pay attention and cut on your lines, and you won’t have an issue. Case in point, the other side cut perfectly and the jigsaw had no trouble completing the corner cuts.
After finishing the cutout, I test fit the cooler and it fit great. It’s a little oversized, but that’s fine.
Final Assembly
With the cutout done, I could add the rest of the exterior boards, starting with the sides.
Once the sides were attached, I could attach the last of the exterior boards, the front pieces. These run the full length of the patio cooler, covering the end grain on the sides and providing a super clean look to the front of the piece.

After attaching the boards at each end, I marked a line down the center and added a row of screws there as well.
With that, all of the exterior boards were added, so I could go ahead and get the base attached to the top. I flipped the top over, set the base in place, centered it, and added 1 ¼” pan head screws to attach it.

Finishing Touches
The final touch on the patio cooler was to add a bottle opener to the side of the piece. I decided to make things a little fancier and add a few rare earth magnets to the inside of one of the boards, so that the bottle caps would catch magnetically instead of falling on the ground.
To do this, I removed one of the side boards and drilled a few holes on the inside face of the board using a Forstner bit that matched the size of my magnets. I used some CA glue to install the magnets into the holes, and I made sure to orient the magnets correctly that they they would catch the caps.
After reinstalling the board, I tested it out with a well-deserved beer and it worked perfectly. With that, the patio cooler was done!
