
How To Build A DIY Plywood Media Console // Limited Tools Build
I built this DIY plywood media console using additive joinery, allowing me to create dado joinery using basic tools! This whole project could be constructed with a circular saw, brad nailer, and drill, and the final product is super sturdy and pretty sweet looking!
🛠 Tools Used On The (affiliate):
📦 Materials Used On The (affiliate):
Step 1: Breaking Down Materials

This media console is constructed entirely of ¾” plywood, so the first step was breaking down the larger panels into smaller pieces. I do have free plans available for this project on my website, there’s a link in the video description below. The plans have a detailed cut list and cutting diagram, to show you how to break down the plywood most efficiently.
I wanted to illustrate that you don’t need a table saw for projects like this, so I used the Kreg Accu-Cut circular saw guide on this project, which allows you to make repeatable cuts with your circular saw. This ended up working out great, as most of the cuts are just over 15 inches wide, perfect for this guide.
I like to make these cuts on a piece of foam insulation, available at any home center, and this keeps the saw blade from damaging whatever’s below the piece I’m cutting.
Step 2: Breaking Down Materials (continued)

For the larger pieces, I needed to crosscut one of the sheets of plywood, so I pulled out my circular saw guide, or door board as it’s sometimes called, which I made in a previous video. Between the Accu-cut and one or two of these door boards, you could break down any sheet goods with no table saw.
I used a drywall t-square to make sure the door board was square to the plywood, clamped it in place, and then made the cut.
After showing these two methods, I did finish cutting the rest of the pieces on my table saw, just to speed things along.
A few of the boards needed pocket holes drilled in them before assembly, so I did that using my Kreg K4 pocket hole jig. You could definitely cut more dados into the center dividers and skip the pocket holes, but that would require either a table saw or router.
Step 3: Joinery

Before I dive into assembling this thing, let’s take a second to talk about the design of this piece. Basically, I’m using individual pieces of plywood to build up larger panels and leaving gaps between the pieces to create dados. This is something I saw Jesse Uyeda from iJessup and Homemade Modern do on a project and I thought it was a super cool idea.
This process of additive joinery allows people who don’t have access to a table saw or router the ability to make something like this. That said, it does use a lot more plywood, but I think it’s a cool finished look.
Step 4: Glue Up

Back to the build, I could start the process of gluing this whole cabinet together. First, I glued up the top and bottom panels. I used a scrap piece of the same plywood as a spacer, added glue, and then pin nailed one of the pieces in place, making sure it was square to the panel.
I kept repeating the process until all of the pieces were added on the top and bottom panels, and then added clamps around the edges of the panels to make sure any gaps were closed up.
I could then repeat the same steps for the sides.
It was absolutely critical that each of these pieces was square, as any errors would have compounded as I added more pieces across the panels. I used a 12” speed square to check for square along the way. Pin nails don’t have a ton of holding power, so you could pry up the boards and reattach them if you get out of square, but luckily I didn’t need to do that.
After letting the glue dry, I could scrape off any glue squeeze out from the edges.
An optional step is to trim the edges of the panels using a table saw, to get rid of any excess glue squeeze out and remove any inconsistencies between the pieces. If you don’t have a table saw, you could just use a belt sander after gluing up the rest of the cabinet.
Step 5: Carcass Assembly
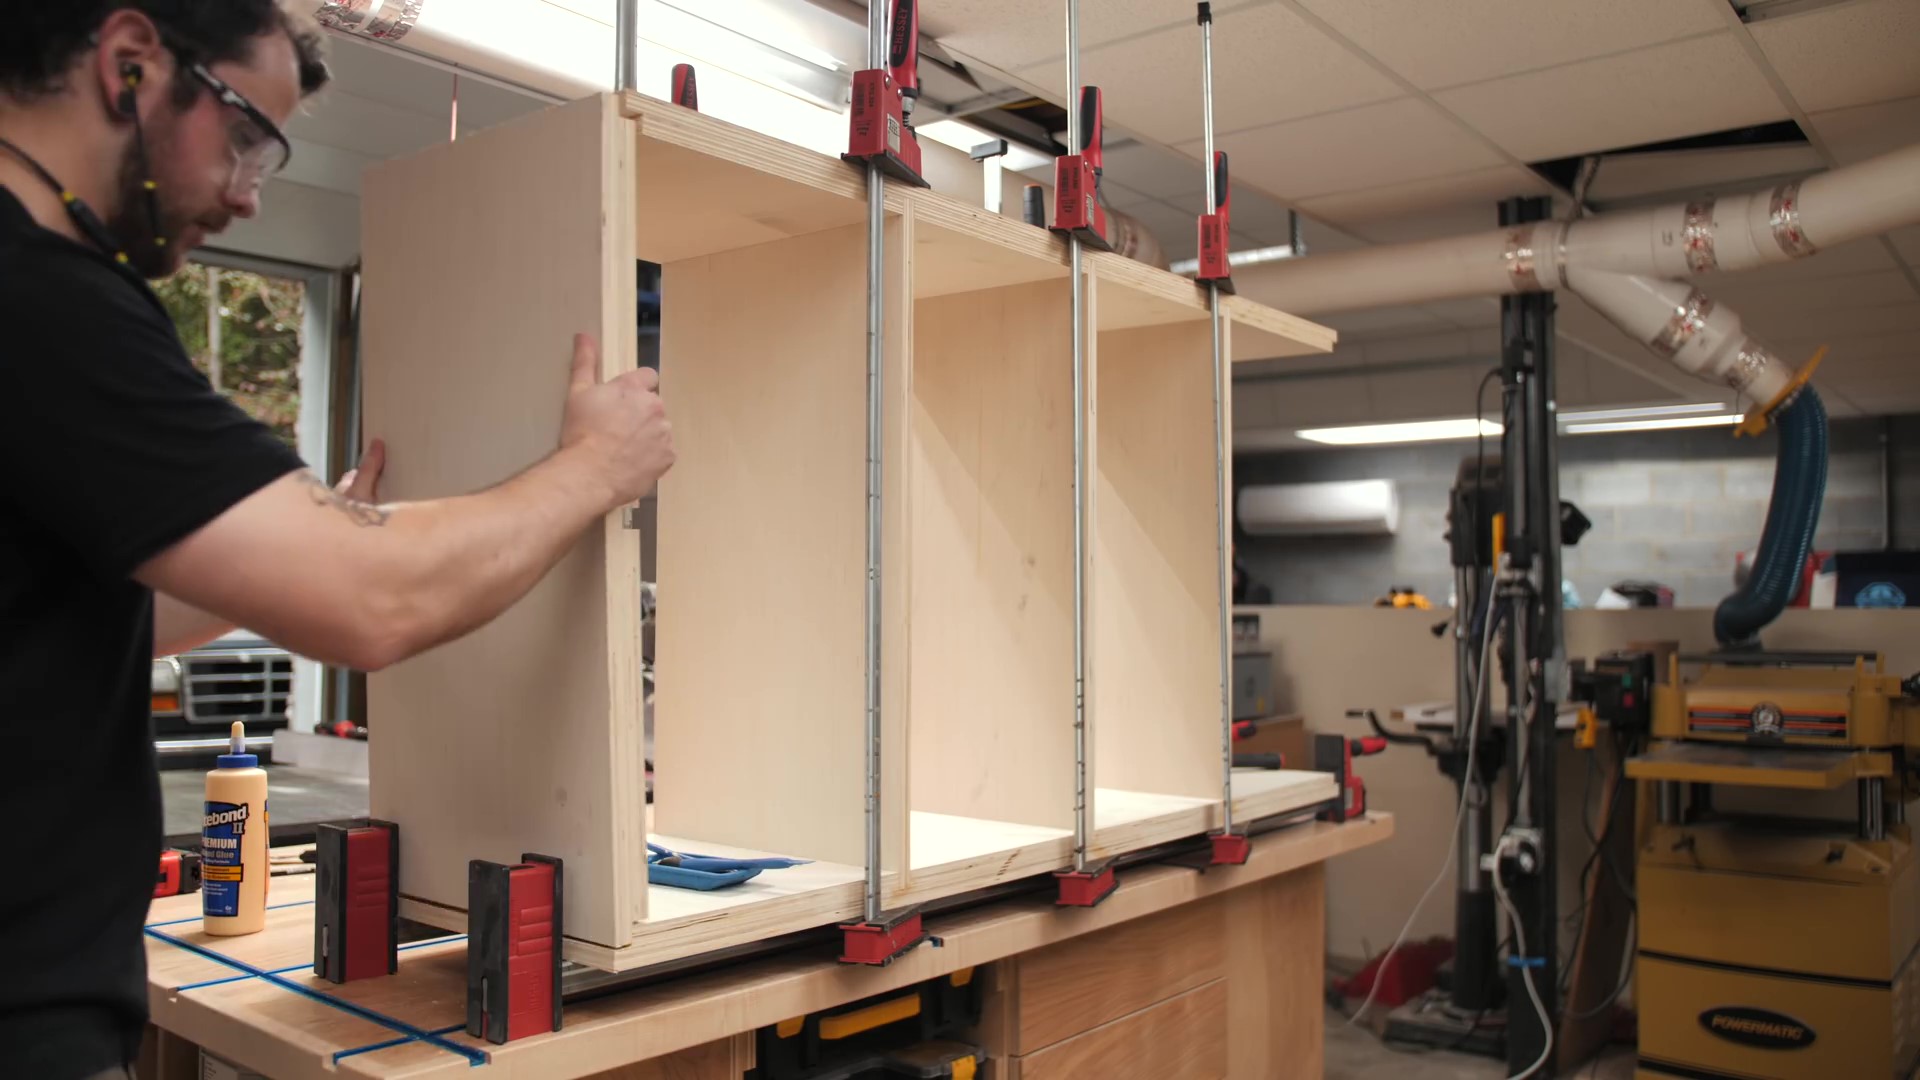
Next, I could get to assembling the cabinet carcass. First, I added glue to the center dados in the bottom panel, added the uprights, then added the top panel and added clamps.
I could then add the side panels, adding plenty of glue and then clamping them in place. You can see how nicely everything seated, I was really happy with the way this whole thing came together.
Now, I had run out of clamps at that point, so I let the glue dry and then could come back and add the shelves.
Step 6: Shelf Assembly

First, I added the center shelves, which are attached solely with pocket screws. I cut some spacers at the miter saw to hold the pieces at the right height while I added clamps and then I could drive in the screws. Also, I’m assembling this whole thing upside down, the pocket holes will be facing the ground in the final cabinet.
Next, I could add the outer shelves. The dado for the first shelf was pretty tight, so I had to persuade it into place, and then clamp the shelf and add pocket screws.
The other shelf slid right in, no persuasion needed. I could check everything for square, which it was, and then let the glue dry.
Step 7: Sanding and Painting

Before painting the cabinet, I sanded any of the loose pieces, just to keep them from screwing up the paint, but I saved most of the sanding on the edges for after paint since I’d need to sand the edges to remove any excess paint anyway.
I also chamfered the outside edges with my little block plane, which I absolutely love for this task.
Next came the tedious process of taping off the plywood edges. This probably wasn’t completely necessary, since I could have sanded back the excess paint, but I didn’t want any paint getting into the voids on the plywood edges and messing up the look.
After taping, I could roll on a couple of coats of this Valspar furniture paint, which worked pretty well. I probably should have added one more coat, I only did two, but I’m pretty happy with how the surface looks.
Step 8: Edge Treatment

After letting the second coat dry, I peeled back the tape and was left with some less than perfect paint lines, but that didn’t matter as I needed to sand the edges anyway.
Before doing that, I filled any of the voids or gaps between the pieces with wood filler and then I could sand the edges with 180 grit to smooth them out.
For the chamfers, I just took a few more passes with the block plane and it cleaned them right up. I love how crisp the paint lines are wherever I used the plane, it was an ideal tool for that job.
It was at this point that I decided I wasn’t going to add a back to the cabinet, because it just doesn’t need it, so I sanded the back edges as well, breaking the edges with a little hand sanding.
Finally, I could add a few coats of water based polyurethane to the edges to seal them and the cabinet was done. If you wanted, you could stop here and you’d basically have a super beefy Ikea Kallax, but I wanted some doors for this thing.
Step 9: Doors

Actually, the entire point of building this was to replace our existing Ikea Kallax, as our little dude is about to start crawling and we really needed doors to keep him out of the contents of the shelves.
Rather than just make doors for the Kallax, I figured this would be a good opportunity to rebuild the piece, making it a lot beefier, and experiment with this process of additive joinery.
I cut the doors to size on the table saw from some scrap plywood and then started drilling the holes for the Euro hinges I was using with this Kreg concealed hinge jig. These hinges are soft close, another bonus for the little guy so he can’t smash his fingers if he manages to open the doors.
After drilling all of the holes for the hinges, I sanded all of the doors, breaking the sharp edges, and then I could paint the doors.
I used four different colors for the doors, to add some visual interest to the piece, and here are the exact colors I used, since I always get asked this question.
I sprayed on a few coats on the doors and then let the paint dry overnight.
Step 10: Finishing Up

Once the paint dried, I could go ahead and install the hinges on the doors, as well as these door pulls. They’re super simple and low profile, I really like the way they look and I’ll have a link to them in the video description below if you want to check them out.
Next, I needed to add the other half of the hinges on the inside of the cabinet. I made a quick drilling jig for this so I didn’t have to measure over and over, and pre-drilled all of the holes then installed the plates in the cabinet carcass.
To keep the doors from closing too far into the cabinet, I added these rubber door stops, which have a cam adjustment so you can dial in the door placement just by turning the stop.
Finally, I could attach the doors to the plates, make any adjustments, and the doors were done.
The last thing to add on this project were some legs, and in this case I decided to use these cool red rubber casters. I think this gives the piece a little bit of an industrial vibe and, as a bonus, it makes the whole thing really easy to move, since it is super heavy. If you don’t like casters, you could add hairpin legs, make some legs out of more plywood, or just sit the whole thing on the ground. Tons of options.
With the casters added, this media console was done!