
How To Make Glass Cabinet Doors with Router Bits // Home Bar Pt. 3
Learn how to make custom glass cabinet doors using a router bit set! This is a great DIY cabinet door option If you buy pre-milled wood.
Note: the links below are Amazon affiliate links
🛠 Tools Used On The Glass Cabinet Doors (affiliate):
📦 Materials Used On The Glass Cabinet Doors (affiliate):
🔹 Rockler Zip Driver Screws (to attach filler strips)
⅛” Tempered Glass (custom cut locally)

Pin It!
Process For Building Glass Cabinet Doors With Router Bits:
Step 1: Choosing Lumber For Home Bar Build

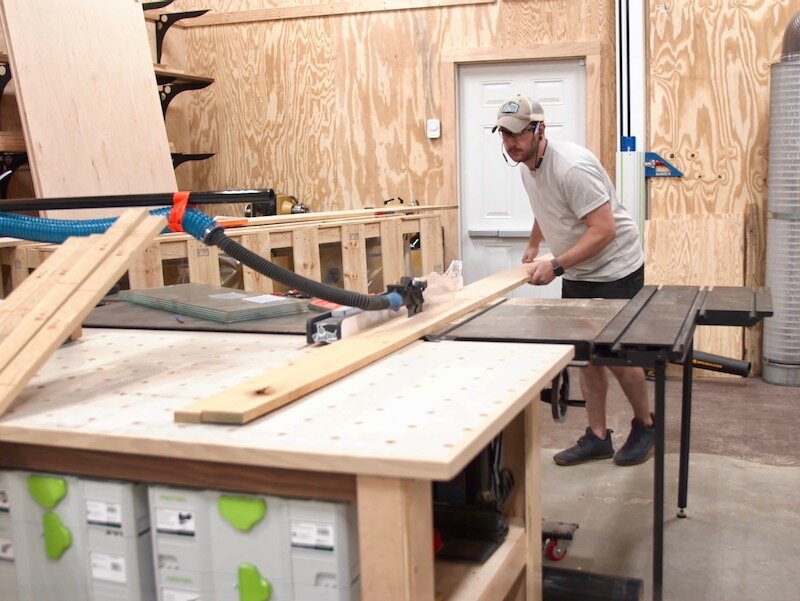
Back to the home bar build, I went with White Oak, to match the plywood I used for the cabinets, and picked up some 4/4 boards from Asheville Hardware, my local lumber and woodworking store.
I managed to find these super wide boards which were perfect for this project, since I could rip the door parts from the outside edges of the board, giving me mostly straight grain boards. Boards with straighter grain will tend to be more dimensionally stable, a very good thing when it comes to cabinet doors.
Step 2: Milling Lumber In Shop
I ripped the boards to rough width at the table saw then cut them to rough length at the miter saw. I like to cut my boards as close to their final dimensions as possible prior to milling, as it will usually mean less material has to be removed to get the boards flat.
Speaking of milling, next I could get the boards milled perfectly flat on one face and one edge at the jointer. Some of these boards had a decent bow to them, so I really needed to flatten them out prior to moving forward.
I like to face the bowed face of the board towards the bed of the jointer, as I find you can usually remove less material this way. Also, when doing this, I try to only apply light pressure towards the ends of the board, so that I don’t flex the board, which would temporarily push down the bow without actually removing it.
After getting one flat face and edge at the jointer, I moved over to the planer to bring the other face parallel. To set the cutting depth on my planer, I start with the bed lowered so that the board isn’t contacting the feed rollers or cutter head. Next, I slide the board in so it’s about halfway through the planer and then raise the bed until the board starts moving. This is essentially my zero point.

Next, I raise the bed by moving the handle about another half turn and mark across the entire face of the board with my pencil. This will help tell me how much of the surface of the board is being milled. Next, I run the board through again, and there were still some pencil marks left, so I raise the bed by about another half turn.
After that pass, there were still a small amount of pencil marks left at each end of the board, so I raise the bed about a quarter of a turn and then I could run all of the boards through. I wanted to bring the boards down to final thickness in one pass, as I wanted to remove the minimum amount of material in the shortest time, and this allowed me to do that.
I also ran the boards through with the end of the board butted up against the previous board, which really helps to reduce planer snipe.
With the boards at their final thickness, I could rip them to final width at the table saw. I made sure to use a featherboard here to make sure I got nice, clean edges.
Finally, I could cut the boards to final length at the miter saw, and I set up stop blocks to make sure my parts were the exact same size.
Step 3: Cope And Stick Joinery On Cabinet Doors
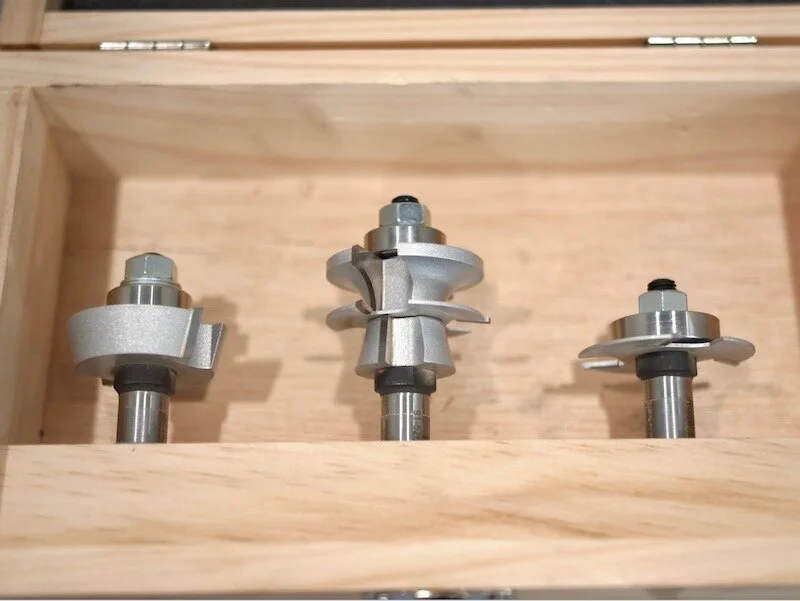
With the door parts milled to final size, I could move on to cutting the joinery that holds the doors together as well as the recess for the glass panel. I used this three piece router bit set from Infinity Tools on this project and am really happy with the finished result.
The combination of these three bits cuts the cope and stick joinery, which is a traditional method of joining cabinet door parts, while at the same time cutting a rabbeted area for the glass. The cool part about this set is it also cuts a quarter round glazing strip which holds the glass in place. This results in a seamless and super custom looking glass door, as opposed to using something like plastic clips to hold the glass in place like I’ve done in the past.

Anyway, to get started, I installed the first bit in the set, the rail cutter, which makes the cope cut across the ends of the rails. The bit height on this first bit is kind of arbitrary, you really just want the bit cutting about halfway through the piece. I set my bit slightly lower, since I ended up with pieces slightly thinner than ¾”, and this worked out fine.
I actually used a coping sled here, also from Infinity Tools, so I had to reset the bit height to account for the sled, and then I could set the fence so that it was in line with the bearing on the bit. This just helps to support the piece as it’s run through the bit, and I used a straight edge to do this.
Finally, I could make my first test cut and it went smoothly, except I forgot to use a backer board so I got a little blowout.

With the test cut looking good, I went ahead and made the coping cut on each end of the rails, making sure to use a backer board this time.
Also, one other thing to mention here, all of these cuts are made with the boards facing down on the router table, with the back of the boards are facing you. This means that any discrepancies end up on the back face of the door, which is obviously a good thing. I labeled the back side of all of my parts before going to the router table to avoid any confusion.
Once that was done, I could swap over to the second bit in the set, the stile cutter, which cuts the profile to match the rails, as well as cuts half of the slot for the glazing strip.
The height setting on this bit is much more critical, and I needed to flush up the bottom edge of the slot cutter to the bottom edge of the cope cut. Here’s a closeup, which hopefully shows you what I’m talking about.

After setting the height, I made the cut on my test piece and then checked the fit and, luckily, I was pretty much dead on. As you can see here, you want the bottom face of the cope cut to meet the top face of the sticking cut. You can also see the beginnings of that quarter round glazing strip.
With the bit height set, I could make the cut on the inside edges of all of the boards. I set up a few featherboards here to help keep consistent pressure on the boards as I ran them through the router table and also used a push stick to keep my hands away from the bit.
Once that was done, I could swap over to the last bit in the set, the slot cutter. This makes a perpendicular cut to the slot cutter on the stile bit and finishes cutting the glazing strip.
Once again, the height on this cut is pretty critical, so here’s another close up. The top edge of the slot cutter needs to be in line with the inside edge of the slot.

After setting the height, I set the fence in line with the bearing on the bit and then made the cut on my test piece. As you can see, this cut is made with the board on edge, and the back face of the piece needs to be against the fence.
This cut frees the glazing strip and here’s the finished result, a perfectly matching glazing strip.
With the height confirmed on my test piece, I could make the cut on the rest of the pieces. Once again, I set up featherboards to keep consistent pressure.
This cut frees the glazing strip and here’s the finished result, a perfectly matching glazing strip. DIY home improvement. Crafted Workshop.
Once I finished making the last pass on the router table, I could test fit the parts and they fit pretty much perfectly. You can see the beveled edge where the door will meet the glass, and that’s a subtle detail that I think looks great.
Step 4: Assembling Cabinet Doors

Next, I could get the doors glued up, which was a pretty quick process. I applied glue to each end of the rails and then clamped them in place, making sure they were flush with the ends of the stiles. I checked for the doors square by measuring the diagonals and then adding more clamps if I needed to close up any gaps.
I repeated the process for the rest of the doors, and some of them were slightly out of square when I clamped them. If that was the case, I would add a clamp diagonally across the door to bring it back in to square, which usually required barely any clamping pressure.
Step 5: Finalizing Glazing Strips
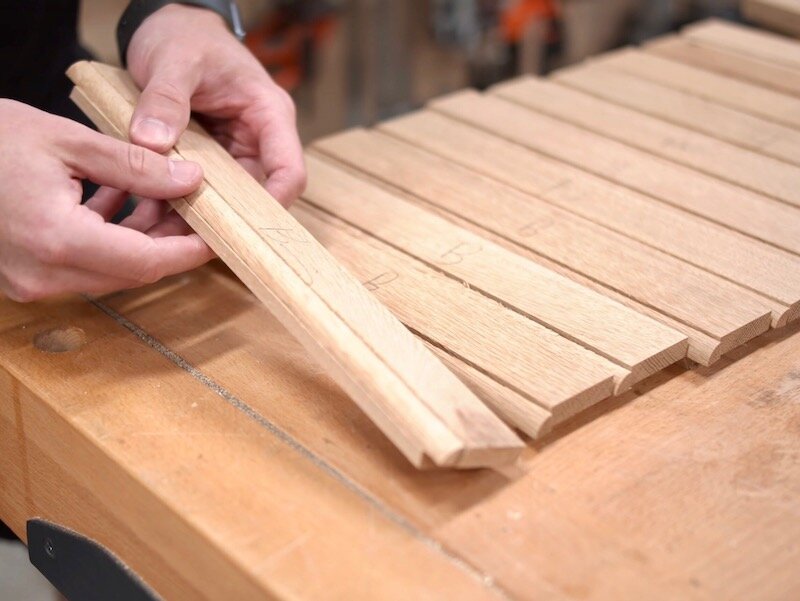
Once the glue was dry, I removed the doors from the clamps and then I could work on getting the glazing strips cut to final length. As you can see, the strips from the stiles needed to be cut to length, but the strips from the rails really just needed to have a miter cut on each end.
There were also some little hanging bits leftover from the routing, so I first knocked those off with some hand sanding, and then I could cut the miters.
First, I would cut the miter on all four strips with the miter saw turned to the left. On the longer strips, I didn’t really need to be precise, as I had a few inches of material to cut away, but I wanted the miter to line up exactly with the end of the shorter strips. The laser line on my miter saw definitely came in handy here.
Next, I turned the miter saw to the right and repeated the process, cutting the shorter strips with the miter right at the end of the strips. On the longer strips, I set up a stop block so that they would all match.
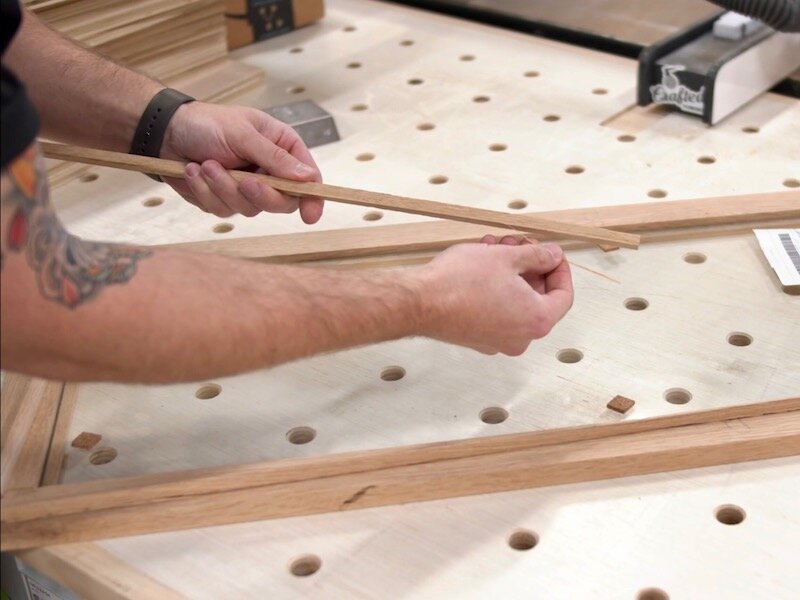
After cutting the pieces to length, I could test fit the strips and ended up with a nice, snug fit, exactly what I was looking for here.
With the fit confirmed, I just repeated the process on the rest of the strips. As you can see, I didn’t really try to keep the strips corresponding to their specific door, as it didn’t really matter if the grain pattern matched perfectly for me since I would be spraying all of these parts with black poly anyway.

When test fitting the strips to the doors, I noticed that the glazing strip was above the surface of the inside face of the door, due to the thickness of the glass panel. I wanted to bring the strips down in thickness so they’d be flush with the door.
To do this, I used my drum sander, although the planer might have worked. The nice thing about the drum sander was it really allowed me to sneak up on the fit and I ended up with a perfectly flush strip.

After sanding, here’s how the strips will look, with one flat edge flush with the doors.
Once that was done, I could also run the doors themselves through the sander, to remove any extra material and glue squeeze out.
Also, another tip here, I set the height on my drum sander similarly to how I do on the planer. I put the piece about halfway through the drum sander and then lower the head until it just touches the piece. I test this out by turning the drum manually until I feel resistance.
I keep that same setting for my first pass, as you really don’t want to remove a ton of material with the drum sander, especially on wider pieces like the ends of these doors. The doors only took a few passes to level out any uneven spots and then I could move on to drilling the holes for the hinges.
Step 6: Installing Hinges and Hardware To Custom Cabinets

This was the exact same process as I covered in the first part of this series, so go check out that video if you want more detail, but I just used the Kreg concealed hinge jig to drill the holes and then dry fit the hinges to confirm the fit. Also, as you might be able to notice, the stiles on these doors were just barely wide enough to support these hinges, I kind of lucked out there.
The last thing to do before sanding was to cut the recessed area for the edge pulls, just like I used on the doors on the base cabinets in the first video in this series. Once again, I covered this process in that video, but I set my blade height to match the edge pull and ran the door across the blade side-to-side to clear out the material.

Step 7: Sanding All Parts Of Home Bar Before Finish
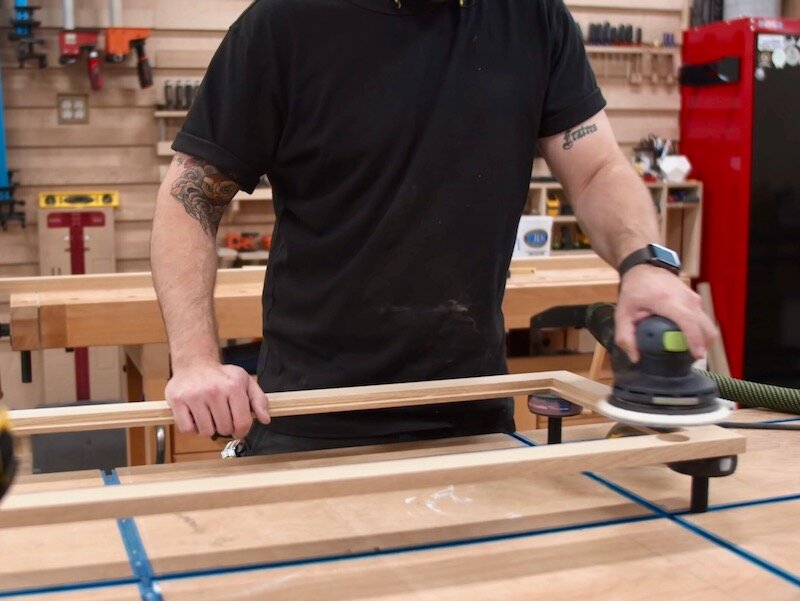
With that, the doors were ready for finish prep and I sanded them up to 180 grit. Since I used the drum sander, I had some cross grain scratches on the rails, so I needed to focus on removing those, but that went quickly. I also broke all of the edges and hand sanded the edges with 180 grit.
Also, I’ve gotten a few questions about this sanding block, which I absolutely love. It has velcro that matches the backing on my random orbit sanding discs, so I can use them interchangeably. I’ll link to the sanding block in the video description, in case you’re interested.
Step 8: Cabinet Filler Strips

The last pieces to work on before moving on to finishing were these filler strips. Here’s the SketchUp model, to show you how they look in the finished bar. The strips fill in the areas at the top and bottom of the upper cabinets and make the doors flush, giving the cabinets a more finished look.
I ripped the strips to rough width at the table saw and then milled them square at the jointer and planer. I made sure to leave the planer set at the final setting for the door parts earlier, to ensure these strips would be the same thickness.
Finally, I ripped the strips to final width at the table saw, cut them to final length at the miter saw, and then sanded them up to 180 grit.
Step 9: Spraying Black Polyurethane Finish To Custom Cabinets

I used the same black poly that I used for the rest of the cabinets. DIY home improvement. Crafted Workshop.
With that, I could move on to spraying the finish, and I used the same black poly that I used for the rest of the cabinets. Finishing went fine, although the glazing strips were kind of a pain, as they were so light that they wanted to blow away. I ended up using painter’s tape to hold them in place after applying the sealer coat to the backs of the strips, and this worked pretty well.
After spraying three coats of finish, I could get the glass panels added to the doors. I first dropped the glass into place then dropped in the glazing strips. To attach the strips, I used pin nails, which are pretty much invisible in the finished doors.

I repeated the process on the rest of the doors and then I could get the edge pulls and hinges installed.
Step 10: Installing Custom Cabinets
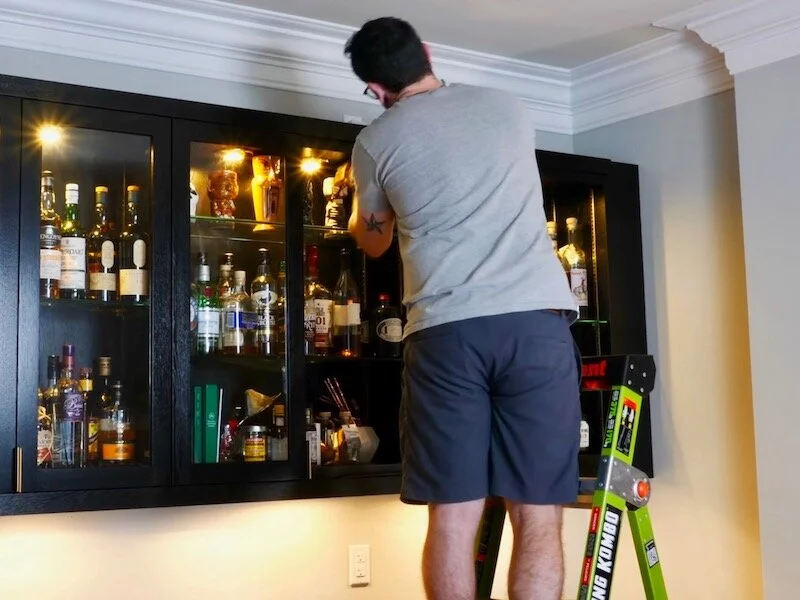
Once the hardware was installed, I could load up and head back to the house to install the doors.
First, I installed the filler strips, which are flush with the top and bottom edges of the cabinets. I clamped them in place, pre-drilled countersunk holes from the inside of the cabinet, then drove in 1 ¼” screws.
Next, I could install the mounting plates for the hinges inside the cabinets. I used the same method as when I installed the hinges on the lower cabinets in the first video, except that I used painter’s tape to keep from having to mark on the cabinets themselves.
I set the door in place, using an ⅛” spacer below the door, and then marked each edge of the hinge. Next, I lined up the Rockler hinge plate template centered between the lines I marked, clamped it in place, then drilled the holes using a self-centering bit.
With the holes drilled, I could attach the hinge plates with screws and then attach the doors, making any necessary adjustments to get an even reveal. I just repeated that process for the rest of the doors and I could call this part of the build complete!