
Building My Shop, Part 4 : Installing Doors, Trim & MOVING INTO THE SHOP!
In this last part of the shop build series, I'll show you how we installed the doors, trim, and got my tools moved into the new shop!
Note: The links below are Amazon affiliate links
📦 Materials Used On The Shop Build:

Build Process For Doors And Trim:
Alright, let’s dive back into the shop build series. The next task to work on was getting the doors installed, which was another completely new skill for me. Luckily, as was the case with the rest of this build, Justin had plenty of experience installing doors.
Step 1: Choosing Doors And Door Frames

We used exterior doors on this project, both for the extra width for bringing materials through the front area into the shop as well as the added security of a steel door.
Step 2: Preparing Door Frame And Jamb

We removed the threshold that came with the door off camera and then, after removing the door itself and the weatherstripping, we could set the jamb in the framed out area for the doorway between the front area and the shop.
First, we checked how much of a difference there was between the left and right sides of the jamb, as well as the gap between the top of the jamb and the bottom of the header.

Since the right side of the doorway was a decent amount lower than the left side, we used a piece of the vinyl plank flooring we were going to be installing as a spacer, so that we wouldn’t have to undercut the jamb on that side. Speaking of which, if you missed that vinyl plank flooring installation video, here is a link.
Step 3: Fastening Doorframe To Door Jamb

Next, we could start getting the jamb fastened to the framing. We used 2 ½” screws for this, which made it really easy to readjust things if needed.
We started from the bottom on the right side, shimming the jamb out about ⅛” so that we wouldn’t have to fight the framing when getting the rest of the jamb plumb.
After setting up the line laser even with the end of the jamb, we continued working up the jamb, shimming it so that it was plumb and then adding more screws. We added screws near the hinge areas to start.

Next, we hang the door and could start looking at the reveal around the door, making sure it was nice and even.
To make the reveal across the top of the door even, we shimmed the left side of the jamb up slightly.
Next, we could start working our way down the left side of the jamb, again shimming the jamb and added screws to secure it. The main focus here was making sure the reveal around the door was even, since, as long as that was the case, the door would function properly.
After getting the door secured into place, we could go back and continue adding screws, making sure to shim those areas so the screws didn’t pull the jamb out of alignment.
One other note here, we made sure to drive the screws through the areas where the weatherstripping would cover them, so that they would be hidden in the final door.

Once the door was fully secured and opening and closing smoothly, I could cut away the excess shims with my oscillating multi-tool, which is really the ideal tool for this job.
Step 4: Installing Second Door

With the first door done, we could move on to the door between the front area and the office. First, we cut a scrap piece of 2x6 to width to fill in the gap between the header and the top of the jamb. This filler piece is really just there to give us something to fasten the trim around the door to, and we also went back and added it to the other doorway.
Installing the second door was pretty much the same process, except we installed this door after we had put the flooring in due to scheduling constraints.
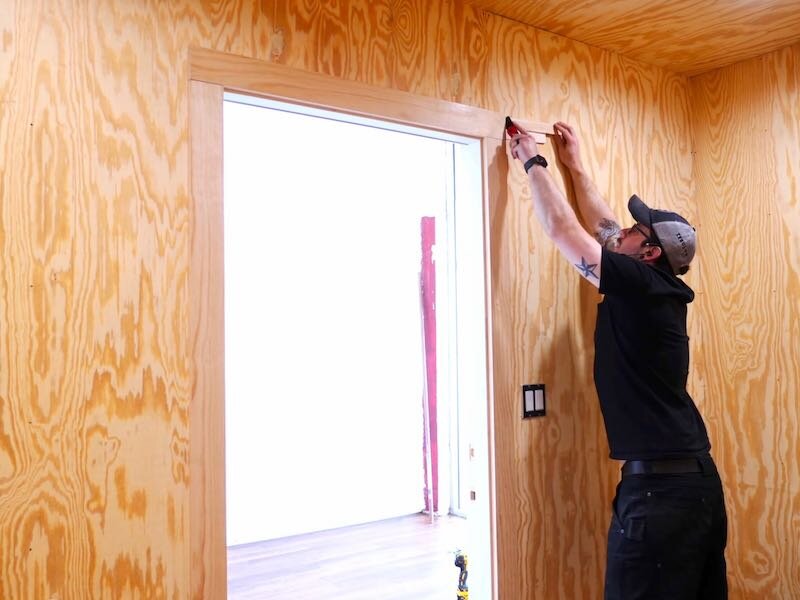
Step 5: Installing Trim Around Door

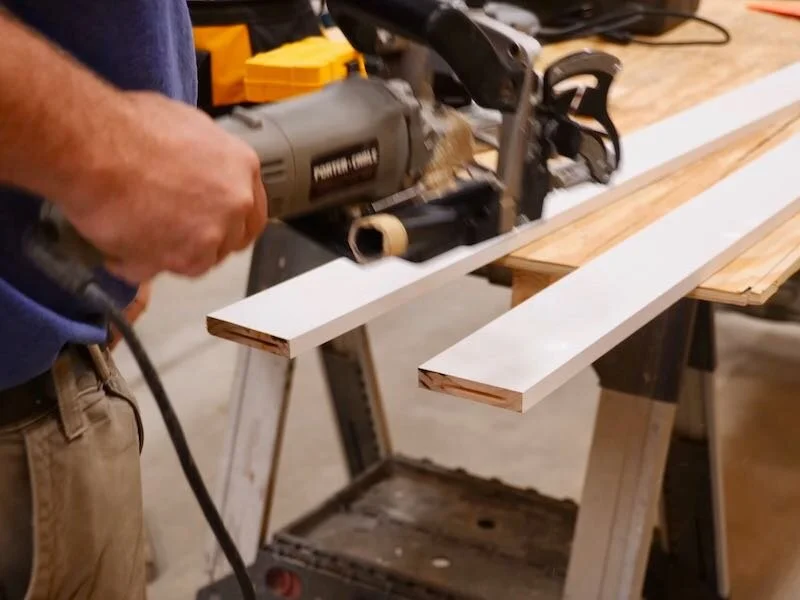
With both doors installed, we could move on to installing the trim around the doors. When adding trim, you leave ¼” of the jamb showing, so we first measured from the floor up to ¼” above the bottom edge of the jamb.
Next, we could cut the trim to length at the miter saw. Also, you probably won’t have exactly the same measurement on both sides of your door, depending on how level your floor is, so these boards likely won’t be the same length.
After cutting the two vertical trim pieces, we test fit them, making sure they were the right length to leave the correct reveal by placing a scrap piece of trim on top of the trim pieces.
Before tacking the vertical pieces into place, Justin added biscuit slots to the top end of the boards, which will help keep these trim boards aligned with the horizontal trim piece over time.
Next, Justin tacked the two boards into place, starting with just one nail so he could make adjustments if needed.
With the side trim pieces in place, we could work on the top trim. First, we measured and cut the board to length at the miter saw, then we transferred the line for the biscuits from the side trim to the top trim and cut the biscuit slots.
After dry fitting the board, we could permanently attach it by adding glue to the biscuit slots, adding biscuits, placing the top trim, then nailing everything into place.

The nice thing about biscuits is they have some side to side slop, which makes getting everything aligned here really easy.
The wall was slightly uneven in one spot, so we shimmed the trim slightly so that it sat evenly.
Step 6: Office Door
Next, I repeated the process on the inside of the office, with the only difference here being that I used Radiata Pine trim to match the plain plywood walls. The plywood walls on the outside of the office will be painted, so we used the primed trim there.
If you want to see how we added the trim along the floors in this front area, again go check out that vinyl plank flooring video, as I covered that process in detail in that video.
Step 7: Installing Door Handles and Deadbolts

With the doors installed, next I could work on adding the handles and deadbolts. Once again, security is one of my primary concerns in this space, so I did add a deadbolt to both doors.
First, I worked on getting the handle installed, which had to be ADA compliant since this is a commercial space.
To start, I installed the latch by screwing it into place. The latch plate was a little bigger than the area that was already cut, so I marked around the plate with a utility knife and then chiseled out the area to match.
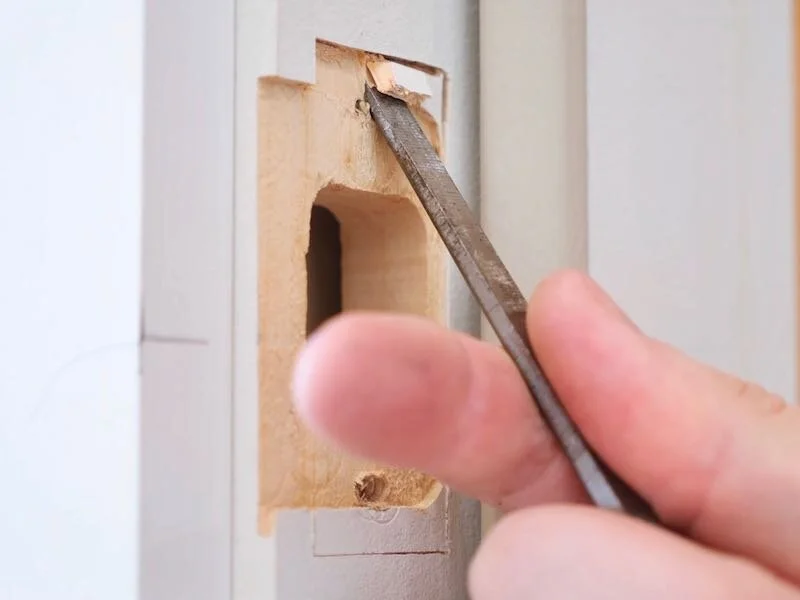
Once that was chiseled out, I could reinstall the latch and then get the handle installed.
Yes, I’m installed the handle backwards. It’s funny how your mind can completely blank on something when you’re more focused on getting the shot than on the task at hand.
After switching the orientation of the handle, I tested the handle and it worked well.

The next part to get installed was the strike plate, which again needed to be custom fit to this door. I again installed the plate, traced around it with a knife, then chiseled out the area.
Also, I’ve got to say, it’s so satisfying how easy this Pine jamb was to work with, it cut extremely easily compared to the hardwoods I’m used to working with. It was super simple to get a clean line.

After installing the strike plate, I tested the handle and it worked great.
Step 8 : Installing Combination Deadbolt

Next, I could work on getting the deadbolt installed. Once again, I installed the strike plate, traced around it, then chiseled out the area. I also needed to drill out the center area for the deadbolt, so that it could extend fully into the jamb.
With the plate installed, I could install the deadbolt itself, which pretty much just bolted on. I used keypad locks so I didn’t have to deal with keys when getting into these spaces and just got the simplest keypad lock I could find.

Once I got everything installed, I could test the deadbolt out and it worked great.
Step 9: Finishing Out The Trim For The Office

Next, we could finish out the trim in the front area. Again, I’ll be painting these plywood walls, so we added some trim to cover the horizontal seams between the panels, which weren’t as tight as the vertical seams, as well as along the top edge of the office.
We also added some corner trim to cover the outside corner of the office, since the plywood didn’t meet up in that area. It’s really amazing how much of a difference a little bit of trim makes in the visual appearance of a space, these few boards took the office from looking like a crappy room in a warehouse to a much more finished room.

We also decided to continue the trim around on the side wall, just to make it look a little more purposeful.
Since we had some leftover pieces, we also decided to add trim along the top of the side wall in this area as well. We used a scarf joint to seamlessly run this trim, and Justin cuts his scarf joints at about 30 degrees, as they’re hidden a little easier than those cut at 45 degrees.

With the trim in the front area done, we could move on to the trim in the shop, which was mostly just more of the same. We used the same Radiata Pine trim along all of the plywood walls, adding scarf joints where needed, but we switched to Miratec composite trim in the metalworking area, where we used the fiber cement panels.

We used nails for the wooden trim but ended up using trim screws on the Miratec since brad nails do not work with Miratec.
The last bits of trim to add was trim we ended up cutting to width ourselves, the first of which was for the upper corners in the office. We ripped these 1x4 trim pieces in half, to roughly 1 ⅛”, at the table saw, since we wanted to keep with the square trim look and didn’t want to use quarter round or something like that.

Also, I’ve gotta say, I’m super impressed with the Rockler dust separator I just picked up for my shop vac. If you don’t have a full dust collection system, this little guy works pretty dang awesome and it keeps the filter in your shop vac from getting caked with dust. I also absolutely love this Dust Right hose, and I’ll have links to both of those in the video description.
The trim went up super quick in the office, we just used brad nails to attach it, making sure to hit the studs, and what a finished look the trim gives the space.
Step 10: Finishing Installing Trim And French Cleat System In Shop

The last trim pieces to install were to cover the horizontal seams in the shop area, and we decided to do something a little different here. We picked up 1x6 boards for this and decided to rip them in half at the table saw, except we decided to rip them at 45 degrees. This effectively gives me a French cleat around the entire shop.
I first marked out the center of a scrap piece of 1x6, marking a diagonal line in the center, and then lined up the line with the blade, setting the fence location.

After making the test cut and verifying the cut was right in the center of the board, I set up a featherboard to keep even pressure on these 16 foot boards and then we could get to ripping.
This whole process went extremely fast and saved us a good bit of money vs. buying 1x4s for this trim.
To install the boards, we first tacked them into place, making sure to stay in line with the laser, and then I came back and added screws.
Also, I’m sure some of you will say that this is pretty high for a French cleat, and that’s definitely true. I likely won’t use most of this trim as a cleat, but it was just as fast to rip these boards at 45 degrees and turn them into something useful, and this will be great for hanging taller items like ladders, track saw tracks, long clamps, etc.

For the screws, I used 2 ½” deck screws everywhere but the very ends of the boards and made sure to hit the studs. I added two screws per stud location and the nice thing about these deck screws is that they didn’t require pre-drilling.
At the ends of the boards, I used 2 ½” trim head screws to avoid splitting the boards. I also added these screws wherever we had to connect two boards with a scarf joint.
With that, the trim was complete so we could move on to the final step before getting moved in, the final electrical work.
Step 11: Electrical Work

With the rough-in inspection complete, Robbie, my electrician, started by getting the panel wired up with all of the breakers, and also added a 50 amp outlet right by the breaker for my welder and plasma cutter.
Next, he could wire up all of the outlets, which was pretty simple. Although, it was definitely nice to watch a professional work here and pick up some of the little time saving tips from him. For instance, I didn’t know the little holes in wire strippers are for bending the hook on the end of wires.

After Robbie got the outlets installed, I came back and installed the plates. I went with stainless steel plates, both because they look good but they’ll also hold up really well when they get bumped into, whereas plastic plates would have the tendency to break.

The last thing to do for the electrical was to label the panel, so that I knew what breaker controlled everything. My old panel was far from accurate in its labeling as I changed things over time, and that got super annoying when trying to kill power to a specific circuit, so I’d definitely recommend staying on top of that.

With the electrical done, the shop was pretty much ready to move in to, so it was time for the big move.
Step 12: Moving Tools Into New Shop Space

I did a pretty bad job of documenting this process, so I’m going to rely pretty heavily on my Instagram content here. Also, if you don’t follow me there, I’m @craftedworkshop and I post a decent amount, especially stories.
This move was a massive undertaking and took multiple days of packing and disassembly and then a 10 hour day of actual moving, even with four movers and a 40 foot box truck with a lift gate as help.
Once I got everything back into the shop, it was time for the massive task of putting it all back together.
I referred back to the SketchUp model I created a ton and it was incredibly useful during this whole process.

I started by getting the French cleat wall hung up, but unfortunately mixed up the numbers in my head and placed it about 100” too far down the wall in the shop, so I had to redo that later.
The miter saw station was next, and the trickiest part there was trying to level the whole thing on this jacked up floor. I actually ended up shimming up the entire right bank of drawers with scraps of the trim to even things out.
After finishing up the miter saw station, I moved the French cleat wall into the correct place, and luckily the outlet box cutout I had cut still lined up in this area.
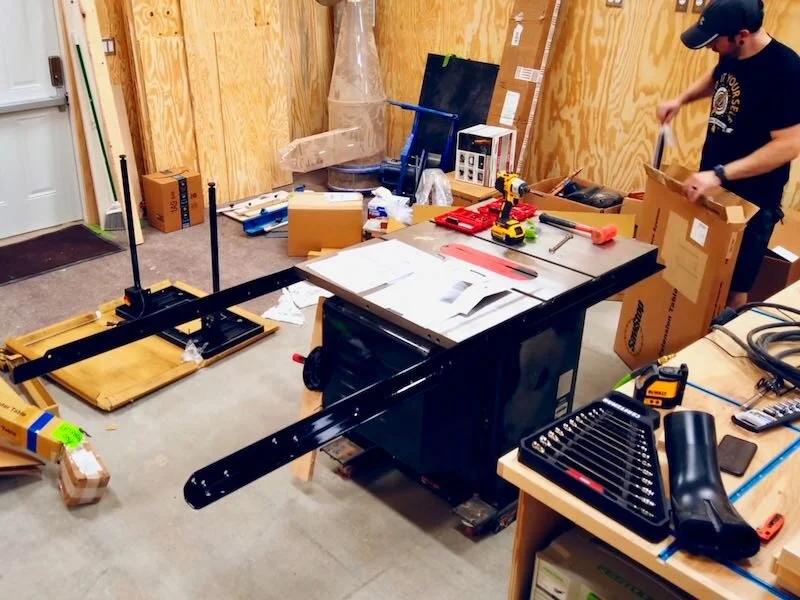
Next on the list was getting the table saw put back together, which had to be disassembled to get through the door into the shop. Luckily, I was planning on adding the router table extension and crosscut table to my saw anyway, so this ended up working out great, as I would have had to remove the rails anyway.
The last thing on the short list was getting my new Powermatic 3520C lathe assembled, and this was a little tricky due to the sheer weight of this thing. Luckily, the guy who came out to install my internet gave me a hand when standing the lathe up, and then my buddy Alex from The Singletrack Sampler helped me get the motor up onto the base.
And with that, the shop was pretty much moved into, and here’s how it looks now.
