
How To Build A Garage Workbench / Miter Saw Station / Outfeed Table Combo Part 1
Learn how to build the ULTIMATE workbench, miter saw station, and outfeed table combo for your garage workshop! This workbench is the perfect all-in-one unit for any small shop, with tons of storage, work holding, and it's mobile! // Get plans here
Note: Links below are affiliate links
🛠 Tools Used On The Garage Workbench:
📦 Materials Used On The Garage Workbench:
Building A Fold Down Miter Station Workbench Process:
Step 1: Work Bench Re-Design
As you might have noticed, I’ve been doing a lot more projects around our house lately, both because we’re social distancing but also because I’ve just got a long list of projects I want to finish here.
I got my current garage workbench set up initially about four months ago, but it was really kind of rushed and I’ve since found some things I don’t like about the bench. Mostly, it lacks well thought out storage, but it’s also a little small to work well as an outfeed table, which I’ve been using it for up until this point.
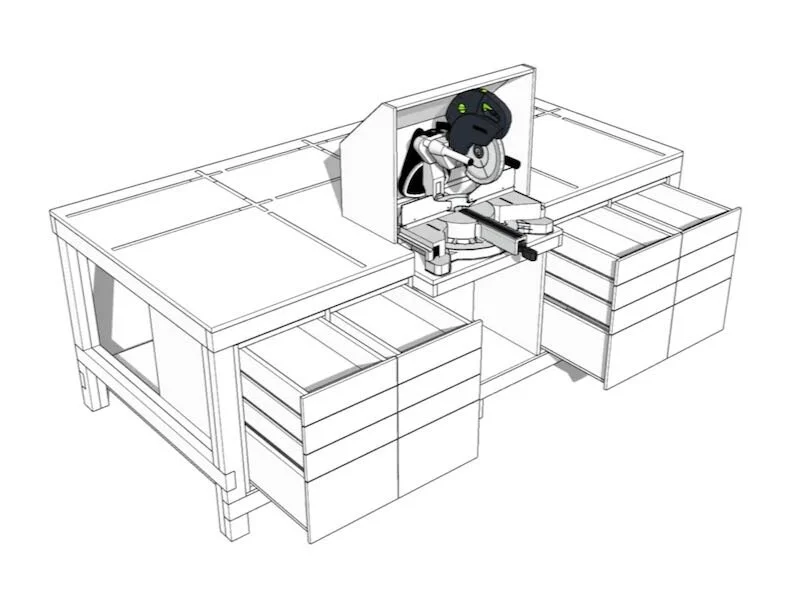
I decided to go back to the drawing board and rebuild another workbench from scratch, incorporating some of the things lacking in my current bench.
Since I have more limited tools here at the house, I wanted to keep the build fairly simple, so I used a combination of plywood and 2x3s. This made for a workbench that was inexpensive to build yet should stand the test of time.
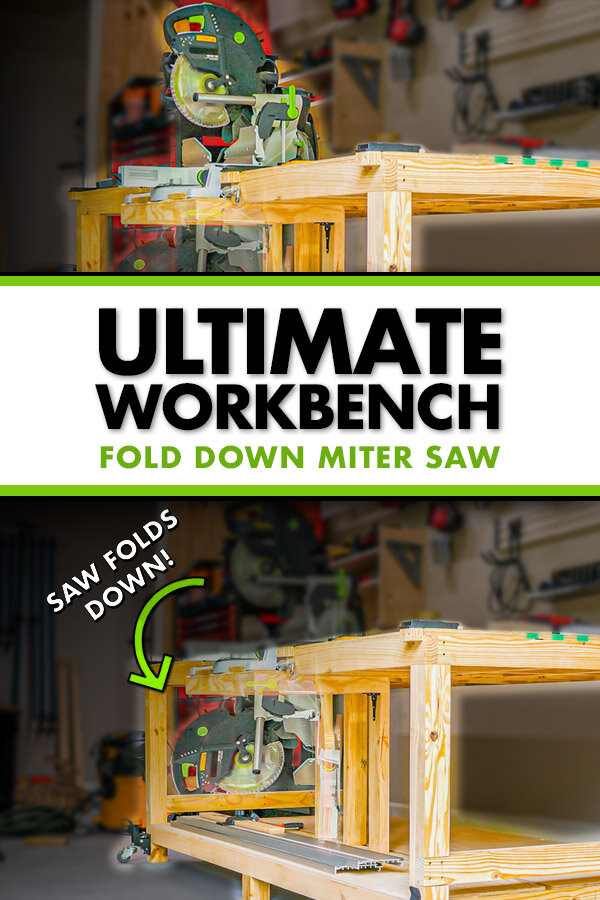
I also decided to add in a cool drop-down mechanism for the miter saw, so I could completely open up the workbench top if I’m working on something really big.
Step 2: Prepare The Material For Your Workbench
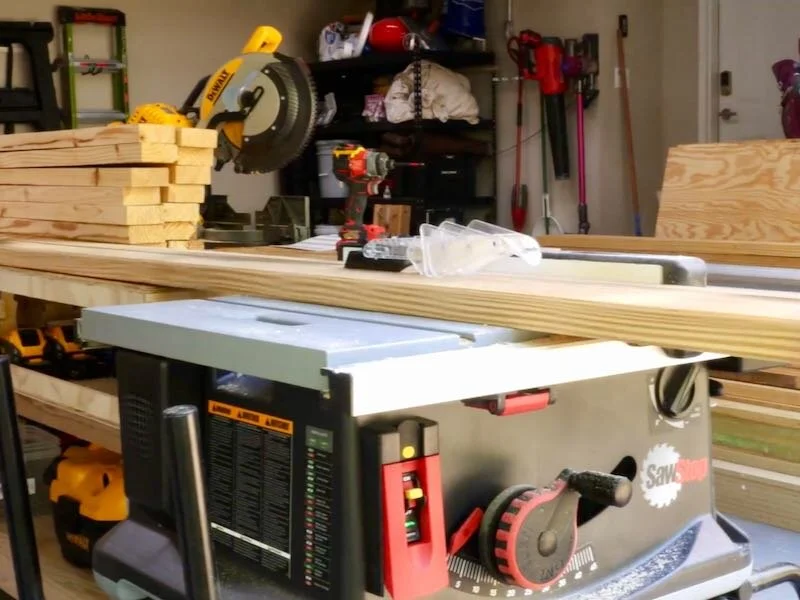
With the design nailed down, I got to building the bench, and I started by ripping some 2x8s down to get my 3 inch wide boards. The reason I went with ripped down 2x8s here, rather than just using 2x4s, is I wanted the sturdier Southern Yellow Pine that 2x8s are made of here in the Southeast, as opposed to the the ultra soft whitewood of which 2x4s are made.
As you can see, ripping these boards down wasn’t the easiest task, as there was a lot of tension in them, but I eventually got them ripped to a rough width of 3 ¼ inches.
After ripping, I went through my pile of boards and picked some of the straightest of the bunch, to use as the framing for the workbench top. Obviously, I wanted the top to be as flat as possible, so I took my time selecting these boards, then I set my table saw fence to 3 inches and ripped off the remaining factory edge from those boards to get them nice and square.

Next, I could start cutting the boards to length, again to make up the framing for the top, at the miter saw. Having a stop block was super helpful here, as it allowed me to make accurate, repeatable cuts, which made assembly later a lot easier.
I should mention that I have plans available for this workbench if you’re interested in building one of these for yourself, and they include a detailed cut list, a cutting diagram, and a SketchUp file. Click here for the plans.
After getting the boards cut to length, I drilled some pocket holes in the ends of the boards. I went with pocket holes here, mostly to keep the finished bench from being riddled with screw holes, but you could definitely just screw through the ends of the boards instead to simplify things.
Step 3: Assemble Framework Of Workbench Top

Before assembly, I marked out the spacing on the apron boards, much like you’d do when framing a wall. This really helps avoid measuring errors and ensures the studs, if you will, will line up nicely.
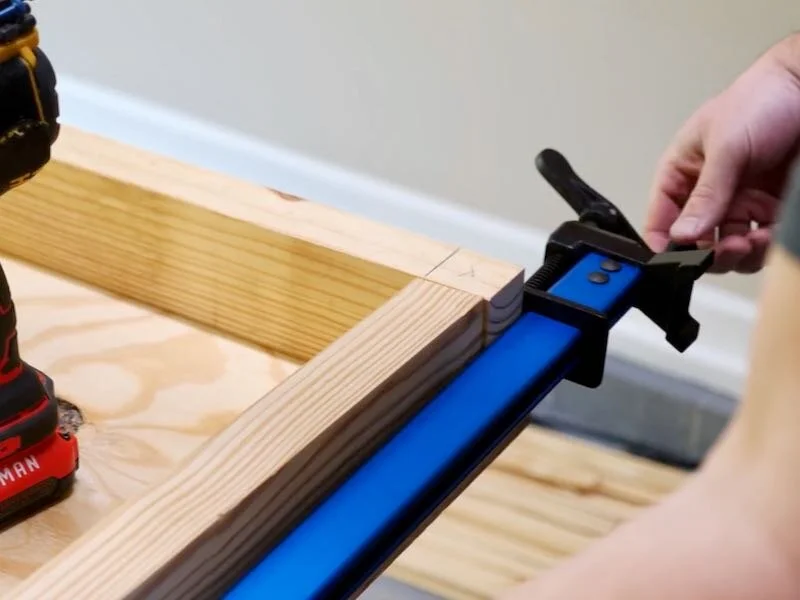
With the locations marked out, I could move on to assembly, which went pretty smoothly. I did make sure to clamp each joint as I drove in the pocket screws, as they have a tendency to cause the boards to shift around otherwise. This does slow things down quite a bit, but it really makes a difference.
As you might be able to tell, this workbench top will have a cutout on one side for the miter saw platform, which is why you see the framing kind of divided into two distinct sections.
When I added the center piece that connects the two sections, I had to get a little creative with my clamping, but I was able to get it worked out.
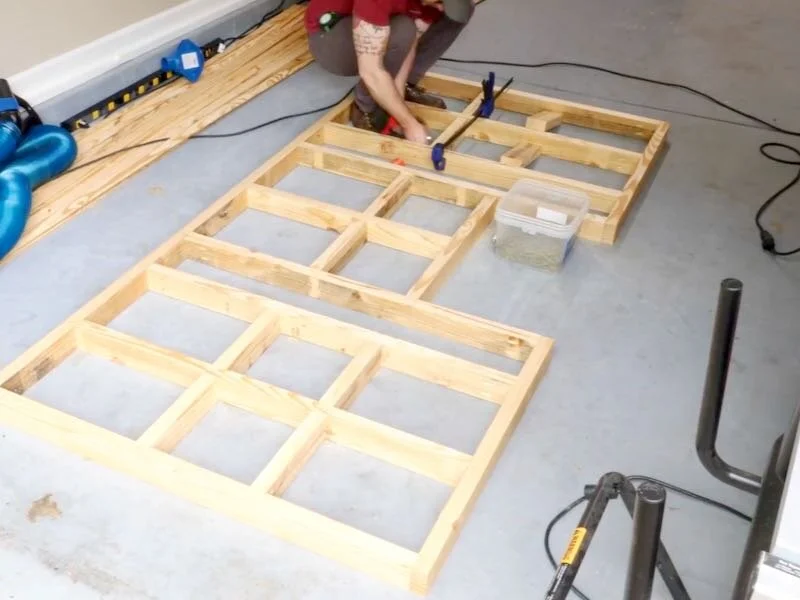
With the main framework assembled, next I needed to come back and add blocking. This blocking not only makes the framing sturdier, but it will also give me something to drive the screws into when I add t-track to the workbench top later.
I ran out of 2 1/2 inch pocket screws by the time I got to the blocking, so I switched to using regular 2 ½ inch screws and just toenailed them through the pieces.
Also, you’ll notice that I switched to working on the floor here as well, and that’s because I wanted this framing to be as flat as possible, and this section of floor is the flattest area in my garage.
With that, the framing for the top was assembled, and next I needed to get the ¾ inch plywood top attached.
Before doing that, I went ahead and laid out the locations of my t-track on the top. Having these locations marked out showed me where I could add nails or screws while attaching the plywood top to the framing, as I definitely didn’t want to run through any nails while routing the grooves for the t-track later.
Finally, I could get the plywood top attached to the framing, and I added plenty of glue before dropping the top into place.
Step 4: Attach Plywood Top To The Framework

I got the top attached to the framing. I used 2 inch finish nails around the perimeter of the top but switched to screws where the t-track would end up going. The screws would provide clamping pressure while the glue dried and I could remove them before routing the grooves for the t-track.
Step 5: Build The Legs For The Workbench
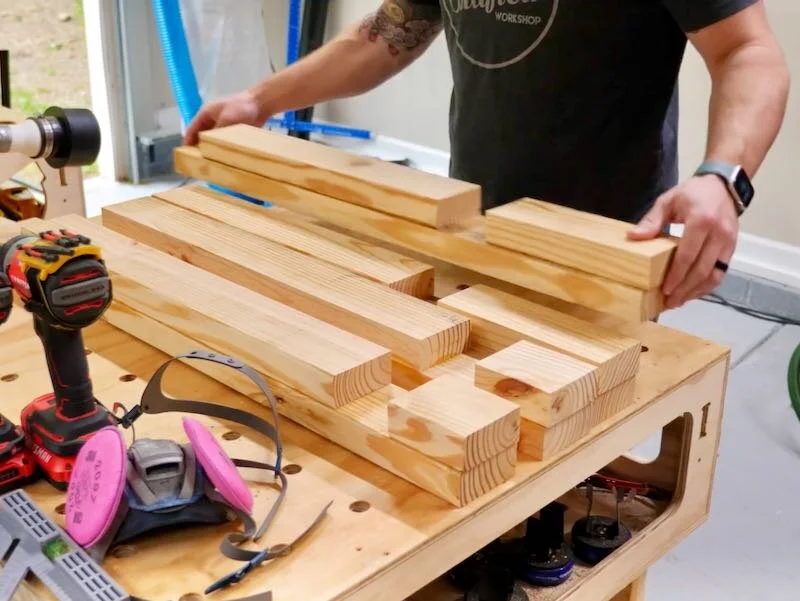
While the top dried, I could start working on the legs for the workbench, first cutting down the pieces at the miter saw.
I designed the legs so that I could create half lap joinery during the glue up without actually having to cut the half laps, by leaving some strategic gaps. I did still have to cut a few half laps, but this joinery method definitely saved me some effort.
Also, I left the leg stock at that 3 ¼” width during the glue up, so I could trim the legs to width and clean up the edges after the glue up.
The front and back legs on the workbench are oriented a little differently, so I did need to keep that in mind during the glue up, but otherwise things went smoothly.
While the glue dried, I went ahead and cut the stretcher pieces that would connect the legs to length at the miter saw, and then I ripped them to their final width at the table saw.
After all of that ripping and cutting, my dust collector had definitely gotten full, and I wanted to give a quick shout out to this new wall mounted dust collector from Rockler.
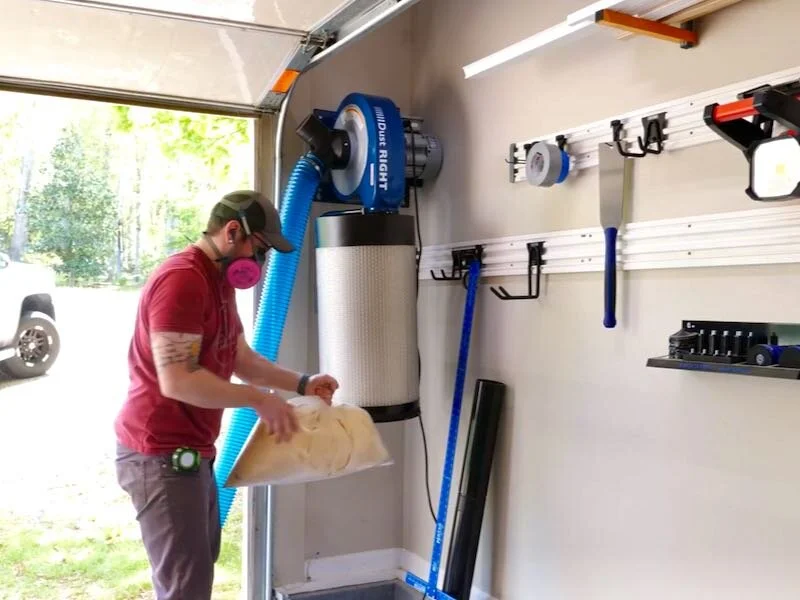
This thing is capable of pulling 1250 CFM, which is plenty for most shop tools, and this optional canister filter really does a great job of keeping the fine dust down. Now I just need to work on improving the dust collection on my miter saw, which is something I’ll tackle with this workbench.
Anyway, after the glue dried on the legs, I could trim them to final width at the table saw, and as you can see, by leaving the legs oversized, I ended up with super clean edges.
I also used the same trick for the bottommost piece on the legs, so I could trim the bottom end of the leg flush after the glue up, which I did at the miter saw.
Now, as I mentioned, I did need to cut a few half laps, exactly one in each leg, so next I laid out the location for those cuts. I referenced the other legs for these measurements, which ensured that my stretchers ended up square to the legs.
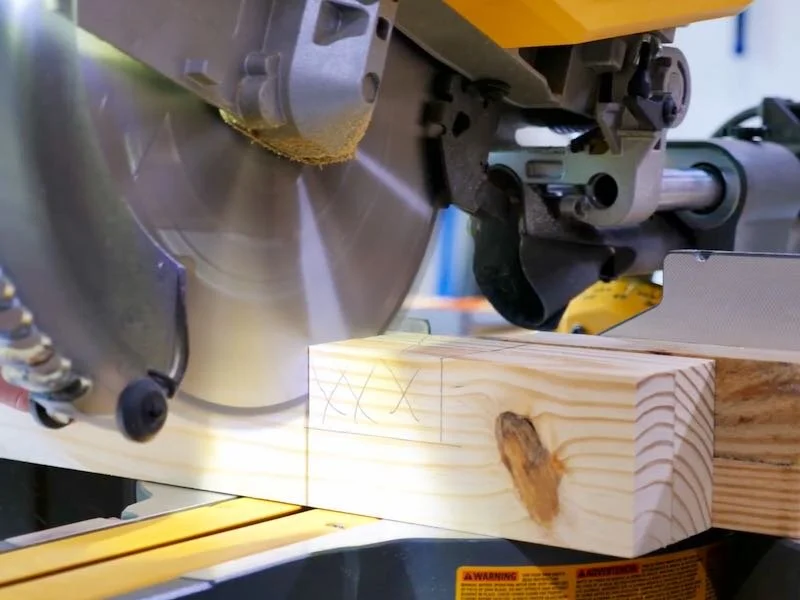
I was originally going to cut these half laps on my table saw, but my dado cartridge for the SawStop is at my main shop, so I figured I’d try a new technique and cut the half laps on my miter saw.
To do this, I set the built-in depth stop on this sliding miter saw equal to the thickness of my stretcher pieces. Most sliding miter saws have this kind of depth stop feature, and this actually worked better than I expected.
To cut across the entire face of the legs, I needed to space them off of the fence, which I accomplished by adding a few scraps between the fence and the legs, and then it was just a matter of cutting to my lines and clearing out the waste.
When I got the bulk of the half lap cleared out, I ran the leg horizontally across the bed of the miter saw, which is a potentially dangerous technique. Only try this if you’re comfortable with it, but the resulting half laps were super clean.

I test fit my offcut and found the half lap needed to be a smidge wider and, after making another pass, I ended up with a great fit.
I just repeated the same process on the other three legs, and I ended up lowering my depth stop just a bit, to make sure my stretchers were totally flush with the legs. I also found that I needed more distance from the fence to get an even depth across the entire half lap, so I just laid the scrap spacers down and this worked great.
After cutting all of the half laps, there was one last bit of joinery left on the legs, and that was notching the top of the two front legs to fit inside the apron of the top, which I did with my pull saw. As I mentioned, the front legs are oriented differently than the back legs, hence the need for this notch.
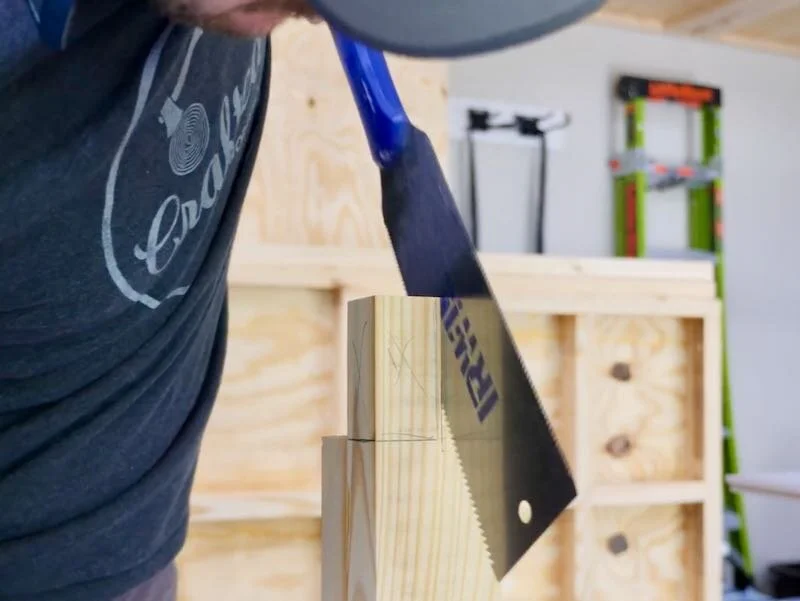
As you can see, that notch allowed the front legs, which are to the left in this shot, to end up flush with the front apron of the workbench. This also meant the drawers I’d be adding would be flush with the front of the workbench, and this is why the front legs are oriented like this.
Step 6: Assemble Legs And Framework Of Workbench Base
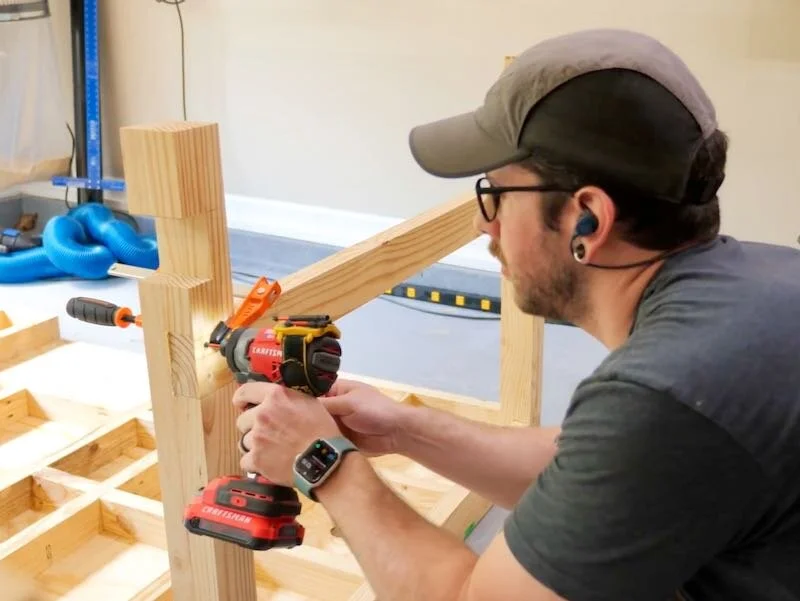
Next, I laid out locations for the screws that would attach the legs to the apron, and I made sure to pre-drill and countersink holes in these locations so I could plug them later. Again, I didn’t want a ton of screw holes visible in the finished workbench, but this was just for aesthetics.
With the holes pre-drilled and countersunk, I could get the legs attached to the apron using 2 ½ inch screws and plenty of glue. I also made sure to check for square when attaching the legs, and I added the stretchers before the glue fully set to help with this.
Speaking of which, next I could get the stretchers installed, and they got the same countersink treatment. Again, I checked the legs for square when adding the stretchers, and I added more 2 ½ inch screws to lock them in place.
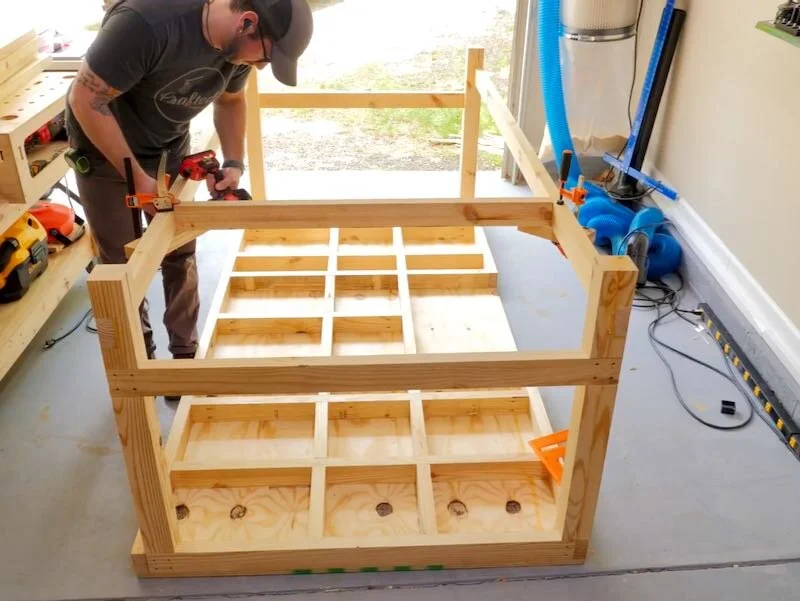
I added the long stretchers last, which were a little awkward as the half laps were pretty tight, but I eventually got them installed and this thing was really starting to look like a workbench.
Next, I needed to add more framing, this time for the bottom shelf. I spaced the framing a little further apart here and used a scrap block clamped to the stretchers to help make sure the framing ended up flush to the stretchers.
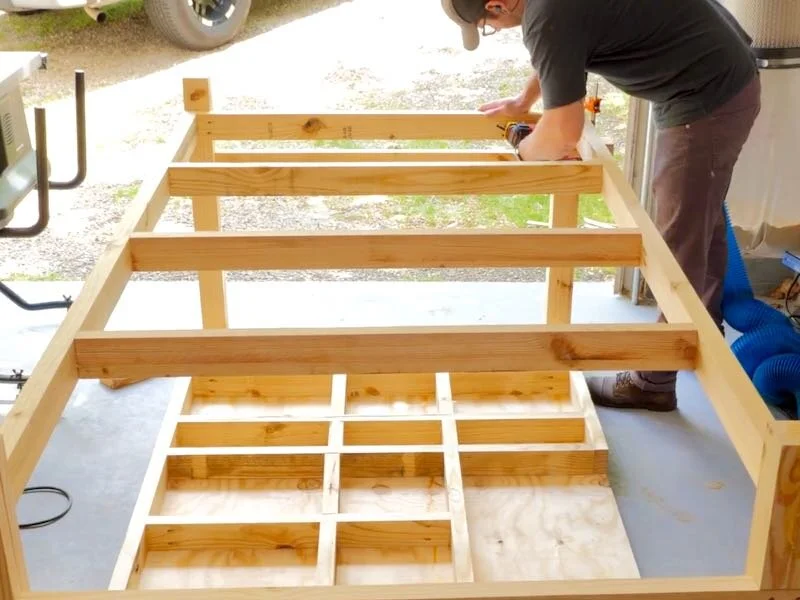
With the bottom framing in, I could finally flip the workbench over and, let me tell you, this thing is solid. It already weighed quite a bit at this point, and I still had a ton more stuff to add to the bench.
Before flipping the bench over entirely, I drilled a few holes through the top to give myself a visual reference of where I could safely cut out the area where the miter saw platform would end up.
With that done, I flipped the bench the rest of the way and checked the top for flatness with a level and I was honestly surprised at just how flat it ended up.
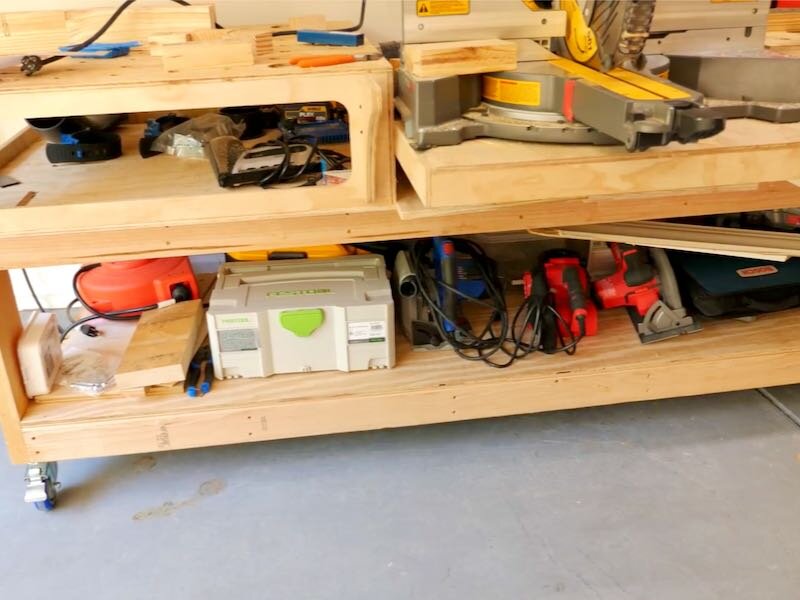
I also had to just set my miter saw in place to see how it looked, and it fit great.
Step 7: Add Sheeting For The Bottom Shelf

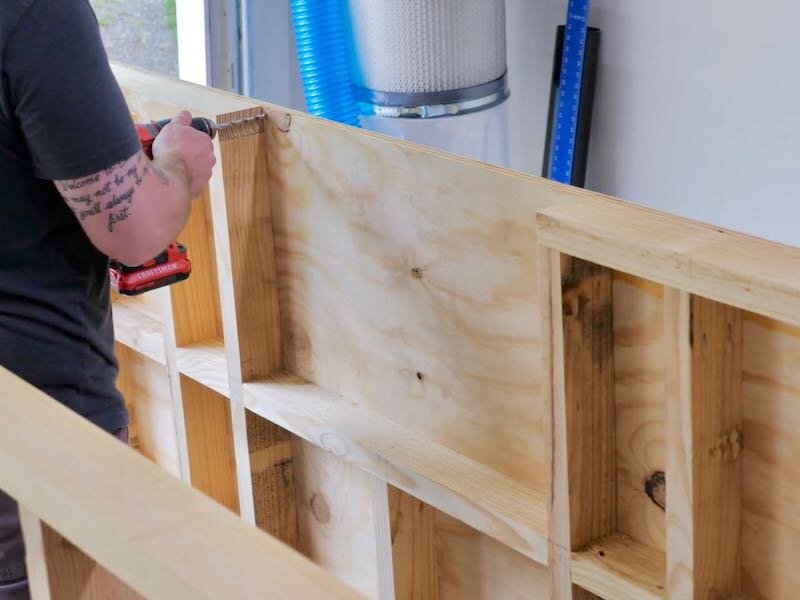
Next, I could work on adding the sheeting on the bottom shelf, and I used some random bits of ½ inch plywood for this. These pieces were actually leftover from my home theater build I did a few months ago, hence the random assortment of pieces I used here.
After adding the plywood, I also added some vertical supports that will help keep the center of the top from sagging over time. These will also function as stops for the dropdown miter saw platform, which you’ll see in a bit.
I also went ahead and added the center legs to the base at this point, but I’m not sure I’d add these in retrospect, as they caused a little rocking on my uneven garage floor, which I’ll talk about in a bit.
Rather than trying to notch out the legs, I again just glued up separate pieces to create my joinery here, which worked really well. Basically, I wanted this notched section to kind of straddle the center piece of the bottom framing, to provide more support plenty of glue surface.
To install the center legs, I just added plenty of glue and clamped the leg in place while the glue dried.
Step 8: Create Fold Down Miter Platform On Your Workbench

Next, I started working on the miter saw platform. The first step was to remove that plywood where the platform would be mounted, which I did with a combination of a jigsaw followed by a flush trim bit on my trim router.
The holes I had drilled in the top before flipping the workbench definitely came in handy when cutting this section with the jigsaw, and then the router got everything nice and tidy.
With that done, I could build the new miter saw platform, and I cut the top of the platform from a scrap piece of ½ inch plywood, but in case you’re following along with my plans, I called for ¾ inch plywood there.
Next, I ripped down that cutout from the top into some strips, which I used as the framing of the platform.
To assemble this structure, I once again called on pocket holes, of course forgetting to change the setting on my pocket hole jig before drilling the first set of holes. Once again, regular butt joints would have been fine here, but I wanted to hide the screw holes.
Step 9: Build Framework Of Platform

After drilling the pocket holes, I got the framing assembled using 1 ¼ inch pocket screws, since this was ¾ inch plywood, and then I attached the top to the framing using glue and brad nails.
Once the glue had a chance to dry, I went ahead and chamfered the edges of the platform, just to soften things up, and I went ahead and sanded this front section of the workbench and chamfered the areas near the miter saw platform while I was at it.
I figured this area wouldn’t be accessible once the platform was installed, but that actually wasn’t the case, and having to measure around the heavy chamfer made things a little more tricky.
Speaking of which, next I could get the miter saw platform installed. I ended up using hardware I already had on hand here, again so I could avoid going to the store, but this isn’t necessarily the hardware I’d recommend, and that will be reflected in the plans.
Step 10: Attach Hinge Hardware To Miter Saw Platform And Work Bench

I initially installed the miter saw platform flush with the top, and I installed the hinges with that in mind.
After installing the hinges, I rested the platform on the hinges and clamped the platform flush with the workbench top, adding a few spacers at the back for clearance, and then I attached the other half of the hinges to the platform.
As you can see, this all worked out really well and the platform ended up perfectly in line with the workbench top.
Next, I played around with some different gas support struts, to assist in the raising and lowering of the platform, but I ended up removing these as they didn’t help much and also kept the platform from folding down entirely. There might be other options out there that would work better but, again, I was using hardware I had on hand.
The next bit of hardware to install was some kind of locking mechanism, to keep the platform securely in place while in the upright position. I’m actually going to be building a 4x8 shed as my next project and I ended up robbing these spring loaded barrel latches from the hardware I had ordered for that project, and they worked perfectly for this.
Step11: Attach Locking Hardware

I mounted the latch to the front of the workbench, so that the barrel would end up roughly centered on the side of the platform, and then I marked out where the barrel contacted the platform.
Next, I center punched that hole location to keep my bit from wandering and then I drilled the hole using a ⅜ inch bit. This hole size resulted in a pretty tight fit, so I reamed it out a bit more, and, after that, the dropdown mechanism was functional and working great.
With the platform working, I could get my miter saw moved into place and attached, and you’ll see that I’m going with a different miter saw here than I’ve been using in the rest of the video.
The reason for this is the way in which the sliding mechanism works on this Festool Kapex miter saw, with the rails oriented towards the front of the saw, rather than to the rear like on most miter saws, including the Dewalt saw I was using previously here.
Having this shallower overall depth frees up a ton of room on the rest of the workbench surface and is definitely a major consideration when picking a miter saw for a workbench like this.
Now, obviously, the Kapex is a $1,400 miter saw, well outside of most budgets, but Bosch has a miter saw with a similar compact depth in their line of glide miter saws, and they’re well under half the price of the Kapex.
Anyway, I got the miter saw centered on the platform and aligned with the front edge, pre-drilled some holes through the mounting holes in the miter saw’s base, and then attached the saw to the platform with some Powerhead screws.
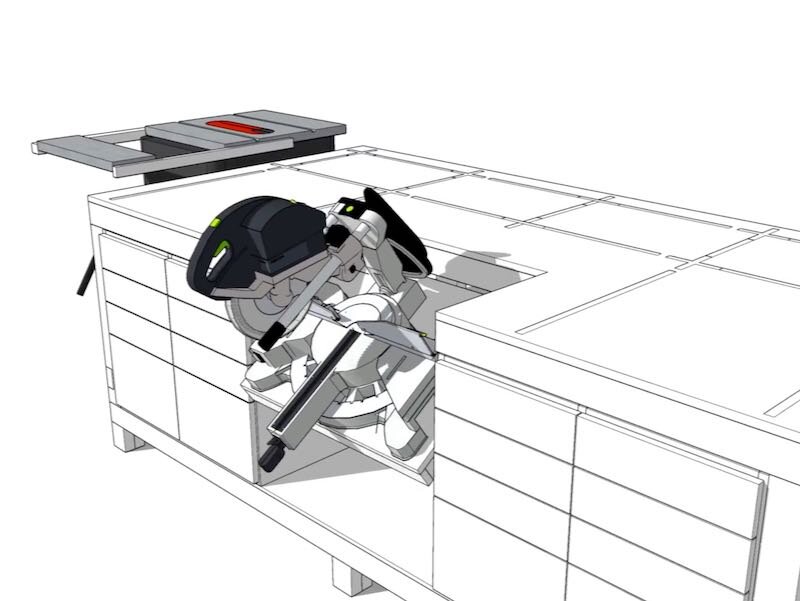
It was at this point that I decided the miter saw platform being flush with the workbench top put the saw too high for comfortable use, at least for me at 5’10”. Because of that, I decided to change out my hinges and actually mount the hinges to the vertical supports, so I could have the miter saw platform much lower.
This also meant I needed to re-think my barrel hinge mechanism, since the barrel would no longer line up with the side of the platform, and that’s when I decided to use eye screws as part of the latch mechanism, rather than a hole drilled through the platform.
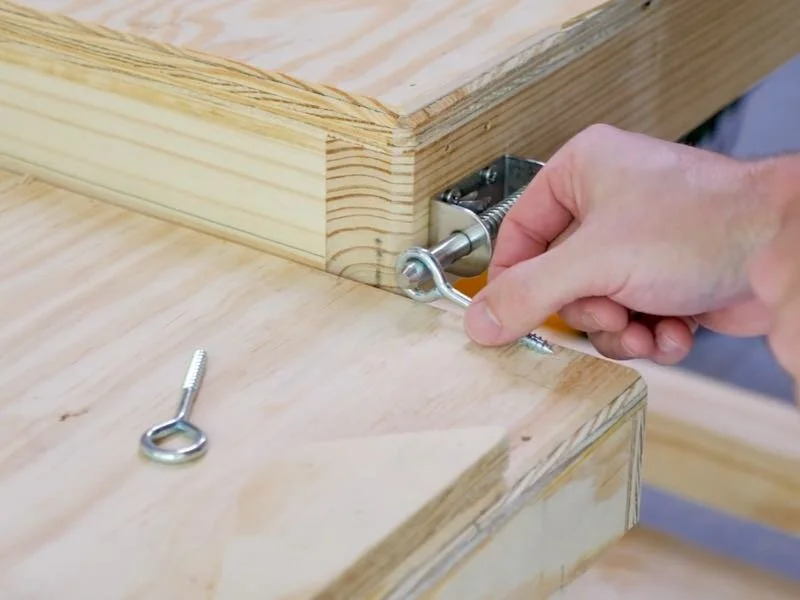
These eye screws were a major improvement to this system, as they were much easier to engage the latch through since the hole was oversized, and the fact that the eye screws thread into the platform meant that I could make fine adjustments to the position of the platform by threading the eye screw in or out.
Also, I think these eye screws will hold up much better over time since they’re metal, vs. the latch going into a hole in a piece of wood, which would likely expand over time.
After getting the eye screws positioned correctly, I reinstalled my miter saw onto the platform, and you’ll notice that I added some pieces of blocking before removing the saw initially so I didn’t have to reposition the miter saw when adding it back. This will also be helpful if I ever need to remove the saw for use in the future.
Step 12: Install Miter Saw And Miter Saw Fence
Next, I needed to work on some supports for the miter fence mounts, which would need to extend past the front of the workbench. Again, I was originally going to use a different mount with the miter saw in its original higher orientation, so these mounting blocks were a bit of an audible and might be adjusted if needed later on.
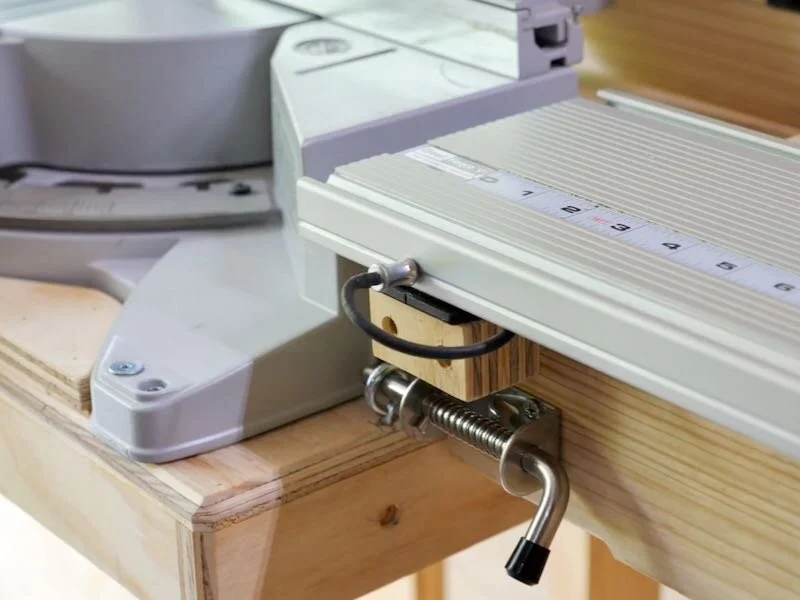
After mounting the support blocks, I mounted the fence mounts themselves, and these are part of FastCap’s Best Fence system, which I’ve been using on my miter saws for years. These mounts allow you to easily add and remove the fences, which is great for a garage shop like this where I need to break things down when I’m not working in there.
My plan is to eventually attach these with threaded inserts, so I can easily remove the mounts if I need to use the entire workbench top, but I just mounted them initially with more Powerhead screws.
As you can see, the fence just drops onto these mounts and then locks into place with a locking pin, which you can drill a hole for anywhere on the fence. This will ensure that the fence is reinstalled in the exact same location each time, which will keep the stop block system accurate even after removing and reinstalling the fence.

Speaking of the stop block system, next I needed to set a new zero point on the stop block, which is super simple with this system. I just set the stop block to zero and made a new cut with the miter saw, which sizes the stop block perfectly to this saw. I also went ahead and undercut the bottom edge of the stop block a bit, to make sure any dust on the surface of the fence won’t interfere with the stop block.
I could then make a test cut with the newly set up stop block and, as expected, it was dead on.
With that, I could remove the fences to get them out of my way and, as you can see, they store away really easily.
Now, I should mention that there are lots of ways to add a stop block system to this type of setup if you don’t want to invest in something like the Best Fence, including just adding t-track right into the workbench top which has become a popular option lately. I wanted to use this Best Fence system because, one, I already had it, but also, it adds support for longer pieces, which I find myself needing more of in my home improvement projects.
Step 8: Install Casters To Workbench Base To Allow For Mobility
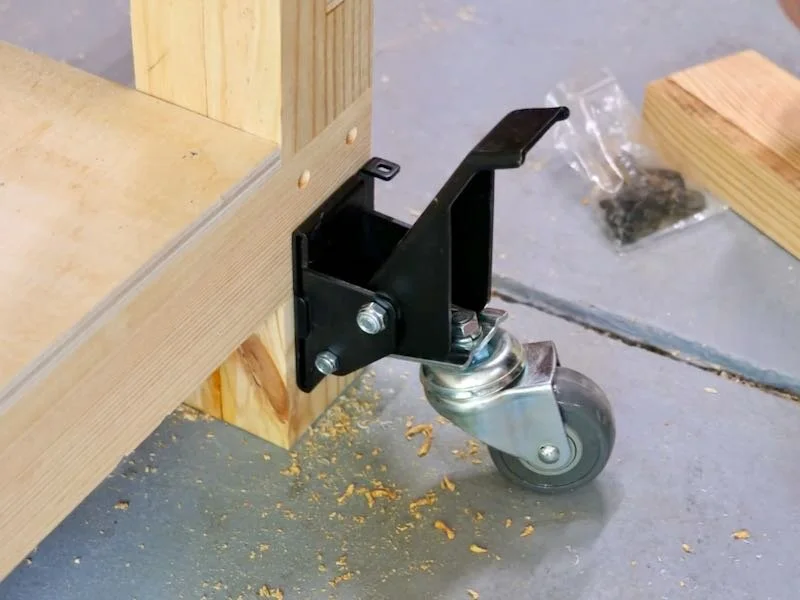
Anyway, the last bits of hardware to add were these mounting plates for the Rockler workbench casters I’m using to move this workbench around my garage.
These plates are designed to be mounted onto ¾ inch material and come with mounting bolts and nuts for that application but, clearly, my workbench legs are much thicker than that.
Instead of finding different bolts because, once again, quarantine life, I decided to just drill the holes for these bolts slightly undersized, so I could essentially tap the holes with the bolts themselves.
To help with this, I added some wax to the bolts before driving them in, which helped a ton and significantly reduced the heat build up on the bolts.
Once the holes were threaded, I could attach the mounting plates, and I actually think this solution worked great.
I got all four mounting plates attached and then I could move the workbench back against the wall, which is when I realized those center legs were going to cause issues since my garage floor was poured in multiple sections which, as it turns out, aren’t even. I’ll probably trim the center legs down to fix this.
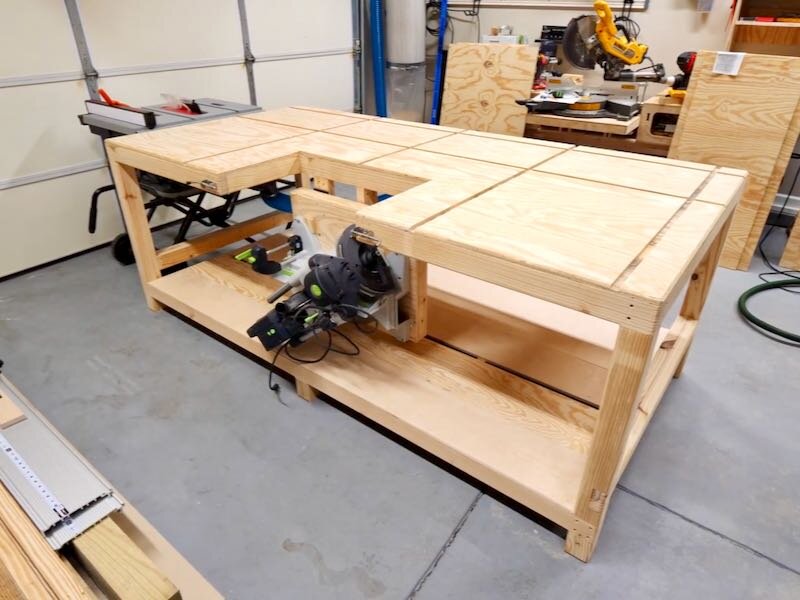
With that, I’m going to call part 1 of this garage workbench project complete, as you could really stop here and have a super functional workbench and miter saw station.
That said, I’ve got a lot more to add to this setup, including a bank of drawers in the lower section of the workbench, a bunch of t-track to the top, a custom built miter saw hood to help with dust collection, and an end vise for additional work holding.
Make sure to get subscribed and ring the notification bell so you don’t miss that video, and again, I do have plans available in case you want to build one of these workbenches for yourself, which I’ll link to in the video description below.
Alright, I think that’s going to do it for this one so thanks for watching y’all and, until next time, happy building.